Showing posts with label Card Making. Show all posts

Tuesday, January 5, 2016

OCCASIONS AND SALE-A-BRATION START TODAY!!!

Wow, the most wonderful sales events of the season for Stampin' Up! start today. The Occasions - Made from the Heart Catalogue and the Sale-a-bration Catalogues are now available for you to view and order from.  

Although I've permanently updated my side bar with the PDF links for these catalogues.  I thought I would make it easy and add them here.  I know you're going to love all the new products.  My wish list is long and I know yours will be too!  

Occasions 2016 - Made from the Heart
Sales Period from January 5th through May 31st, 2016:

English Version PDF

French Version
 Sale-A-Bration - Earn Free Products!
January 5th through March 31st, 2016

English Version
French Version
Happy Stamping Everyone!
Penny Tokens Stampin' Spot 

Tuesday, September 8, 2015

Congratulations Card ......#CCM371

I spent today with my stamping bestie, Sheri for a wonderful "Stamping on Tuesday" session.  We both love doing sketch and colour challenges, so when we get together we look at what's current and what tweaks our interest, before settling on a challenge.  Today we decided to work on the Create With Connie and Mary sketch challenge #CCMC371.  

For me there's nothing like stamping with a friend on a cloudy rainy day to let the sunshine in! And, what a blast we had! I love the collaboration and chit chat that goes on when you're trying out a challenge and of course the awesome food we always have.  Today's menu included Chicken Enchiladas that were to die for and Marbled Chocolate Cheese cake.  Yum!

Here is the Connie and Marie Sketch for this week:
 Here's My Card:


Supplies:
Stamp Sets:  Bright and Beautiful (SU Retired), I Am (SU Retired)
Card Stock:  Whisper White, Basic Black, Silver Glimmer Paper
Ink:  Momento Tuxedo Black
Accessories:  Small Star Punch (R)*, Basic Rhinestones, Thinlets Label Card dies, Small and Large Oval Punches,Trimmer, Lucky Stars Embossing Folder, Big Shot.   *(R) means it's retired.


Assembly:

1.  I cut the Whisper White card stock for the base to measure 4 1/4" x 11" and scored it at 5 1/2". 
2.  The Silver Glimmer Paper mat measures 3 7/8" x 5 1/8" and the Basic Black mat measures 3 5/8" x 4 7/8".
3.  I dry embossed the black mat with the Lucky Stars Embossing Folder and 8 stars were cut out with the now retired small star punch.  This mat was adhered to the Glimmer paper layer with Tom Bow Glue
4.  The sentiment "You Are" was stamped in Momento Tuxedo Black ink on a scrap of Whisper White card stock and then cut out with one of the small label dies from the Thinlet Label Card set(R).  
5.  Although the card already has a lot of shine from the glimmer paper I added Basic Rhinestones to each of the star centers and to the ends of the label tag to make the card front extra special

6.  I layered a 5 1/4 x 4" piece of Basic Black card stock with a piece of Whisper White card stock that measures 5 x 3 3/4".  
7.  I stamped a medium sized star from the Bright and Beautiful (R) stamp set in the center of the card with black ink. 
8.  I stamped the "A Star" sentiment from the "I Am...." stamp set onto Whisper White card stock and  punched it out with the small ovals punch.  The sentiment was mounted with dimensionals onto a piece of Silver Glimmer paper that was punched out with the large oval punch.  Note:  Dimensionals don't adhere well to glimmer paper so you need to use an adhesive that has a bit of extra bond if you want your paper to stay put. 

That's it for another fun sketch challenge.   I hope you've enjoyed it!  If you get an opportunity to try out  this challenge yourself go for it.  It closes on Thursday.  Be sure to drop by the Connie and Mary Blog to check out all the other entries into this challenge.  As always there are some great card entries and inspiration.


Happy Stamping!
Penny Tokens 

Friday, September 4, 2015

Clipper Street Appreciate Day and the Storm

Last Saturday I was invited to attend a fun "Customer Appreciation Day" event being held at Clipper Street in Langley. 

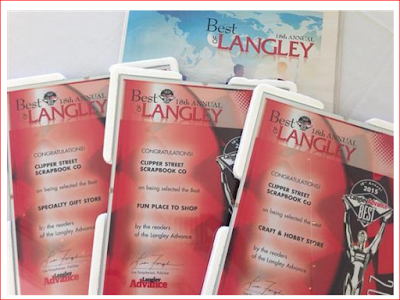
This Langley scrapbooking company was nominated and won awards for being the "BEST" in 2015 for:
  • Specialty Gift Store 
  • FUN Place to Shop and 
  • Crafts and Hobby store 
When my friend Ethel and I met pre-class for breakfast at a local restaurant it was overcast and raining so we were excited about being inside for our class.  Little did we know what was in store for us later in the day.


We joined a wonderful group of ladies and our instructor Deanna to make two cards.  Here's a shot of the group:
Ethel in Wisteria Wonder and I'm wearing the Calypso Coral top.

  Here are the two cards we made:

It was a great fast paced class taught by Deanna and we really enjoyed making these multi-layered, happy cards.  We were a bit worried we wouldn't be able to finish as throughout the class the lights were flickering and a couple of times the power actually went out.  

We finished on time though, and after touring this great store and sampling
some of the lovely cake and punch we headed out to our cars. The moment we walked outside we were almost blown off our feet by the pineapple express winds that were wreaking havoc around us.  We had just walked into the worst storm since 2006 to hit the lower mainland.

We yelled hasty goodbyes and ran to our cars to get out of the wind and rain.  My car was literally rocking from the buffeting winds. Needless to say it took me a long time to drive the 34klms to my home and it was one of the most frightening driving experiences I've ever been through.  Trees were falling everywhere and the rain was so heavy at times you couldn't see out the windshield.  Power lines were down and debris and flying objects were everywhere.


I eventually made it home to safety.  When I arrived our power was out for about four hours, but we were some of the lucky ones, as over a half a million people were without power, some as much as three days, and there was so much damage and destruction. 

This was an experience I won't forget for a long time.


Happy Stamping!
Penny Tokens

Thursday, July 9, 2015

CMCC#79 - Colour Me... Striking!

What a great combination of colours for this week's Colour Me challenge. They are Bermuda Bay, Marina Mist and a neutral of your choice. I chose white to offset these beachy summer colours.  

Here's My Card:
I  really like the fern fronds in the Butterfly Basics stamp set and decided to combine them with the butterflies on my birthday card.  


1.  The Bermuda Bay card base measures 8 1/2 x 11 and is scored at 5 1/2.  I embossed it with the new Elegant Dots Textured Impressions Embossing Folder (TIEF).
2.  The Whisper White mat measures 3 1/4" x 5 1/8".  The Marina Mist, Bermuda Bay and Whisper White strips on each side of the white mat measure 1/4" x 5 1/8" and were adhered with Tom Bow glue.
3.  I stamped the large lacy butterfly in Marina Mist on the bottom of the Whisper White mat.  I re-stamped this image on a post it note and used that as a mask before stamping the ferns.  The ferns were stamped in Bermuda Bay.  I only inked the stamp once and then after the first image was stamped I moved the stamp towards the left and re-stamped and then repeated this for the last image.  Note:  Don't raise the stamp in between stamping just turn a little on an angle and repeat.  You'll wind up with a nicer more evenly balanced image as the colour gradually fades out.
4.  I stamped the three small butterflies on the Whisper White card mat.  I re-stamped them on a scrap of Whisper White and cut them out with the Bitty Butterfly punch and adhered to the card base with dimensionals.  Two were stamped in Bermuda Bay and the third is in Marina Mist.  Small basic rhinestones were added for some bling to the centers of each of the butterflies. 
5.  The "Happy Birthday" sentiment from Butterfly Basics was stamped across the center on an angle in Marina Mist ink. 
6.  The whisper White card mat for the inside of the card measures 5 1/4" x 4". 7.  I stamped the greeting "Sending Good Thoughts Your Way" from the Perfect Pennants stamp set and the Butterfly in Marina Mist.  The ferns were stamped in Bermuda Bay ink.
Supplies:
Stamp Sets:  Butterfly Basics and Perfect Pennants
Ink:  Marina Mist and Bermuda Bay
Card Stock:  Whisper White, Bermuda Bay and Marina Mist
Accessories:  Elegant Dots TIEF, Big Shot, Bitty Butterfly punch, Basic Rhinestones, dimensionals and Tom Bow glue. 

Thanks as always for by.  

Happy Stamping!
Penny Tokens 

Tuesday, July 7, 2015

Love Notes

I haven't done any card challenges for a while so today I thought I'd give it a whirl again.  I feel quite proud of myself as I've actually made a card using both a colour and a sketch challenge.   

Here's My Card:

The sketch challenge is from Paper Craft Crew Card and it's sketch #PCCS151.  

I found the Pals Paper Arts colour challenge PPA258 which uses two of the new In Colours, captured my interest so I decided to go with it. 

Supplies:
Stamp Sets:  Big on You, Button Buddies (R) and Yippie Skippie (R)
Card Stock:  Whisper White, Cucumber Crush, Watermelon Wonder and Night of Navy
DSP:  Cherry on Top Paper Pack
Ink:  Cucumber Crush and Watermelon Wonder
Accessories:  Basic Rhinestones, Happy Heart TIEF, Big Shot, Ribbon Itty Bitty Accent Punches (Heart)
  

Happy Stamping!
Penny Tokens

Saturday, October 5, 2013

World Card Making Day Contest and Events - 2013

Today is a very special day.  It's a time when card makers around the world have an opportunity to gather together, take paper and ink in hand and demonstrate and celebrate their creative passion for card making.  I hope you're one of them.  

Not sure how to take part in this special day.  Well you can look for events in your neighborhood, join a card making challenge at some of the sites I've listed below, or simply invite some friends in to your home and share this day. 


To help you celebrate and kick off the card making season Stampin’ Up is having a contest . . . to inspire you even further! There are two ways to enter.

  • Post a photo of a card (or of you making a card) on Instagram on World Card Making Day. Mention us by typing @stampinup and use the hashtag: #wcmd2013 in the description.
This contest is open to everyone—demonstrators, customers, friends, spouses, children . . . you get the idea! However, there are a few conditions:

  • You must be over the age of 18 to win a prize.
  • You must use Stampin’ Up! products to create your project.
  • You may enter as many times as you wish, but each entry must feature a different card.
  • The contest will last all day on October 5, from midnight to midnight.
  • We will randomly select 100 winners from our English-speaking North American markets to receive a Paper Pumpkin kit.
A selection of pictures will be posted to our World Card Making Day Pinterest board and the winners will be announced in a current update.


Challenge Sites:

Need some card making inspiration.  Just visit any of these sites for current sketches and ideas:

Tis the Season Stamping a new Christmas Card challenge blog, that's posted it's first challenge.  They'll be posting a new challenge every other week, that will rotate between Sketches and Color Combos with a Optional Trimming. Challenges will run for two weeks so lots of time to play along. Check out their first sketch here: tistheseasonstamping.blogspot.com


SU Only Challenge #80 - Welcome Baby.  Their current challenge is to make a card – or other paper crafted project! – for a baby.  This challenge closes in two days time, but there's still time to play with it today.  Check out some of the entries so far and see what the design team has come up with just click here: http://suochallenges.com/
Created by Deanna Boos of http://www.myhomegrownart.com/

Just Us Girls blog site has a World Card Making Day Challenge going on for the next week.  There are prizes being offered. Check it out here:  http://justusgirlschallenge.blogspot.ca/    And here's their current sketch:

Pals Paper Arts Color Challenge for October is happening this week.  Their color challenge experts have chosen Pumpkin Pie, Pear Pizzazz and Baked Brown Sugar (or similar colors) to play with. Check out the samples by their uber talented resident artist's who've created some beautiful designs. occasions to inspire you.  Check out their site here:    http://www.palspaperarts.com/

Paper Craft Crew Challenge Sketches 
The Paper Craft Crew design team has come up with some fun card samples using this week's card sketch. PCCCS #61: Card Sketch which closes on October Check out their site at:  http://www.papercraftcrew.com/

Friday, August 30, 2013

PUMPKINDEAL - Almost Gone

Just like Cinderella running from the ball to catch the coach, time is running out on the PUMPKINDEAL.

What is Paper Pumpkin?  
Well, it's a nifty little stamping kit that comes once a month and offers a variety of simple paper crafting ideas for people who want to do something creative and simple, or for those who want to experiment and learn what paper stamping and crafting is all about.  Click here to find out more.

Why Would You Want to Get the PUMPKINDEAL?
If you're never ordered Paper Pumpkin before but you're interested in ordering and getting the best deal of the year on a subscription to Paper Pumpkin this deal is for you.  But remember you only have until 10pm Mountain time (just over 24 hours) to use the promo code PUMPKINDEAL and get in on this special offer.


What's the Big Deal? 
Sign up tonight or tomorrow (before 10pm MT) and you'll get the first two months of Paper Pumpkin delivered to your front door for only $12.50. 

That's right you can sign up for half price and get two months at $12.50 per month plus applicable tax (shipping is included in the price).  After that time the price for future monthly kits will go back to the regular price of $24.95 (plus applicable tax).

When you get your first kit, which is the Welcome Kit, it includes a Clear Mounting Block for your rubber stamps to adhere to.  This Clear Block will work with every kit you subscribe to.  This in itself is a "big deal".  Want to know why?
Clear Block C     118486   Price: $8.95
For all the Paper Pumpkin kits you subscribe to you will receive clear mount stamps which means you'll need a clear block to adhere your stamps to. Stampin' Ups! blocks are a clear choice. Made from high-quality, sturdy acrylic, these blocks can hold one stamp or multiple stamps if you want to create a collage of images.  The big deal here is that you're getting it basically for free with this promo.


How To Sign Up:

 1.  Visit mypaperpumpkin.com to join.

2.  Select "1" as the quantity for kits

3.  Click on  "Add Promo Code" and then enter the promo code PUMPKINDEAL in the "Promo Code" field which is located just below the kit quantity. 

4.  Mark or select me as your demonstrator - Penny Hanuszak

5.  Finish with your payment information and click "Submit."

6.  You will receive a confirmation email and a request to set up a password. You can do that at any time.

7.  You must join by Saturday, August 31, 2013; 10:00 PM (MT) after that time My Paper Pumpkin goes back to it's regular price.


Want to See What I Made With the August kit?


August's kit contains enough supplies to make four cards with envelopes.  The set comes with two cute little stamps - a bicycle and a thank you banner.  It also includes Bermuda Bay and Baked Brown Sugar ink spots, ref self stick flags and paper strips that are like Washi tape. 


How Do I Store My Paper Pumpkin Supplies:


Although I love the pretty red boxes that the monthly Paper Pumpkin kits come in, they are way too big to use as storage for the kits, so I decided to save those boxes for wrapping Christmas presents and look for a different kind of container.  I wanted something light weight and stack-able to put the stamp set, ink spots, instructions and left over paper supplies into once I had assembled the kit.   I decided to use a 3 1/2 x 5 1/4" tin box with an Acrylic hinged lid. 
Here's what I came up with.  This lovely metal tin holds everything, stacks, and is easy to grab off the shelf when the stamping urge hits.  The Acrylic lid is perfect because you can see the stamp image and the stamp set name.  Although you can't see it in these pictures I've also added a computer file label on the end of the tin so the stamp set name can easily be seen when stacked.

I've folded the kit instructions and added them to the lid along with the embellishments.  In the bottom of the tin I've removed the white paper from the back of the rubber block and then stuck it to the bottom of the tin.  When the stamps are not in use they sit in this rubber support and don't move around.  The ink spots fit perfectly to the side, and the clear block could easily be stored in this tin too.


My Promo:  Anyone new who signs up for Paper Pumpkin tonight or tomorrow using the PUMPKINDEAL promo code and naming me as their demo, will receive two tins to store their kit supplies in.  Just forward a copy of the Paper Pumpkin Confirmation email from Stampin' Up! to me by email at pennyhanuszak@telus.net and include your mailing information, and I'll get your prize out to you.  

Saturday, September 15, 2012

World Card Making Day - October 6, 2012


Hard to believe, I know, but October is just around the corner and you know what that means.  Along with designing your Thanks Giving Projects and Halloween goodies it's just three weeks away from Paper Craft Magazine's seventh annual World Card Making Day!

You can join your fellow card makers as the holiday card-making season officially kicks off on Saturday, Oct. 6.   Visit www.WorldCardMakingDay.com for participating retailers, exclusive projects from their sponsors, a gallery to upload your creations, and fun ideas for celebrating with your friends.  

While you're there, don't forget to enter their 2012 World Card Making Day Card Contest! This year 20 winners will be awarded a prize package valued at more than $400, and an opportunity to be published in the March/April 2013 Paper Crafts issue.   For submission details, including the five card categories, click HERE. Deadline: Monday, Oct. 15.


Tuesday, July 31, 2012

Snail Adhesive Changes

Do you buy Stampin' Up!s SNAIL Adhesive? If so, this note is to let you know about a change that's coming.

Stampin' Up! will be switching the type of liner used in their SNAIL Adhesive. The new liner will be tinted blue and it'll be thinner than the previous liner, making the roll appear to have less adhesive.

Rest assured that you're still getting the same amount of adhesive; the only change is the liner itself due to the supplier no longer carrying the current one.

If you haven't tried SNAIL Adhesive before you should.  Why?  Because you get 472" of this permanent double-sided strong bond adhesive in every SNAIL Adhesive cartridge.  It's great for cards, scrapbooks and other art projectsSNAIL applies a controlled amount of adhesive directly to your project, so both your hands and work area never get sticky. You only need a small amount to create a strong bond, so your cartridge lasts a long time. You can also order refills that slip right into the cartridge case, so you’ll never find yourself without your SNAIL. I know you’ll love this adhesive, and it’s a great price, too! Click here for more information.

Sunday, July 8, 2012

Convention Swaps


Ten days and counting down!  That's right!  My long awaited trip to convention is just around the corner and I've been busy, busy, busy preparing my swaps, getting my gear together and chatting with other convention goers. 

I'm officially entered in 3 swaps which include an 80+1 and two 10+1 swaps based on cards using stamp sets and products from the new Idea Book and Catalogue.  How exciting is that!  I'm also making some 3 x 3 card swaps and some 3-D swaps to trade on the convention floor. 

I'll be travelling to convention with Adel Klassen a member of the Colourful Impressions Stamping group I belong to.  Adel and I are both very excited about this adventure and we've managed to get together twice now to work on our swaps.  What fun we've had!  Working together really helped us stay focused and plan out our time in Salt Lake City.

Without giving away what I'm making, here's a sneak peak at my Convention Swaps.


Wish you could be there with us too!  2013 Convention will be even bigger, as Stampin' Up! will be celebrating their 25th Anniversary! Contact me to find out how you can become part of my team and eligible to attend the 2013 festivities!  And, stay tuned for more convention news as it happens!

Reason To Smile

I love promotions, especially ones like this.  During the month of July you can purchase the Reason to Smile Stamp set for just $5.00 when you spend just $60.00 on Stampin' Up! products.

The Reason to Smile stamp set is exclusive to this promotion and will not be available after July 31, 2012. 

Whether you order online, at a workshop or through me directly, you can take advantage of this special offer.  The only restriction is that there's a limit of one (1) set per customer.

Note:  When you're placing your order online, you won't be automatically prompted to enter the $5 Item Number for a qualifying purchase.  The best way to ensure you get this promotion is to enter one of the codes below when your order reaches $60.00 (before S&H and sales tax) to qualify.

Wood Mount 131274  $5.00
Clear Mount  131275  $5.00

If you're placing your order directly through me or at a workshop, no worries.  I'll ask you if you're interested in taking advantage of this offer, and if you are it'll be added to your order in the choice of setting (wood/clear mount) that you'd prefer.  

To see the stamps included in this great value just click on the July Promotion button on my sidebar or on the Reason to Smile link in the first paragraph of this note.  Happy Stamping!

NESTS OF CHRISTMAS PAPER PUMPKIN ALTERNATIVES USING #fms#662

 Here's the latest sketch challenge from Freshly Made Sketches #662 and designed by Jen T.  Make sure you check out the Design Team car...