Aren't these cute? Post It Note and Pen Holders are one of my favourite gift items to make. Especially at Christmas time.
These little cuties make great stocking stuffers or hostess gifts and sell quickly at craft and vendor fairs. People can't resist them, after all everyone uses Post It Notes in some shape or form.
Another thing I like about making Post It Note holders is that they're adaptable for any season and they're quick and easy to make. Anyone can make these!
Today I'm going to walk you through the easy steps and show you some samples from my recent Christmas theme Post It Note & Pen Holders. Enjoy!
Supplies and Accessories:
- Small mini gel pens ( I buy mine at Staples - 12 to a package for $3.95)
- Post It Notes (I'm using 3 x 3 post it notes for these holders)
- Card stock cut to 3 1/4 x 7 3/8" for the base a contrasting card stock measuring 2 7/8 x 3 1/8" for the first layer and a neutral card stock measuring 2 3/4 x 3" for the next layer
- Designer Series Paper in two coordinating designs enough to punch out four 1 1/4" squares
- 1 1/4" Square Punch
- Stamp Set of your choice or embellishment for center of cover
- Ink to coordinate with DSP and card stock
- Paper Trimmer
- Adhesive - Snail and Sticky Strip
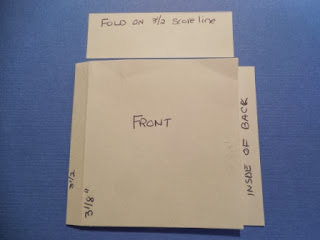
1. Cut card stock for base to measure 3 1/4 x 7 3/8", score at 3 1/8, 3 1/2 and 3 7/8 inches.
2. Crease along each score line with a bone folder. Fold cover on the 3 1/2 score line.
3. Make two cuts to the score line about an inch apart for the pen holder.See picture for placement.
4. Open up the card stock and leave the slot for the pen facing outwards but push the two outer pieces to the inside of the cover. Apply two small strips of sticky strip to the inside score line between the 3 1/2 and 3 7/8 lines and then fold to the back to adhere.
5. Attach the Post It Note pad to the back cover with sticky strip, and decorate the front of the cover in whatever design you choose.
Here's two of my recent designs:
 |
| Here's what the inside of the Post It Note Holder looks like. |


3 comments:
Thanks for the tutorial.
These are super cute, Penny! Thanks so much for sharing the how-to's for creating them.
Penny- they are adorable! I've been wanting to make these for a long time. Even bought the mini pens a while back and just never got around to it. I don't even think I ever had a tutorial, so I really appreciate it:) thanks for sharing!
Post a Comment