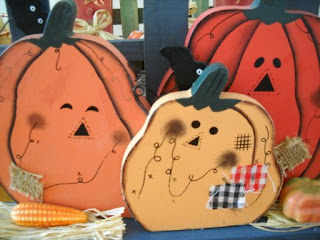
Just like Cinderella running from the ball to catch the coach, time is running out on the PUMPKINDEAL.
What is Paper Pumpkin?
Well, it's a nifty little stamping kit that comes once a month and offers a variety of simple paper crafting ideas for people who want to do something creative and simple, or for those who want to experiment and learn what paper stamping and crafting is all about. Click here to find out more.
Why Would You Want to Get the PUMPKINDEAL?
If you're never ordered Paper Pumpkin before but you're interested in ordering and getting the best deal of the year on a subscription to Paper Pumpkin this deal is for you. But remember you only have until 10pm Mountain time (just over 24 hours) to use the promo code PUMPKINDEAL and get in on this special offer.
What's the Big Deal?
Sign up tonight or tomorrow (before 10pm MT) and you'll get the first two months of Paper Pumpkin delivered to your front door for only $12.50.
That's right you can sign up for half price and get two months at $12.50 per month plus applicable tax (shipping is included in the price). After that time the price for future monthly kits will go back to the regular price of $24.95 (plus applicable tax).
When you get your first kit, which is the Welcome Kit, it includes a Clear Mounting Block for your rubber stamps to adhere to. This Clear Block will work with every kit you subscribe to. This in itself is a "big deal". Want to know why?
How To Sign Up:
1. Visit mypaperpumpkin.com to join.
2. Select "1" as the quantity for kits
3. Click on "Add Promo Code" and then enter the promo code PUMPKINDEAL in the "Promo Code" field which is located just below the kit quantity.
4. Mark or select me as your demonstrator - Penny Hanuszak
5. Finish with your payment information and click "Submit."
6. You will receive a confirmation email and a request to set up a password. You can do that at any time.
7. You must join by Saturday, August 31, 2013; 10:00 PM (MT) after that time My Paper Pumpkin goes back to it's regular price.
Want to See What I Made With the August kit?
How Do I Store My Paper Pumpkin Supplies:
Although I love the pretty red boxes that the monthly Paper Pumpkin kits come in, they are way too big to use as storage for the kits, so I decided to save those boxes for wrapping Christmas presents and look for a different kind of container. I wanted something light weight and stack-able to put the stamp set, ink spots, instructions and left over paper supplies into once I had assembled the kit. I decided to use a 3 1/2 x 5 1/4" tin box with an Acrylic hinged lid.
My Promo: Anyone new who signs up for Paper Pumpkin tonight or tomorrow using the PUMPKINDEAL promo code and naming me as their demo, will receive two tins to store their kit supplies in. Just forward a copy of the Paper Pumpkin Confirmation email from Stampin' Up! to me by email at pennyhanuszak@telus.net and include your mailing information, and I'll get your prize out to you.
What is Paper Pumpkin?
Well, it's a nifty little stamping kit that comes once a month and offers a variety of simple paper crafting ideas for people who want to do something creative and simple, or for those who want to experiment and learn what paper stamping and crafting is all about. Click here to find out more.
Why Would You Want to Get the PUMPKINDEAL?
If you're never ordered Paper Pumpkin before but you're interested in ordering and getting the best deal of the year on a subscription to Paper Pumpkin this deal is for you. But remember you only have until 10pm Mountain time (just over 24 hours) to use the promo code PUMPKINDEAL and get in on this special offer.
What's the Big Deal?
Sign up tonight or tomorrow (before 10pm MT) and you'll get the first two months of Paper Pumpkin delivered to your front door for only $12.50.
That's right you can sign up for half price and get two months at $12.50 per month plus applicable tax (shipping is included in the price). After that time the price for future monthly kits will go back to the regular price of $24.95 (plus applicable tax).
When you get your first kit, which is the Welcome Kit, it includes a Clear Mounting Block for your rubber stamps to adhere to. This Clear Block will work with every kit you subscribe to. This in itself is a "big deal". Want to know why?
How To Sign Up:
2. Select "1" as the quantity for kits
3. Click on "Add Promo Code" and then enter the promo code PUMPKINDEAL in the "Promo Code" field which is located just below the kit quantity.
4. Mark or select me as your demonstrator - Penny Hanuszak
5. Finish with your payment information and click "Submit."
6. You will receive a confirmation email and a request to set up a password. You can do that at any time.
7. You must join by Saturday, August 31, 2013; 10:00 PM (MT) after that time My Paper Pumpkin goes back to it's regular price.
Want to See What I Made With the August kit?
My Promo: Anyone new who signs up for Paper Pumpkin tonight or tomorrow using the PUMPKINDEAL promo code and naming me as their demo, will receive two tins to store their kit supplies in. Just forward a copy of the Paper Pumpkin Confirmation email from Stampin' Up! to me by email at pennyhanuszak@telus.net and include your mailing information, and I'll get your prize out to you.


