Showing posts with label handmade cards. Show all posts

Tuesday, February 28, 2017

On February 21st Stampin' Up! let us know about their second release of FREE products for the 2017 Sale-A-Bration sales period.  The release included two new stamp sets and today I want to share a video by Carrie Cudney demonstrating how to use one of them.  

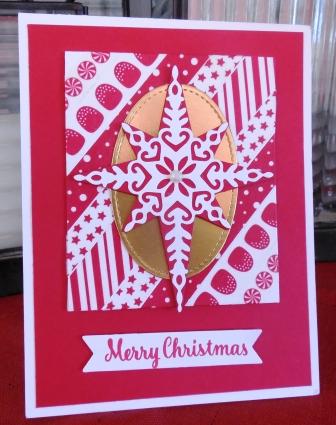
She's demonstrating how to be creative with the Make a Medallion stamp set, which is so versatile.  This set is an 8 piece Photopolymer that coordinates with the Circle Framelit Dies.  You can't purchase this stamp set but you can earn it for FREE by placing a minimum $60CDN order (before tax & shipping and handling) with me before March 31st, 2017.  Check out my on-line store.

Here's Carrie's great video presentation:

Happy Stamping!
Penny Tokens Stampin Spot

Wednesday, February 22, 2017

Bringing Back Birthdays .... cards that is!

In this day of technology and speed most people tend to respond to special occasions and events by sending out e-cards and Facebook messages.  Sending or giving a friend a card the old fashioned way, is often overlooked by the sender, but the receiver never forgets the delight of picking up the mail and discovering something special, just for them.  It's like getting extra presents!

For my birthday this month I received greetings both electronic and by mail and I was delighted with all of them. Everyone was so thoughtful and it made my day so special.  

I just had to share three very special handmade cards I received.They simply made my day and you couldn't wipe the grin of my face or replace the joy in my heart as I opened them.  Thanks Betty Lee, Phyllis and Heather for not only remembering my day but for sharing in my joy of a hand made card and taking the time to drop them in the mail.  

Betty Lee's card was made with the beautiful Botanical Builder Dies and paper.  The tropical feel of this card just made me so happy.  I loved it!
Oops that stamen got a little bent out of shape when I was photographing this card.  The colouring on this flower and leaf are fantastic.  I also like the burlap die cut in the background.  It really enhances the sentiment.  Great job Betty Lee.

Phyllis' "Beautiful You".  This is like a mini piece of art!

I'm a super huge fan of the Stampin' Up! Beautiful You stamp set  and this card just embodies the versatility you can achieve by adding colour.  Beautiful Phyllis.  I was blown away by the colour mix and artistry in this card, not to mention the good wishes for my day!
Inside and out these cards designed by my wonderful sister Heather, were so awesome.  I'm a huge fan of Graphic 45 Designer papers and Stamps and this one is especially beautiful.  I love that this card is tall.  I'm so used to seeing A2 sizes that it was refreshing to get one in this style.  Something I'll have to remember. 

I love the sentiment Heather used for this card.  It's absolutely so true and I really try to live that mantra.   The stamped image reminds me of one of my favourite paintings by Jack Vetriano, "The Singing Butler".  Awesome!  Thanks so much Heather for remembering me in this way. 
I hope you enjoyed this card share as much as I did.  Once again ladies thanks for making my day!

Happy Stamping!
Penny Tokens Stampin' Spot 

Tuesday, December 27, 2016

Seven Cards I want to share

What is it about receiving cards?  

Cards are such an important way to share friendship at any time and any occasion during the year.  But especially at Christmas. 

I can't even begin to express how much it means to my husband and I to receive them. It's so exciting to reach into the mail box and discover some special envelopes.  These cards bring sunshine and smiles to our day, and just knowing someone has taken the time out of their busy lives to acknowledge us and share some of their seasonal updates makes us happy! 

I  must admit that at this time of year there are some cards that stand out from the rest and I pick them up over and over.  They are the hand crafted cards and today I want to share seven such cards.  I was amazed and thrilled with the love that went into each and every one of these cards.

Card One by Betty Lee: 

I really loved this card stamped with the Reindeer from the Stampin' Up Cookie Cutter Christmas stamp set. Betty Lee has punched out the cute hat in from Red and Dazzling diamonds glimmer paper and the Stampin' Up! Jolly Hat Builder Punch.  What a great card Betty Lee!  Loving it!

Card Two By Debby Evoy:
Isn't this a gorgeous combination of the Stampin' Up! Starlight Thinlet Dies and Candy Cane Lane Designer Washi Tape. I totally loved the design! Great way to use the Washi tape Deb!  This card was made by mygood friend and fellow demonstrator Debby Evoy from Abbotsford BC. 

Card Three By Elise:

My sweet and talented sister-in-law Elise from Vancouver, BC made this super cute card with fun foam stickers.  We loved it Elise.  Beautiful inside and out, just like you! 

Card Four by Cheryl LeFore:

Every year I receive an amazingly beautiful card from the very talented Cheryl LeFore, a Stampin' Up Demo from Laquinta California.  Cheryl was Stampin' Ups! Artisan of the year in 2012, so it's such a thrill to get one of her creations.  I love all the elements Cheryl's used on this card and the background snowflake stamping.  Cheryl, thanks for thinking of me!

Card Five by Heather:
My sister Heather's been participating in the Merry Monday Christmas Card challenges and the Watercooler Wednesday weekly challenges during 2016 and has made some simply amazing cards. This very cute card features some happy little "snowbirds" and snowflakes inside and out.  It brought a smile to my face Heather.  Super cute!  Thanks so much!

 Card Six by Ethel DeTemple:

I'm totally loving this Christmas card made with the Jar of Love Stamp Set and Dies set and Cookie Cutter Christmas Designer Series Paper.  Ethel you did a fabulous job with this shaker.  It's so perfect!  Thanks so much for this fun card!  My good friend Ethel is also a Stampin' Up! demonstrator in the Surrey Fleetwood area of BC.  
Card Seven by Phyllis:


Our last card is from another good friend Phyllis, who lives in the Okanagan.  Phyllis created this stunning die cut card featuring products from Stampin' Up! and Karen Burnston die cuts.  This card took my breath away Phyllis when I pulled it from the envelope.  Wow!  Simply beautiful! Thanks so much!

Well, there you have it for today.  Beautiful and much appreciated cards from friends that I love!  Thanks everyone for making my Christmas memories in 2016! 

Happy Stamping!
Penny Token's Stampin' Spot 
Merry Christmas Everyone!

Thursday, September 3, 2015

Connie & Mary Colour Challenge - CCM370 Too Late!

I was stamping with my bestie last Tuesday and she suggested we make some cards using Connie and Mary's Colour Challenge.  Their combination of Pool Party, Watermelon Wonder and Black, sounded awesome. 

Here's their challenge:  


I really liked the card I made last week using the Butterfly Pop Up Diagonal Fancy fold, so I decided to use a similar layout for an anniversary card I was putting together.

All went well until I started trying to fine tune some of the details like how I would combine the colours.  While Sheri surged ahead and made the cut off time, I simply took too long deciding what sentiments to use and how I would use them and the next thing you know I missed the cut off for the challenge.

Oh well I'm sure that's happened to some of you too.  Since I was happy with the card I eventually made, I decided I would go ahead and share it even if it didn't make the challenge.   

Here's My Finished Card:


I finally decided to use the CELEBRATE sentiment from the Celebrate Today stamp set.  I stamped the image with Versa Mark Ink and Momento Tuxedo Black ink and heat set it with Black Embossing powder.  I couldn't find a framelit or punch that work with this image so wound up fussy cutting around the words.  I mounted it between the butterflies with dimensionals. 

Here's a view of the inside of the card.  I used the "Love begins in a MOMENT grows over TIME and lasts an ETERNITY" image from one of my favourite retired stamp sets called Occasional Quotes.  I simply love that verse.  The "Happy Anniversary" which you can barely see is from another retired stamp set called Something to Celebrate stamp.

Supplies Used:
Stamp Sets:  Watercolour Wings, Something to Celebrate (R), Celebrate Today
Ink:  Momento Tuxedo Black, Pool Party, Watermelon Wonder, Versa Mark 
Card Stock:  Pool Party, Watermelon Wonder, Black Glimmer Paper, and Whisper White 
Accessories:  Trimmer, Big Shot, Bold Butterfly Framelits and Butterflies Thinlet Dies, Basic Rhinestones, Black Sharpie Alcohol Marker, Tom Bow Adhesive, Dimensionals.  

I hope you like this card and are inspired to post your card samples even if you missed a challenge cut-off like I did. 

Happy Stamping!
Penny Tokens  

Monday, April 7, 2014

Wetlands Card Set

We've been having a lot of rain lately, in our little corner of the Pacific Northwest.  

I'm not complaining though.  I know it's good for the water table since we didn't have a lot of snow pack this winter and it's great for all the spring flowers that are popping up all over, it's just that it's really been curbing our daily walking routine.  

Yesterday when the sun popped out for an hour or so we did get a chance to go for our walk starting out by the pond below our place. The evidence of Spring is everywhere, from the buds on the branches and the vivid hues of the Forsythia and cherry trees. The ducks and Canada geese are nesting by the waterside and soon their hatchlings will be trailing along behind them down the many paths.  

You might be asking yourself what all this has to do with stamping?  Well, let me tell you.  On returning from our walk I was inspired to play with one of my new and soon to be favourite stamp sets called "Wetlands"

Wetlands is comprised of six stamps - three with images of waterbirds and greenery and three with beautifully scripted sentiments.  Wetlands is one of those sets you can easily pass by in the catalogue but it's worth taking a second look.  You can find it on page 69 of the Idea Book and Catalogue. 
 
Wetlands Wood Mount #126695 $26.95 or Clear Mount #126697 $20.95

Here is a set of cards I made:

I'm a big fan of inchies and window cards so when I saw a card on Pinterest by Julia Carmichael, I was eager to CAS it.  Julia's version has a Pool Party card base and her layered inchies were both in Whisper White card stock.  Click here to see Julia's beautiful card.

For the detail on this card I made three short score lines in varying lengths, using my Simply Scored Board.  I started scoring at the outside and decreased the length of each score by 1/4" as I moved towards the center.  I changed up the position of these scores with the layout of each of the four cards.  Although the cards look nice without these score lines, the addition of such a simple detail takes the cards to a higher level. 

I changed the position of the inchies on each of the cards as well as the sentiments and placement of the score lines.  I think this makes for a nicer set of cards. I also plan to make two Birthday Greeting cards to go with this set and a box to hold them.  What a nice gift this will be for someone.

I stamped the images randomly on a scrap piece of Whisper White card stock with Staz On Black Ink, and then punched them out with square punches. I used a 1 1/4" square punch for the images and a 1 3/8" punch for the coloured card stock layers.  The card stock colours I chose were for a colour challenge and featured Smokey Slate, Crushed Curry and Marina Mist, in small amounts this was a great combination.
  
I really like the sentiments that come with this set.  They are similar to those in the Sincere Salutations Stamp set which retired last year.  I really, really missed that stamp set, so Wetlands now gives me back at least three of the stamps that I use most often. 

I kept the inside of my card simple and just added the shore birds stamp at the base. 

Supplies for My Card:
Stamp Set:  Wetlands   
Card Stock:  Whisper White, small scraps of Crushed Curry, Marina Mist and Smokey Slate for the 1 3/8 x 1 3/8" background layers.    
Ink:  Staz On Black Ink

Accessories:  Simply Scored Score Board and Scoring Tool, 1 1/4" and 1 3/8" square punches, dimensionals, adhesive.

I hope you liked these cards.  They are clean and simple, but so rewarding.  You can't make just one, I promise you.  

I'll be posting more Wetlands cards later this week so come back again.  If you like this stamp set and would like to order it just click here for my online store.   

If you live in the Fraser Valley area and would like to attend a class featuring different techniques using the Wetlands set just email me and I'll set something up.  I have a lot of Wetlands sample cards on my Pinterest site.  I hope you'll check it out.  Just click on the Pinterest Button on my side board panel, and then once you're in my cards board, simply click on my picture and it will take you to my other posting boards.  You'll find the examples on the board called " Cards - Wetlands".  

Penny

Sunday, August 4, 2013

Convention Swap Posts: Day Five

Sorry I've been dragging my heels on getting this next set of swap cards posted, but I've been dealing with an upper respiratory tract infection, that hit me shortly after returning from convention.  And quite frankly it knocked the wind out of my sails.  I've been very dragged out and tired, so resting a lot and not getting much accomplished.  I keep persevering a bit each day though and I'm starting to see light at the end of the tunnel.  

In other words, I'm almost getting to the bottom of the swaps I'd like to share with you.  I hope you're still with me and enjoying the tour.  I know I've discovered a lot by really looking at how these cards were made.  So here we go with card number Forty Six:
Card Forty-six:  Marie Costanza created this cute card using the new Giggle Greetings set on pg 29 of the catalogue.   This cute 4-stamp set has a funny greeting for several occasions.  Marie has made her card base from Whisper White card stock and layered it with Pacific Point DSP.  Gorgeous paper.  She has stamped the little dog in basic black ink and coloured it with markers.  It's been popped up on dimensionals and added to a piece of Pacific Point card stock that's been punched out with the 2 1/2" Circle punch.  For finishing touches she added a set of google eyes (which are retired) and a bow made with the 1/4" Stitched Grosgrain Ribbon in Basic Gray. Great card!

Card Forty-Seven:  Love this "hero" card in in it's bold Night of Navy, Real Red, Whisper White and Burnt Brown Sugar, stars theme.  It was created by Monica Bradford.  The stamp set used is "Simply Stars" on page 124 of the catalogue.  There are only 4 stars in this set but she has been able to effectively stamp them on her background so that it looks like a field of them.  The other really nice touches that Monica has added were the two banners in Real Red and Night of Navy.  They were cut out with the Hearts a Flutter Framelit Dies on page 187.  She's also cut out and added one star in  Silver Glimmer Paper and mounted it with dimensionals.  The "brave" sentiment which is stamped on Whisper White and punched out with the decorative label punch comes from the "Words of Courage" stamp set on page 42.  Great card Monica, thanks for sharing!   
Card Forty-Eight:  Bertina Maloy created this stunning card using the Beautifully Baroque Embossing Folder and a tag from the Chalk Talk stamp set on page 12 of the catalogue. Her card base is Basic Black card stock followed by a layer of Basic Gray.  To achieve the beautiful backround effect on the next card layer she did a Faux Patina technique starting with Whisper White Card Stock then inking up her embossing folder with Smokey Slate and Wisteria Wonder Inks.  Very effective!  The Chalk Talk tag was cut from basic black card stock using the Chalk Talk Framelits. Did you know you can purchase the Chalk Talk stamp set and matching framelits as a bundle and save 15% of their original price?  Click here for details - it comes in wood or clear mount.  Bertina embossed the tag with silver embossing powder, but she wasn't finished yet.  To complete the tag she stamped the sentiment "For You" (also from Chalk Talk) in Basic Black ink onto Wisteria Wonder, punched it out with the 1/14" circle punch and then glued it to the center of the tag. She added Crystal Effects for a glossy finish.  Two basic rhinestones and a piece of White Taffeta ribbon complete this card.  Well done Bertina!

Card Forty-Nine:  My next New Catalogue Swap Card comes from Gale Hansen of Fort Deposit, MD.  She has created a unique and fun baby card with the Sweetest Gift stamp set on page 57 of the catalogue.  She added  Gingham Garden DSP to Whisper White card stock as the base for her card.  Her next layer actually opens as the card.  To create this fun layer she cut a piece of Melon Mambo card stock into a strip measuring 3 1/4" x 8 and then scoring it at the center.  It was adhered to the card base with the fold sitting at the center top of the card. She punched out a large scallop circle with the 2 3/8" Scallop Circle Punch from the top flap of this card and stamped the sentiment "thank you for the sweet gift" in melon mambo ink.   A 3 x 4" piece of Whisper White card stock was cut for the inside. Gale has done an absolutely amazing job of colouring and stamping this inner card piece and also the stork that's adhered to the outside.  She's sponged the most perfect clouds and added the sentiment "congratulations to you and your new little one" to this piece.  To complete the card she's added a white taffeta ribbon and bow.  These next pictures will give a bit more insight into this wonderful card any new parent would be thrilled to receive.  Gale you're simply amazing!   


Card Fifty: This next card, an original design by Tricia Miller was created for the New Catalogue Card Swap using the Sweetly Framed Hostess Stamp set shown on page 205 of the catalogue.  If you've ever wondered what you can do with "itty bitty" stamps like the ones in this set, Tricia's card is a great example.  Tricia used Whisper White card stock for her card base followed by a 3 3/4" x 5" piece of Strawberry Slush card stock.  For the top layer she embossed a 3 1/4" x 4 1/2" piece of Whisper White with the Modern Mosaic Embossing Folder.   Starting in the second row of the embossed tiles, she has stamped the heart image in Strawberry Slush ink on every second row.  The sentiment was also stamped in Strawberry Slush and then punched out with the Decorative Label punch and then added to the card with dimensionals.  The finishing touch on the label was the addition of the tiniest of the Basic Pearl Jewels.  Awesome Tricia, luv your clean and simple card!
Card Fifty-One My next card by Mary Lonneman of Benson, MN features multiple layers that have been stamped with the Morning Meadow Hostess Stamp set on page 203 of the catalogue.  Mary's card base is in Very Vanilla card stock followed by a layer of Coastal Cabana that's been embossed with a non-Stampin' Up! embossing folder.  Mary has layered up the card using the Deco Labels, Label Collection and Apothecary Accents framelits.  Each piece was stamped with an element from the Morning Meadow stamp set.  Basic Rhinestone Jewels were added to the Thank You label and for the little bird which was punched out with the Bird Builder Punch.  Thanks Mary for a great card!
Card Fifty-Two:   Gail Deans from Gaylor MI created this exciting layered card which is as lovely on the inside as it is on the outer layer.  Beautiful!  First of all the vibrant bold colors she has mixed just give you a lift.  The card base is in Gumball Green followed by a layer of Pacific Point that's been texturized with the Square Lattice Embossing Folder.  I love how she's added her leaves and butterflies on the face of the card using the Little Leaves Sizzlits and Beautiful Wings Embosslits, this was a nice touch and ties in with the center flower.  She cut a large circle from the card's top layers using the 2 1/2" Circle Punch revealing the awesome layered flower on the inside. The Five Way Flower single stamp was the ideal choice for this card.  She's stamped the flower in Pumpkin Pie and Melon Mambo inks on Whisper White card stock several times to create the four flower layers, and then used an assortment of co-ordinating punches to easily cut out her layers.  The co-ordinating punches for this set are - the 2 3/8", 1 3/4", 1 1/4" and 7/8"  Scallop Circle punches.  You can also cut out the very center with the Itty Bitty Shapers Punch. Each layer of the flower is stacked using dimensionals and the final layer has a Pacific Point brad in the center. A banner in Pacific Point was stamped in Whisper White ink with a "thinking of you" sentiment.   Thanks Gail for a terrific and inspiring card!  
 

 This picture shows the inside of the card and the sentiment.


Card Fifty-Three: Julie Link's masculine gate fold card is truly inspiring. She starts with a Basic Black card base that measures 4" x 11".  This piece was scored at 2 6/8" and 5 1/2". A 2/12" x 4" piece of Basic Gray card stock was embossed first with the Square Lattice Embossing Folder and then again with the Honeycomb Embossing Folder for the front fold of the card.  She repeated this process for the inside of the card using a  5 1/4" x 4" piece Basic Gray. Before adhering this layer she added three  1/8" Mini Silver Brads to the bottom right hand side of the card.  The moose image from the Walk in the Wild Stamp set was stamped in Basic Black onto Smokey Slate card stock and then cut out with a 2 1/2" circle punch.  Her next layers in Basic Black and Gray and a matching Smokey Slate layer on the inside of the card were cut out with the Window Frames Collection framelits.  Wow a simple but absolutely stunning card.  Thanks again Julie!


 This picture shows the card when it is flattened out. 

Card Fifty-Four: This next card front I received in a hallway trade with Cheryl Welch from Toledo Illinois.  Cheryl used a piece of Daffodil Delight for her card base and topped it with a Tea Lacy Paper Doily that was sponged with Daffodil Delight ink.  A 3 1/4" x 4 1/4" layer of Night of Navy card stock that was embossed with the Flower Garden Embossing Folder was then added.  Cheryl stamped the butterfly images from  the Backyard Basics Stamp set on page 79 in Night of Navy onto three different fine patterned pieces from the Gingham Garden Designer Paper series.  She cut out the butterflies using the Backyard Basics Framelits, which are offered as a bundle with a 15% discount.  The sentiment dream from the "Loving Thoughts " stamp set and the scroll frame from Four Frames were stamped on Naturals Ivory Card Stock in Night of Navy ink and then this piece was punched out with the Decorative Label punch.  A small Basic Pearl jewel was added to the center top of the sentiment for a nice finishing touch.  Thanks Cheryl this is a great card.
Card Fifty-Five: Rene Brown, Heritage Stampers Williamsburg VA created this next simple card using the Kind & Cozy stamp set on page 82 of the catalogue.  This set makes you think of grandma's house and warm apple pie and is a perfect match-up with the Gingham Garden DSP and the Gingham Jumbo Wheel!  Rene started with a base of Whisper White cut 4 1/4 x 11 and folded at the top.  A layer of Night of Navy measuring 4 1/4" x 5 1/4 follows.  The next layer of Whisper White was embossed with the Stripes Embossing folder.  The large circle image was stamped in Night of Navy and punched out with a 2 1/2" Circle Punch.  The thinking of you sentiment was stamped on a piece of Whisper White in Pear Pizzazz and Primrose Petals ink and then cut out with the Decorative Labels punch and layered on the large circle with dimensionals.  A small bow in 3/8" Stitched Satin Ribbon in Primrose Petals completes this lovely card.  Thanks Rene, and so nice running into you again at Convention and having an opportunity to share. 

Card Fifty-Six:  I fell in love with this "blessing" card by Andrea Lee from Sachse, Texas.  She writes on the back of her card "Enabling you to bless others through paper crafting.  I hope this sample will help you to be a blessing to others with your notes of kindness."  Wow, how delightful!  This card truly is a blessing!  It was created using stamped images from the Gingham Wheel, Flower Shop, Polka Dot Pieces and Remembering Your Birthday Stamp sets.  The bottom card layer is in  Basic Black that's been embossed on the card front portion with the Perfect Polka Dots embossing folder.  A strip created with the Gingham Wheel in Basic Black was then adhered along with a crisp Whisper White scallop edge that was embossed with the Delicate Designs embossing folder.  This great combination of layers was pulled together with a piece of the 3/8" Strawberry Slush Ruffle Stretch Ribbon.  To complete the front of the card three flowers from the Flower Shop Stamp set were stamped in Strawberry Slush ink and then punched out with the coordinating Pansy Punch.  The beautiful leaves were punched out of Gumball Green card stock using the Little Leaves Sizzlits.

As if the outside of this card wasn't gorgeous enough, check out the inside.  I told you.  It's equally stunning as the cover!  For the liner Andrea cut a piece of Whisper White card stock to 3 3/4" x 5 1/4"  and stamped the flowers from the Flower Shop stamp set in Strawberry Slush and the leaves from the Polka Dot Pieces stamp set in Gumball Green.  Perfect!  The verse stamped in Basic Black ink is just right for this card.  Andrea many thanks for blessing us with this beautiful card!  Loving it!

Card Fifty-Seven: Kayla Foster the creator of my next featured card which really inspired me with its soft colour combination and clean and simple look. The card base is a 4 1/4 x 11" piece of Whisper White card stock that's been stamped close to the bottom and top of the card face with the line image stamp from Gorgeous Grunge.  What a great choice for a contrast stamp. For her main image and sentiment stamps Kayla chose the "Too Kind" stamp set on page 71. This seven piece stamp set is classified as two-step because it has stamps that can be stamped over top of each other to give depth.  In this card Kayla used Crisp Cantaloupe and Calypso Coral for her light and dark flower colors and Wild Wasabi for the stems. She stamped the images on a 2 1/2" x 2 1/2" square of Whisper White card stock and then mounted this square on a 3 1/2 x 3 1/2" piece of Crisp Cantaloupe that has been embossed with the Perfect Polka Dots Embossing folder. The top and bottom ends of this larger square have a perfect row of scallops in Calypso Coral card stock.  The scallops were punched out with the Scallop Edge Border Punch.  Before mounting the large square to the card face with dimensionals, a 1/4" Stitched Grosgrain Ribbon in Wild Wasabi was tied on this piece. The sentiment was stamped in Calypso Coral onto Whisper White and then punched out with a 1 3/4" circle punch.  This piece was added to a scallop circle in punched out in Calypso Coral. A small basic pearl adorns this sentiment.  I can't thank you enough Kayla for your great card!  Love it!

Card Fifty-EightThis card will appeal to all you vintage lovers out there.  The stamping on this card made by Marga Martinez,  was done with the Shopping Around Jumbo Wheel shown on page 98.  She used Soft Suded card stock for her card base.  To create the first layer she stamped across the bottom of the Very Vanilla card stock in Soft Suede ink with the Jumbo Wheel and then embossed it with the Beautifully Baroque Embossing Folder.  Marga cut out a tag in Crumb Cake using the Chalk Talk Framelits and then added a smaller tag in Soft Suede that was also embossed with the same embossing folder.  To this piece she added a 1 1/2" by 1 1/2" piece of Very Vanilla card stock that was stamped with the Suffragettes image in Soft Suede.  Another nice touch is the small rosette, created with the Buttons and Blossoms Simply Pressed Clay Molds and Pressed Clay.  If you haven't tired this yet, it's a must do!  Marga coloured the blossom in Crumb Cake ink.  The beautiful bow was tied with a piece of 3/8" Soft Suede Taffeta Ribbon.

Card Fifty-Nine: Here's a sweet little birthday wishes card made by Bobbi Kincel.  Bobbi created a card base with a single piece of Pistachio Pudding card stock that measures 4 1/4 x 5 1/2, and then took a 5" x 7 1/2" piece of Naturals Ivory card stock scored it at the center and mounted it on the Pistachio Pudding base.  Prior to mounting this piece to the base she stamped the grid from the Off the Grid background stamp in Crumb Cake ink and added the little fly image from the Postage Collection Hostess set. Then Bobbi got extra creative by adding a super shabby chic frame and banner complete with ruffled ribbon to this fun card front.  The frame shape was embossed with the oval shaped embossing folder from Designer Frames.  The oval shape in the center coordinates with the Extra Large Oval Punch, and you guessed it, Bobbi used this punch to remove the center card stock, and tore around the outer rim of the oval to achieve a shabby chic look.  The oval was sponged with Pistachio Pudding ink and a small piece of Strawberry Slush 3/8" Stretch Ruffle Trim was added to the top edge of the oval along with a tiny flower punched out with the Itty Bitty punch - how cute! The dressed up frame was then mounted to the card front with dimensionals.  For the banner piece Bobbi stamped the happy birthday sentiment from the Simply Sketched Hostess set onto Natural Ivory cardstock and mounted it on Strawberry Slush card stock. The banner points are cut so perfectly on both pieces that I'm assuming she used a square punch to dothis.  There's also a small piece of the ruffled ribbon attached to the end of the banner to tie everything together.    And that's it folks another perfectly delightful card!  Thanks Bobbi for sharing.  I know I'm going to be CASing this one.  

Card Sixty: This beautiful and serene Trefoil Cross Sympathy Card has the perfect pairing of Pear Pizzazz, Elegant Eggplant and Whisper White card stocks and inks.  It was created by Germaine C. Meilach, from Rotonda Florida.  It was this Germaine's first trip to Convention and I had been hoping to run into her after making contact on Late Night Stampers, however as luck would have it we were strangers in passing.  By that I mean we actually managed to trade swap cards in the New Card Catalogue Swap, but in the rush and excitement of swapping didn't actually connect.  Too bad.    Germaine stamped the Trefoil cross in Versa Mark and then in Elegant Eggplant ink before setting the image with Clear Embossing Powder.  It has a beautiful glossy look.  For her background she chose the swirl design from Everything Eleanor and her sentiment comes from the Thoughts and Prayers stamp on page 92.  Germaine also added a strip of the new Pear Pizzazz Chevron Stripe Ribbon which is becoming so popular.  Beautiful card Germaine.  Thanks so much!
Card Sixty-One:  The final card in this post is a "KISS" (keep it simple stamping) card made by Sandi Hurford.  What I like about this card is that it is not the standard A2 birthday card size.  Instead, Sandi chose to do her swap cards on Stampin' Up! Notecards and points out what a great value these note cards are. There are twenty 5 x 3 1/2" Whisper White cards per package with matching 5 1/8" x 3 5/8" envelopes for just $7.50 and they mail at no extra charge.  Great tip Sandi and great card!  
The stamp set that Sandi used is "Sketched Birthday" eight-piece set on page 13 of the catalogue. This set which is available in English and Spanish, also coordinates with the 1 3/4" Scallop Circle Punch, Apothecary Accent and Bitty Banner Framelits.  I really like the way Sandi singled out different elements of the set like the hat, balloon and cake for her card front.  These are stamped in Staz On Black ink on Whisper White and she punched out the images with a  1 1/4" circle punch before mounting them with dimensionals on pieces of Basic Black that were punched out with the 1 3/8" Circle punch. I also like the way she didn't center each punched image, rather she captured them from an angle and then added a little piece of bling to each piece.  There is a basic rhinestone on the candle, a basic pearl on the hat and dabs of dazzling details on the balloon.  Finally I think the Honeycomb embossed card front is the perfect backdrop for these cute little images as it continues that clean crisp look. 
The inside of Sandi's card is nicely finished as well.  She's mounted the center circles from the Happy Birthday Cupcake image onto a basic black scalloped circle and added a basic rhinestone to the cupcake!  Voila!  Well done Sandi and thanks for sharing your talents. 


Paper Pumpkin Alternatives April 2024 and Sketch Challenges

The past week was so busy that time literally flew by.  I have a number of projects on the go, including working on my April 2024 Paper Pump...