Showing posts with label Watercooler Wednesday. Show all posts

Wednesday, April 18, 2018

WWC #166 - Kath's Masculine Anything Goes Challenge

Where do the days and weeks go?  It's hard to believe that only a week ago we were celebrating my mom's 96th birthday and the family was all here to celebrate.  Honestly, this past week seemed to simply evaporate. Since my company left on Monday the rest of the days just blended one into another and here we are and it's Wednesday again.  

We've also been having pretty nasty weather and everyone around me is complaining and wishing the rain and cold winds would "evaporate too".  I'm not letting the weather dampen my spirit though.  I guess I'm a bit like the old saying "when life gives you lemons.......... and I've managed to turn some of that gray dreariness into wonderful stamping adventures.  So far I'm not minding this unusual Spring weather a bit.

Kath is challenging us this week to create a card or project in line with our Masculine "Anything Goes" theme.  

We'd love to have you play along.  There are so many talented stampers out there and we love to see your take on our weekly challenge.  Be sure to check out our Design Team's inspiration this week at the Watercooler because there's ton's of inspiration.  While you're there, be sure to check out our rules for entering your own creation.  It's easy and fun.  You'll find a Linksy at the bottom of the WWC166 post.  This challenge is open until 5:00pm  Mountain Time on Monday April 23rd, 2018.    
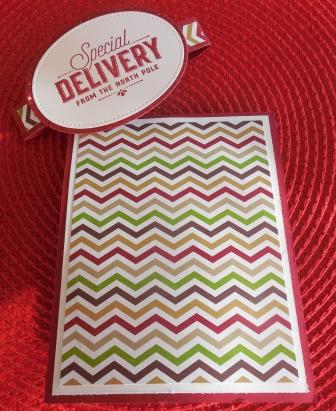
Here's My Card:  


This is my first time using the Truly Tailored Bundle from Stampin' Ups! Occasions catalogue, and I have to say I "love everything about it".  There just aren't enough great masculine sets around, so this one just knocks it out of the park for ease of use.  Whether it's the paper, the stamp images or the great Tailored Tag Punch, you can't beat this one.    

Supplies:
Stamp Sets: Truly Tailored, Guy Greetings 
Ink:  Early Espresso, Crumb Cake
Card Stock: Chocolate Chip, Very Vanilla
DSP:  True Gentleman #145593
Accessories:  Paper Trimmer, Tailored Tag Punch, Small and Large Oval punches (R), Tom Bow Glue, Dimensionals, Detail Scissors.

Details:
This is a standard size Double Z- Fold card and folds to A2 size.  To assemble:

1.  Cut a 4 1/4 x 11 piece of Chocolate Chip for the card base.  Score at 2 1/4" and 5 1/2" and crease on score lines. 

2.  To dress up the base cut Designer Paper as follows:
  • Cut a 4 x 5 1/4" piece of DSP for the large panel on the right, and
  • cut two 2 1/2" x 4" pieces of DSP for the front and inside panels.
  • Adhere all panels to the Chocolate Chip base with Tom Bow glue.
3.  For the smaller Z-Fold:

  • Cut a 3 1/2" x 8 12" piece of Chocolate Chip for the base. 
  • Cut a 4" x 3 1/4" piece of DSP for the front left panel and two 1 7/8" x 3 1/4" pieces for the inside and back panels.  Adhere with Tom Bow Glue. 
  • Cut a 3 3/4" x 3" piece of Very Vanilla for the largest panel, stamp the sentiment "Today is your Day....." in Early Espresso and add a 1/4" x 3 1/4" strip of dsp to the left side.  Adhere to DSP.
  • Cut a 1 3/4" piece of Very Vanilla and adhere to the inside panel.  Leave the last panel with just the DSP layer.
  • To attach the smaller Z-Fold to the larger one put sticky strip on the outside edges of the smaller Z-Fold.  Remove the protective sheet from the end panel and center and adhere it to the back panel of the larger Z-fold. Remove the protective strips from the front panel of the small Z-Fold cener on the front panel of the larger one and adhere. 
  • After stamping the image "To a Classy Kind Of Guy" in Early Espresso on a scrap of Very Vanilla I used the Tailored Tag Punch to cut it out.  Easy peasy! To add some pizzazz I cut a second tag from Chocolate Chip and after fussy cutting around the edge of the Very Vanilla sentiment with my detailed scissors I adhered the two tags together with Dimensionals and glued them to the center bottom of this panel.  To add a little more dimension I stamped the comb portion of the sentiment again, cut it out and adhered with a small piece of Dimensionals over the original comb for a nice little pop.
      
  • I left the inside panel in Very Vanilla without any sentiment or design and added a small happy birthday sentiment from the Teeny Tiny Wishes stamp set onto a scrap of  Very Vanilla.  I punched this out with the old Small Ovals punch and layered it onto a Large Ovals that had been cut from Chocolate Chip - miss those two punches!  To finish off this tag I stamped the small bow tie (so cute) in Crumb Cake and added it to the tag with Dimensionals.  


  • I love Z-fold cards, but I never find they have enough room to write your personal greeting on unless you use a light neutral for the base of the small Z-fold.  Since I didn't do that I added a 4" x 5 1/4" piece ov Very Vanilla to the large panel on the back of the card.  I've left mine plain but you could easily stamp another sentiment here.  


Thank you for visiting my blog today and checking out my  card.  I really enjoyed using this stamp set and this truly amazing paper.  I hope you'll leave me a comment and let me know how you like the Z-Fold card.  

Happy Stamping!
Penny Tokens Stampin Spot 

Wednesday, January 24, 2018

Watercooler Wednesday WWC154 Judy's "All About Christmas" Challenge

 
The days are starting to get longer although they seem to be flying by just as fast if not faster than a month ago.  I haven't been able to scrounge up much stamping time or Mojo since the New Year but managed to get my card finished for this week's Watercooler Wednesday "All About Christmas" Challenge being hosted by Judy Markowitz.  Nothing like getting an early start on making my Christmas cards for next season!  
How about starting your Christmas stash early too. Make a card or project and link your creation with the InLinkz at the bottom of this challenge.  It's easy!

Here's some details:
          1.-No back-linking to previous posts, your must be a new project.
          2. You must link your project back to our challenge 

          3. You must link directly to your post, not simply your general blog.
          4. Can't be linked to more than 8 challenges including ours.
          5. Have fun!

Oh, and don't forget to  use the link-up below to share your project.  The Linky closes Monday, January 29th at 5:00 p.m. Mountain Standard Time.


Here's My Card:

I've made another fun Twist N' Pop card for this week's challenge.  Hands down this card style is one of my favourite fancy folds, and you'll see many examples of it on my blog.  If you're interested in making one simply click here and check out this post for all the measurements and my working template. 

Outside Details:
One of the things I really like making for these Twist N' Pop cards is the belly band.  The belly band is "the keeper of the gate".  It's what holds back the mystery of these special cards.  Honestly with a good belly band you have absolutely no idea what's going to show up inside the card until it comes off.  What fun!
For that very reason I try to make the belly band extra special.  For this card I wanted the sentiment to be bold so I chose the Special Delivery sentiment from Merry Little Labels.  It's stamped in Cherry Cobbler ink on Whisper White card stock and cut out with the large oval from Stitched Shapes Thinlets.  

For some glitz n' glam I cut out a larger oval from Red Glimmer Paper and mounted that with foam tape behind the sentiment layer.  I added a 3/4" x 4 strip of designer paper on the front of the band and then attached the Special Delivery label with Tear N' Tape to the center front.

The card front itself is very simple and has no embellishment.  I added a 5 1/4" x 4" layer of Whisper White card stock followed by a layer of patterned paper   from "Season of Style" DSP. This paper was around a few seasons ago and I still absolutely love the colourful zig zag pattern.   The chevrons of colour are Early Espresso, Crumb Cake, Cherry Cobbler and Old Olive.  Perfect!


When the belly band comes off it reveals Santa Claus and his pack of reindeer, in all their festive glory. 
Inside Details:
Every Twist N' Pop card I make has an inside story. This one begins with Santa's Reindeer, who're eager and ready to "guide his sled tonight". I stamped the reindeer images with Stampin' Ups! Cookie Cutter Christmas which was carried over from last year. I stamped them with Momento Tuxedo Black ink on Crumb Cake and then fussy cut out all those cute little heads with my detail scissors. If you don't like fussy cutting there's a coordinating builder punch.


Using an oval or other shape as a support when you're grouping images really helps to hold them together, so I cut a 3" oval from Whisper White for these ones. Rudolph's shiny nose was cut from Red Glimmer Paper and I scattered some red sequins about for extra shine. I also added a 5 1/4" x 4" piece of Season of Style designer paper to this panel. 

I kept the bottom panel of the card very simple by only adding a 5 1/4 x 4" layer of Whisper White card stock.  I stamped Merry Christmas from Teeny Tiny Sayings in Cherry Cobbler and cut this piece and the Old Olive layer out with the two coordinating dies from the Stitched Sayings Thinlet set.  

Center Panels:
There are four center panels each adding a little bit more to the story and helping to support the greeting.  
The first panel represents the homes waiting for Santa's special delivery and consists of three layers of images.  It starts with a 3 1/4 x 2 1/4" piece of DSP followed by a 2" x 3" piece of Whisper White card stock.  I cut out the sky with the Card Front Builder dies and added a piece of silver shimmer paper behind the Whisper White panel to light up the night sky.  The houses were cut from Basic Black card stock with the Home Town Greeting Edgelit and placed on a slant.  I used the retired Sleigh Ride Edgelits to cut out the final layer of sleigh and horse from Whisper White card stock.  
The second panel is Santa's Suit and is simply constructed from Cherry Cobbler and Basic Black card stocks.  I added a silver glimmer paper square for the belt buckle and some Black Basic Rhinestones for the buttons.  

For the third panel I stamped the Santa Claus image from Cookie Cutter Christmas on a piece of Whisper White Card Stock and cut this panel out with the Pinpoint Rectangles Die. I cut out two more panels from Whisper White and Cherry Cobbler card stock and attached the Santa panel to them before adhering to the DSP.   I stamped and fussy cut a second  Santa image and coloured it with markers and Wink of Stella on the bear, cuffs and hat.

The fourth and final panel has a layer of Old Olive that was embossed with the Holly Textured Impressions Embossing Folder.  The sentiment "Just for You" is from the Merry Little Labels stamp set and the sprigs of holly were cut out with the Card Front Builder die set


Supplies:
Stamp Sets: Cookie Cutter Christmas, Merry Little Labels, Teeny Tiny Sayings
Card Stock: Whisper White, Cherry Cobbler, Basic Black, Old Olive
DSP:  Red and Silver Glimmer Paper, Season of Style (R)
Ink: Momento Tuxedo Black, Cherry Cobbler and Old Olive
Accessories:  Big Shot, Paper Trimmer, Detailed Scissors, Dimensionals, Foam Tape, Tear N' Tape, Black Rhinestones, Wink of Stella, Home Town Greetings Edgelits, Memory Box Pinpoint Rectangles #30065, Holly EF, Stitched Shapes Ovals, Sleigh Ride Edgelits, Card Front Builder Thinlets, Large Oval Punch,

I hope you enjoyed today's Watercooler Wednesday Challenge and that you've had time to check out my template and tutorial on my previous post just click here.. I also hope you've checked out the entries from all the Design Team members at the Watercooler Wednesday challenge as there are so many great ideas and inspiration.

Happy Stamping!
Penny Tokens Stampin Spot  

Wednesday, January 17, 2018

Watercooler Wednesday #WWC153 - Gail's Masculine "Anything Goes" Challenge

This past week has been so much fun.  It's been filled with good things like being with friends, playing cards, cooking Pierogies and entertaining.  All things that put joy in my heart.  The warmer weather and longer days are also contributing to my good spirits.  

Although I didn't have much time for stamping my thoughts were on it and I was able to design a card for the WWC153 at the Watercooler.  Gail Allen is our hostess and she's challenging you to step away from your comfort zone and make a "Masculine Card".

The WWC153 challenge is open for links until 5:00pm MST Monday January 22nd, 2018.  There's plenty of time.

Here's My Card:


Supplies:
Stamps:  Country Living, Gorgeous Grunge, Make a Wish (Fiskers)
Inks: Smokey Slate, Momento Tuxedo Black, Chocolate Chip, Early Espresso,
Card Stock:  Smokey Slate, Basic Black and Sahara Sand 
Accessories:   Paper Trimmer, Detail Scissors, Big Shot, Happy Birthday Thinlet, Tom Bow Adhesive, Gray Dots.


I made this card for a friend whose birthday is coming up soon.  He's into guitar picking and wearing boots, so this card is perfect for him.   I started with a Basic Gray layer for the card base and added a layer of Basic Black.  My third layer was a piece of Sahara Sand that I'd stamped the images on, but I kind of messed up on the stamping and had to cut it down  by a 1/4"  on all sides. Because this panel was so much smaller than I'd anticipated I layered on some   additional layers of DSP that I found in my scrap drawer.
I decided to use the Happy Birthday Thinlet for my sentiment on this card. The bold lettering was perfect.  Because this card is going overseas, I wanted it to be as light as possible and not too bulky.  By cutting two layers of the words in Basic Black and gluing them together, I was able to add a bit of texture and pop and keep the card weight in check. 

I coloured the boots with Chocolate Chip and Early Espresso inks that I'd watered down considerably.  I wanted the guitar to be the focal point so I coloured it with more intensity.  I has a bit of a sheen like a real guitar would. The basic gray dots and splashes from Gorgeous Grunge were added for more expression.

I kept the masculine feel on the inside of this card by adding a strip of the dsp and a piece of basic black card stock.  The sentiment is from an old Fiskars set I have called "Make a Wish".  I stamped it in Momento Tuxedo Black. 


And that's it for this week's challenge.  Hope you liked my card and will leave me a word of encouragement.  Don't forget to check out the entries by the other Design Team Artists at the Watercooler Wednesday challenge.

Happy Stamping!
Penny Tokens Stampin' Spot

Wednesday, October 25, 2017

Watercooler Wednesday Challenge #142 - Charlotte's All About Christmas Challenge


If you haven't started getting your Christmas cards together, this week at the Watercooler should be very inspiring for you.  After all it's now just two months today until Christmas.  I know, i know!  Kick me for reminding you of that! 

Our challenge this week is being hosted by Charlotte out newest Design Team Artist, and it's "All About Christmas". You may know Charlotte by her blog name, "Lady Joyful".  She leads us off with a beautiful snowflake card.

Our Design Team simply loves seeing the creativeness of our participants and having new stampers join in our weekly challenges.  If you're planning on sharing your Christmas Themed card or project on this week's challenge, you'll want to do so before 5:00pm on Monday October 30th, 2017 when our Linsky closes.  

Our challenge rules are simple and are listed on our Watercooler Wednesday home page.  Please take time to review them so you're not disqualified from our winner and runner up draws. It's super disappointing for us when a beautiful card has to be passed over because it was entered in too many challenges.

Here's My Card:
One of my favourite products from the Stampin' Up! Holiday Catalogue this year was the Merry Music Specialty Designer Series Paper, and so my card is all about showcasing how wonderfully these papers mix and match.


Supplies:
Stamp Set:  Musical Season
Ink:  Momento Tuxedo Black
Card Stock:  Whisper White and Basic Black 
Specialty Paper:  Merry Music Special DSP, Silver Foil
Accessories:  Big Shot, Paper Trimmer, Pinpoint Rectangle Layers Dies, 1 1/4" Circle Punch, Hot Glue Gun,Tom Bow Adhesive, Simply Scored, Sponge Dauber.

Details:
1.  Cut an 8 1/2" x 5 1/2" Basic Black card base and score at 4 1/4".

2.  Cut a 5 1/4 x 4" layer of Whisper White and adhere to base.

3.  Cut a 3 7/8" x 5 3/8" piece of Black & White Writing DSP and adhere to the 1st layer.

4.  Cut a  3 1/4" x 4 1/4" piece of Silver Foil.  For my card I die cut this piece using my Pinpoint Rectangle Layers Dies (non SU).  Center and adhere to the DSP layer.
In this view you can see the beautiful  mixture of papers with the silver foil.  These papers are ultra light compared to regular DSP packs, so it doesn't add much more additional weight to the card having a series of layers.

5.  Cut a 3 1/8" x 4 1/8" piece of Black and White Snowflake design DSP and adhere to the center of the foil.  

6.  For the Lolly, cut a 12" x 1 3/4" strip of the Merry Music DSP  and score at 1/4" intervals from end to end.  Use a sponge dauber and Tuxedo Black ink to sponge the edges.  Fold alternately on the 1/4" score lines.  Punch out a 11/4"  circle from Basic Black card stock to use as a base.  Join the ends of the strip together and then form a lolly by gathering the edges together and pushing down gently onto the black circle.  Put a dollop of hot glue in the center of the and press down so the circle holds the lolly's shape.   Punch out another 1 1/4" circle from Black and White DSP and cover the front center of the lolly. 
Note:  If you've never made a lolly before here's a link to Shelley Godby's blog where she shares instructions and a video on how she makes hers (a bit different from mine, but same concept).  These are great for all kinds of projects like banners, rosettes etc.

7.  To finish off the lolly, stamp the sentiment Peace, Joy, and Love from the Musical Season stamp set on to a 3 1/4" x 1/2" strip of  Whisper White card stock and adhere to the center of the lolly.  Use a generous amount of Tom Bow glue to adhere the lolly to the center of the card front.

8.  For the inside of the card cut a 4" x 5 1/4" piece of Whisper White card stock and adhere to the card base.  Stamp the sentiment "May the spirit....." from the Musical Seasons stamp set in Momento Tuxedo Black ink.  

9.  To finish the inside panel adhere a 3/4" x 3 3/4" strip of the handwriting DSP to the bottom of the panel.  Die cut a  trumpet from Silver Foil with the Musical Instruments Thinlet dies.  Adhere, and as Frenchie would say, "Voila you're finished". 


Well, that's it for today's challenge.  Hope you enjoyed this black and white Musical Season themed Christmas card.  I know I had fun making it and plan to make a few more of these before the card exchange is upon us.  For this type of card I will definitely make a box style envelope so the lolly isn't compressed in the mail.  Enjoy!  

If you started at my blog and haven't see the rest of this week's creations by the Watercooler Design team make sure you go back and check them out.  What an awesome array of seasonal cards.  Love them.


Happy Stamping!
Penny Token's Stampin' Spot   

Wednesday, September 13, 2017

Watercooler Wednesday Challenge #136 - Gail's "All About Birthdays"


I don't know about your household but in mine, September and October are almost continual birthdays for friends and family. Because I need so many cards for these special occasions, I was happy to have the opportunity to play along with Gail Allen's Watercooler Wednesday "All About Birthdays" challenge.
Why don't you play along this week too? This challenge will be open until 5:00pm on Monday September 18th. It's easy to link up your card to our Linkski and who knows, your creation might "Rock the Watercooler"! Just click here to go to the Watercooler Wednesday home page and check out the rules of play.

One of the stamp sets I fell in love with from the new Holiday catalogue is called Half Full and features a wonderful array of stamps and sentiments that are wine based. I just knew this set would be perfect for some upcoming birthdays. So, without further adieu I'd like to share my Half Full Birthday card for this week's challenge.
Here's My Card: 


Supplies:Stamp Sets:  Half Full #144999 and Stylized Birthday #141828
Ink and Markers: Momento Tuxedo Black, Fresh Fig,
Card Stock: Crumb Cake, Basic Black and Fresh Fig
Accessories: Stamp-a-ma-jig, Paper Trimmer, Scissors, Dimensionals, Glossy Accents, Basic Rhinestone, Ribbon (non-SU), Paper Snips for Fussy Cutting.

Details:
1.  Cut a piece of 8 1/2" x 5 1/2" Fresh Fig card stock for base and score at 4 1/4".   These are a A2 card dimensions.

2.  Cut a 4" x 5 1/4" piece of Basic Black card stock for the first layer and adhere to base.

3.  Cut a  3 7/8" x 5 1/8" piece of Crumb Cake for top layer.  Using the Stamp-a-ma-jig and Fresh Fig ink, stamp four rows of the multi wine glass image across the widest part of this panel.  Sponge the edges with Fresh Fig ink and adhere to the Basic Black layer.

4.  Stamp the sentiment "Wine improves with age....." on a scrap of Crumb Cake card stock in Fresh Fig.  Fussy cut the image and using a sponge dauber and Fresh Fig ink sponge around the edges.  Using the 4th label die from the Lots of Labels Framelits cut out a Basic Black label.  Center and adhere the Wine Label to the Basic Black label and then cut it down so only the top and 1/16" show around the sides and bottom.  Adhere to card front on an angle on the left side.  Make a small bow and attach with a glue dot and a Basic Rhinestone. 

5.  Stamp the wine bottle image on Fresh Fig Card Stock and on Crumb Cake card stock.  Fussy cut the Fresh Fig bottle.  Fussy cut the wine label and the bottle top from the Crumb Cake bottle and piece on the Fresh Fig bottle.  To give the appearance of a glass bottle, use clear glue or Glossy Accents on the Fresh Fig portions of the bottle and let dry.  Attach with Dimensionals beside the tag.

6.  Stamp the wine glass on Crumb Cake and fussy cut it. Use a Fresh Fig marker to colour in the wine in the glass.  Cover the glass with Glossy Accents and let dry, then go over the wine with a Fresh Fig Marker to make it stand out.  Attach the glass with Dimensionals beside the wine bottle.  

7. To finish the inside of the card begin by cutting a Basic Black panel 5 1/4" x 4" and adhere to card base.

8. Cut a 5 1/8" x 3 7/8" piece of Crumb Cake for the inside panel.  Sponge the edges with Fresh Fig ink and stamp "Happy Birthday" using the Stylized Birthday stamp in the center.  Stamp a wine glass in the bottom right hand corner.  


This card came together pretty quickly and I love the glossy accents on the wine bottle and the glass, it just brought them to life.  I know my friend will love receiving this birthday card. 

I hope you like it as well and would love to hear your comments.  If you started at my blog forget to check out the other Watercooler Wednesday Design Team Birthday Projects.  So much inspiration! 
 
Happy Stamping!
PennyTokens Stampin' Spot

Zany Birthday FMS#628

Well another week has flown by and there's a promise of Spring between the rain drops.  I'm thrilled to see all the cherry trees sta...