We finally have some good weather and have spent the week tidying up in the garden and the garage. Visits to the recycling plant to get rid of an accumulation of winter's junk and trips to local nurseries have been very rewarding.
My husband and I are such creatures of habit always going to get our plants at Costco or Devans, but this week we surprised ourselves by checking out three new nurseries in the area. Now our patios are looking inviting and we can't wait to entertain and use them again.
This week's Freshly Made Sketch was designed by Jen B
 |
| Click Here to See the FMS Blog Link and Design Team |
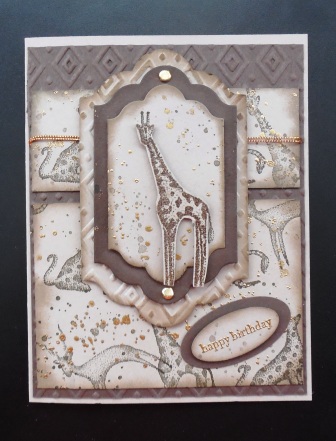
Here's My Card:


This kit comes with everything you need to make eight cards. I started my card with a basic black cardstock base that measured 8 1/2" x 5 1/2" and scored at 4 1/4". On the right hand side of the card front I cut a 1" by 5 1/2" strip off so that the inside of the card was exposed.
For the front mat I cut one of the Crushed Curry card bases from the Rock Legend Kit down to 3" x 5 3/8" and adhered it to the front of the card. For the rest of the front panel detail I layered a Velum Star with the guitar and Happy Birthday sentiment, both of which were adhered with dimensionals. Next I adhered five of the red plastic stars to fill up the white space on the star. Voila, almost done!
The inside of the card also came together very quickly. I added a 1" x 5 3/8" strip from the reverse side of the card base that I'd used on the card front. This Crushed Curry strip had no pattern. I also cut a panel of Whisper White cardstock for the inside that measured 3" x 5 3/8" and adhered this beside the Crushed Curry strip leaving a 1/16" gap between the two pieces.
During the Last Chance Sale in April, I was fortunately enough to get the Rock Star Stamp Set and coordinating dies from the expiring mini catalogue. I'm happy I did. I stamped "Have a Rock and Roll Birthday" in Momento Black ink for the inside sentiment and I love how bold and masculine this stamp is.
 |
| Sorry for the blur. This stamp and die set is now retired. |

Thanks for stopping by. I hope you enjoyed this card and will drop by again soon.
 |
HAPPY STAMPING!
PENNY TOKENS STAMPIN' SPOT
Penny Hanuszak, CDN Stampin' Up! Demo since 2006