Showing posts with label cards. Show all posts

Monday, August 3, 2015

Floral Frames Sympathy Card

Sadly, I've just learned my friend Bev's mom passed away over the weekend.  I knew from talking with Bev recently that her mom's health had been failing for some time and she had been slipping away little by little.

I'm so grateful my husband and I had an opportunity to meet Norma and her sweet husband Mel, some years ago and have fond memories of those get-togethers.  

We first met this great couple from Winnipeg on one of their visits to Black Mountain Ranch, in Washington state. Our memories of Norma's friendliness, warmth and great cooking skills during those visits remain. She was one of those women you instantly took a liking to, with her great smile, strong hug and wonderful sense of humour.

Our sympathy goes out to Mel, his children and grandchildren in the loss of their wife, mom, grandma, and an all around great woman.   

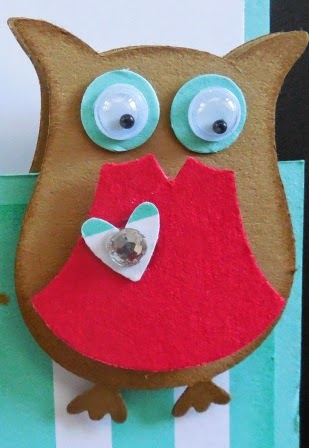
Here's a card I made to express our sympathy:

Supply  List:
Stamp Sets:
Gorgeous Grunge, You’ve Got This
Inks:
Rich Razzleberry, Crumb Cake
Card Stock:
Rich Razzleberry, Daffodil Delight, Crumb Cake
Accessories:
Floral Framelits, Basic Rhinestones, Detailing Scissors, Tom Bow Glue, Dimensionals
Tools:
Big Shot, Paper Trimmer


This is the inside of the card.  I added the additional cut flowers to cover the back of the ones on the front of the card. 


Happy Stamping! 
Penny Tokens

Friday, July 18, 2014

Stippled Blossoms Thank You Card

Today's card is a thank you card that I'm sure you'll like.   I got my inspiration for this card from  a blog challenge site called "Just Add Ink".  There is a link button on my left side panel so you can go and check out this site anytime.   

Just Add Ink has been around since January 2010 and during that time they have hosted over 200 challenges.  They are an Australian/New Zealand Stampin’ Up! challenge blog run by Australian and New Zealand Independent Stampin’ Up! Demonstrators.   Along with their challenge blog they also have Pinterest and Facebook pages you can follow.  It's worthwhile, because they have sketch and colour challenges that are awesome not to mention all the wonderful samples from the talented design team and fans.

 Just Add Ink #223 Sketch Challenge
This really challenging sketch was created by Tina Gillespie.  She used this sketch to create a birthday card for her daughter.  Check it out on her blog Scissors Paper Card.
Here's My First Attempt at this Card: 

Oooops!  I don't know if you're like me but if you are take heart, sometimes we just don't get it right.  I began this challenge with one card in mind and ended up with a bit different card, I'll call it my "stepped up" card.  That's the one I submitted to the challenge.  

For my first card I wanted to use my new InColour card stocks and inks but when I assembled the card it just didn't do it for me, it was too dark.  Here's the first card and I won't go into a lot of discussion about it's assembly just some basics.

Assembly:
I really liked the full circle in the card sketch but chose to mount it on a square card base.  I didn't want anything too big, so chose to do a 4 1/2" x 4 1/2" square.  The Whisper White card base for this card measures 4 1/2 x 9" and it's folded at 4 1/2".
For this first attempt I used Blackberry Bliss, Mossy Meadow, Perfect Plum and Whisper White card stocks and inks.  I used a sponge dauber to edge the card and stamped the sentiment directly to the Whisper White card stock.  Basic Rhinestones were added to the flower centers. 


I embossed the flower layer with the Decorative Dots EF but the layer of Blackberry Bliss in the background is plain.  Instead of pearls I used Basic Rhinestones for the flower highlights.  

The inside of my card was plain with only the floral image stamped in the corner.

Here's my "Stepped Up" version:

I did some tweaking with the layers adding an additional one to give it more connectivity.  See my note below.

I stamped the roses from Stippled Blossom in Perfect Plum and Blackberry Bliss and added leaves in Pear Pizzazz.  The Thank You sentiment is from the Blooming With Kindness Stamp set. The sentiment was stamped on Whisper White in Blackberry Bliss and then punched out with the 1" circle punch and mounted on a 11/4" circle of Perfect Plum.  This piece was then adhered to the card front with dimensionals. 
 
For the inside I cut a 4 1/4 x 4 1/4" piece of Blackberry Bliss and then layered it with a 4 x 4 piece of Whisper White.  I don't really like verses inside my cards but I do like some kind of adornment so I chose to stamp  just the detailed stamp of the large rose from the Stippled Blossoms set. I probably should have stamped off the ink to give this image a softer look, but I'm glad I decided to go with full ink.  The image came out clear, detailed, bold and, is a striking contrast to the Whisper White card stock.

Layers, Layers, Layers:  
Remember I mentioned there were lots of layers on this card, well I cannot tell a lie.  There are a lots and lots of layers!  Why?  Because I like the way it pulls everything together and adds depth to the design. 

The first layer on this card is cut from Pear Pizzazz and measures 4 1/4" x 4 1/4".  The next layer of Blackberry Bliss measures 4 x 4" and was embossed with the Decorative Dots Embossing Folder (EF).  I just can't get enough of those large dots.  

After that, I added a layer of Pear Pizzazz cut out with the Floral Frames Framelits die and then embossed it with the now retired Vine Street embossing folder.  It made the floral image look like veined leaves, which was just the look I was trying to capture.

Finally I added a 3 1/4" circle of Blackberry Bliss topped by a 3" Whisper White circle cut with the Circle Framelits.  The Whisper White circle was cutout, stamped and then cut into puzzle pieces before being mounted on the Blackberry Bliss circle.  Tip:  When mounting the circle pieces I used Tombow Multipurpose Glue so I would have some flexibility in getting the pieces to line up properly along the circle rim and in between.  Once the floral layers were put together, I added dimensionals and adhered it to the Pear Pizzazz flower shape. 

I added the Basic Pearls to the flower centers after the card was assembled.  The Thank You sentiment was the last piece added and was popped up with dimensionals.  I love the script used for this stamp.  So romantic!

Here are the two cards I made together. 
 
Card No. 1

 
Card No. 2


 Supplies Used: 
Stamp Set:  Stippled Blossoms and Blooming With Kindness
Ink:  Blackberry Bliss, Perfect Plum, Mossey Meadow, Pear Pizzazz
Card Stock:  Whisper White, Pear Pizzazz, Blackberry Blizz, Mossy Meadow
and Perfect Plum
Accessories:  Decorative Dots Embossing Folder (EF), Vine Street EF, Big Shot, Trimmer, Circle Framelits, Flower Framelits, Basic Pearls, Sponge Dauber, 1" and 1 1/4" circle punches, Tom Bow Multipurpose Adhesive and Dimensionals. 

Hope you enjoyed this card.  Leave me a comment if you did.  Let me know which version is your favourite.  It will make my day.

Happy Stampin!
Penny Tokens 

Friday, May 23, 2014

Petal Parade Double Time Stamping

Unfortunately I didn't get to play much with the free stamps and products I earned from the Sale-a-bration catalogue this year as we were away.  

One of the stamps I had been eager to use was the Petal Parade set.  I liked the look of the flower and leaf images. 

Now that I'm back home and stamping on Tuesdays, I've had an opportunity to ink up this stamp and I love the results. I think you will too when you see these five cards. 
 
Here Are My Cards:

Card One is a Double Time card stamped on Naturals Ivory cardstock. To achieve the double time effect you center the Natural Ivory layer over top of the card base with repositioning tape and then stamp your images all over the cardstock.  Remove the top layer and adhere it to the Always Artichoke layer.  Add the ribbon to this layer and tie a bow.  Take the Always Artichoke layer and adhere it to the card base matching up the flower images that have over lapped and adhere it with adhesive.  
 Supplies:
Stamp Sets:  Petal Parade (SAB 2014 retired), Perfectly Penned
Ink:  Sahara Sand, So Saffron, Always Artichoke, Early Espresso
Card Stock:  Naturals Ivory measuring 4 1/4" x 11" for card base and scored at 5 1/2". Cut another layer to measure 3 3/8" x 4 7/8".  Always Artichoke layer measures 3 5/8" x 4 7/8".  
Accessories:  Ribbon 10 inches in Daffodil Delight, Adhesive, Trimmer
 
The inside of the card was left blank except for the flowers and leaves.

The Happy Birthday sentiment is from the Perfectly Penned Stamp set.

Perfectly Penned a 4 piece stamp set on page 95 of the Idea Book and Catalogue will retire on May 31st of this year. 
 
Card Two:  This is the same as card one but instead of the Naturals Ivory I've used Whisper White card stock.  All measurements and other materials remain the same.  The images are quite a bit crisper on the Whisper White and it doesn't have the homespun a look as Card number One. 

Here are Cards One and Two together.

Card Three is a side-fold card once again the Petal Parade stamp set stamped in the new Stampin' Up! In Colours - Blackberry Bliss, Lost Lagoon and Hello Honey.  

Supplies and Measurements:

Stamp Sets:  Petal Parade, Work of Art (NEW)

Ink:  Lost Lagoon, Hello Honey and Blackberry Bliss

Card stock:  Whisper White card base measuring 4 1/4" x 11 and scored at 5 1/2".  Whisper White layer measuring 3 3/8" x 4 5/8", Rich Razzleberry layer measuring 3 5/8" x 4 7/8" and a Sage Shadow layer measuring 4 x 5 14" and embossed with the Designer Dots embossing folder.  

Accessories:  Dimensionals, Designer Dots Embossing Folder, Big Shot and Trimme


Card Four is a side fold card that uses the Emboss Resist Technique.  This card uses the same cardstock, ink and measurements as Card Three.  The only additional accessories you'll need are a heat tool, Versa Mark Ink, Clear Embossing Powder, Basic Rhinestones and a sponge dauber. 

I stamped the leaves with Versa Mark Ink randomly across the White Layer, covered with Embossing Powder and then heat set it with the heat tool.  I then did the rest of the stamping on the card.  I stamped off some of the smaller flowers so the images were faded.  Once all the stamping was done I rubbed over the embossed areas with Lost Lagoon ink and the sponge dauber to bring colour to those areas. 

Card Five uses the Resist Embossing Technique too but I've changed up the colours and added a small banner.  This is a top fold card.   

The leaves were embossed using Versa Mark ink and Clear Embossing Powder.  The colour was applied with a sponge dauber once all the stamping was finished on the layer.

The sentiment "Fabulous is what you are" is from the Million and One stamp set and is stamped in Coastal Cabana ink on the inside of the card. 

The sentiment on the banner was stamped in Blackberry Bliss on a piece of Whisper White card stock and then cut out using the small banner from the Chalk Talk framelits set.  I used the next size framelit to cut out a piece of Elegant Eggplant cardstock to use as a mat for the sentiment.  The small flowers were cut out with the Itty Bitty Punch. 
 Stamps:  Petal Parade, Perfect Pennants, Million and One.

Card stock:  Whisper White, Elegant Eggplant, Coastal Cabana.

Ink:  Crumb Cake, Blackberry Bliss, Elegant Eggplant, Coastal Cabana, and Versa Mark 

Accessories:  Chalk Talk Framelits, Itty Bitty Punches, Basic Rhinestones, Clear Embossing Powder, Heat Tool, Adhesive, Dimensionals, and a Sponge Dauber.

Thanks for dropping by and visiting my blog.  Leave me a comment if you think these posts are good and inspiring you to stamp or try a new technique.

Penny 
Happy Stamping! 

Sunday, May 4, 2014

Owl Friendship Cards


Recently some very good friends of ours came for dinner.  They arrived with this absolutely stunning white bouquet, to thank us for our hospitality.  I can't even begin to describe how wonderful a gesture that was.  

For me, there is something so absolutely special about receiving flowers in the first place, but when I get an all white bouquet it simply takes my breath away.  

These beauties lasted for over a week and brought me joy each and every time I walked in the room.  What great friends and how thoughtful!  

During their visit my girlfriend spent some time in the card room with me and she got a big kick out of this owl card I made while CASing one of Dawn Griffiths projects (see original post here).  

She liked it so much in fact, that she asked me to make her five cards to give to her friends.  I changed up a few of the colour details, but basically kept the same design features.  I thought I'd share the cards I made for her, because they are just so darned cute.  

The highlight of this card is the Owl Builder Punch.  This unique punch is a two-step punch that cuts out all of the pieces you need to build an owl. The punch includes an owl body, detailed eyes (not just one circle size but three so you can create dimension), and a small heart. All you have to do to start creating just punch and then layer the pieces.
 
Owl Punch #118074  Price $22.95

The card base is done in Night of Navy with Whisper White and Cherry Cobbler layers.  The Night of Navy DSP is from an old retired DSP pack I had and worked really well on the front of the card.
Here's a view of the inside of the card complete with this dressed up little owl.  Isn't she cute!
 
I've added some google eyes and her dress is cut from beautiful red glimmer paper. The flower was cut from Silver glimmer paper and is topped off with a basic white rhinestone. 

Hope you enjoyed this post.  The owl builder is such a versatile punch.  There's no end to the characters you can make with it.  

Penny

Friday, April 18, 2014

Million & One Flower Shop - CASE

I've been a big fan of Dawn Griffith for several years now and always make a point of checking out what's new on her blog.  Last week I came across a card she made called "A Million And One Flowers".  I liked it so much, I just had to drop everything and CASE it in it's entirety.  I think you'll agree its FABULOUS!
Million & One Stamp Set sentiment............how bold and beautiful is that?

Here's My Card: 
Sample One:  This is the first card I made CASing Dawn's design.  For this one I changed the rhinestones to Basic Pearls, and it gave the card a real "wow" look.
Sample Two:  For this card, I used Basic Rhinestones the same as in Dawn's post.  They look beautiful.  For this card I changed up the Petite Petals flowers by using two different stamp designs, however, I prefer the polka dot petal design in Sample One.
Supplies:

Stamp Sets:  
Flower Shop #130942, Petite Petals #133155 and A Million & One #126377
Flower Shop Stamp Set:  Clear Mount # 130942 $21.95 or Wood Mount #130939 $29.95 Six beautiful floral stamps that coordinate with the Pansy Punch.  
Petite Petals Stamp Set:  Clear Mount # 133155 $11.95 or Wood Mount #133152 $15.95. One beautiful flower, six gorgeous designs--it's the stamp set that keeps on giving! Includes 6 stamps. Coordinates with the Petite Petals Punch. This limited-time set is only available from January 3 through May 31, 2014, so order yours today! Available in both wood- and clear-mount.  Bundle the Petite Petals Stamp Set and the Petite Petals Punch and save 15%: Wood #134821 $24.50 or Clear Mount #134822 $21.25.


Million & One Stamp Set:  Clear Mount #126377 Price: $15.95 or Wood Mount #126375 $20.95 You don't need to say thanks in a million ways if you are sincere about just one. The two sentiments in this set are as sincere as they come. Coordinates with the Simply Fabulous Simply Sent Kit.
 Ink:  Sahara Sand Classic Ink, Staz On Black

DSP:  Sweet Sorbet (Sale-a-bration Designer Series Paper, now retired)

Cardstock:  Whisper White and Sahara Sand 

Accessories: 
Pansy Punch #130698, Petite Petals Punch #133322, Basic Rhinestones #129324, Adhesive and Dimensionals #104430.
Pansy Punch #130698 $21.95
Petite Petals Punch 133322 $12.95  pg33 Occasions Catalogue coordinates with the Petite Petals Stamp Set. Bundle and save 15% off the purchase of the stamp set and punch until May 31, 2014.
Assembly:
Sahara Sand Card stock:  
Cut the base at 4 1/4" x 11".  Place long side of card stock in trimmer to 5 1/2" mark and then move cutter blade down to 2" mark.  Remove card stock, put short side back in trimmer and line up at 2 1/4" then move cutter blade down to 5 1/2". Remove cardstock from trimmer and score across center at 5 1/2".

DSP:  
Cut two 2 " x 5 1/4" pieces from the Sahara Sand DSP paper (looks like fish scales) . Adhere these pieces to the front and inside panel on the front of the card. In sample one I sponged around the DSP with Sahara Sand ink and a sponge dauber.  This technique gives a nice vintage feel to the card.

Whisper White Card stock:  
Cut a piece of Whisper White to measure 5 1/4" x 4".  This is the inside panel of the card.  Stamp "Fabulous is What You Are" sentiment from the One In a Million stamp set in Staz On Black ink.  Adhere panel to the inside of the card.  Adhere Basic Rhinestones to the swirls on the sentiment.

On a scrap piece of Whisper White card stock stamp 4 quilt patterned flowers from the Flower Shop stamp set in Sahara Sand classic ink.  Punch out these flowers with the Pansy Punch. Now, stamp 5 flowers from the Petite Petals Stamp Set in Sahara Sand ink and punch them out with the Petite Petals punch.  Adhere the small flowers to the centers of the larger flowers with dimensionals, and finish them off with a basic rhinestone in the center.

Starting at left edge of the card adhere the flowers with dimensionals along the width of the front panel. Make sure that your dimensionals are low enough on the flower that they don't show on the reverse of the panel.  Attach the fifth Petite Petal flower to the inside of the front panel with a dimensional. 


That's it, you're done and now you have this amazing WOW card!  Thanks Dawn Griffith

Here are some other cards I've made using this design: 

This card features a Daffodil Delight card base.  The polka dot DSP is from the Watercolor Wonder Designer Series Paper in the Occasions catalogue.  The flowers are inked in Crisp Cataloupe and Daffodil Delight.  The sentiment "Celebrate Today is from the Perfectly Penned stamp set. I used Basic Rhinestones for the flower centers and on the curlycews in the sentiment.

In this photo you can see the finishing on the inside of the card.
In this closeup of the card front you can see the sponged detail around the flowers and how it sets off the flowers.  


For this version of the card I used Melon Mambo ink, card stock and Designer Paper.  This card is stunning and bright.  I used Basic Pearls for the details and again the sentiment is from the Perfectly Penned set.  All of the sentiments were stamped in Staz On Black Ink.  


The inside view of the Melon Mambo card.  I love it! So bright and cheery.  Who wouldn't want to receive this card for their special day!

 
Perfectly Penned stamp set

Okay now for something completely different.  This card uses the same framework but I wanted something cute and funny for an anniversary and I think I succeeded. 
 
It looks like these little owls are practically flying off the page, but no fear they are holding on tight with dimensionals.  The sentiment is from the Sale-a-bration stamp set called See Ya Later.  It's retired now, which is really too bad because it's such a great sentiment set.  The sentiment on this card reads "once in a lifetime you meet SOMEONE who changes everything". 


This sweet little owl is constructed with the Owl Builder Punch.  His body is punched out of Baked Brown Sugar in-colour card stock and he has a Real Red vest on.  I had some googlie eyes left over from Halloween and decided to use them for all the owls. The Owl Builder punch not only punches out the owl body but also includes 3 different sized circles for layering the eyes, the heart and the cute little vest.  This is a great punch to have in your collection because it can be used for so much more than "just an owl". 

 
This is a view of the inside front panel of the card.  Hope you get the humour in this.  The striped paper is in Coastal Cabana and is from the Fresh Prints DSP pack in the Occasions Catalogue. 
Here's the full view of the inside of this card.
 Here's a last look at four of the five cards I've made so far with this card design.  This was a lot of fun.  Hope you enjoy this post.  I'd love to hear your comments so let me know if you like them or not.

 Penny

Atlantic Hearts Sketch Challenge #572:

April has sure been living up to its reputation for rain showers but it's been really on the cold side which isn't normal for this t...