Showing posts with label "Saleabration". Show all posts

Sunday, January 17, 2021

CAS Color and Sketch #401 Weekly Winner.............Yeah!

What great news today!  I'm proud to say my Donkey Birthday Care was one of the three Weekly Winners of Challenge #401 at the CAS Colour and Sketch Challenge last week.  How awesome is that? 


Click here to see my post and details on this card

I'm very proud to display my Weekly Winner's badge:  

 Click here for Announcement

Thanks so much to the CAS Colour and Sketch Team for choosing my card along with Stephanie L. and Lucie's.   Made my day!  


Happy Stamping!
Penny Tokens Stampin' Spot


Penny Hanuszak, Independent Stampin' Up! Demonstrator

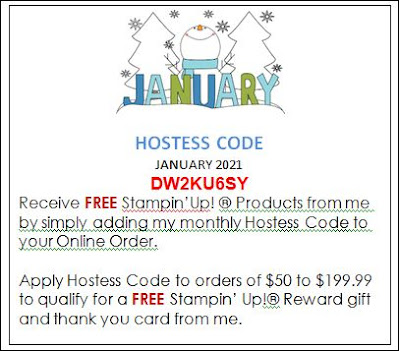
JANUARY HOSTESS CODE:

Tuesday, January 5, 2016

Shop!

Here's the Sale-A-Bration Deal: 

For every $60 you spend (before tax and shipping), you get a FREE Sale-A-Bration product. That means it's the perfect time to purchase those products you've had your eye on while earning more products for free.

The Fine Print:  

  • Pages 4-15 of the Sale-A-Bration brochure show products available throughout the entire Sale-A-Bration sales period (January 5-March 31 2016); 
  • Pages 16-19 show limited-time products available only until February 15.*  
  • Watch for another batch of limited-time products coming February 16!* Based on inventory, availability may be temporarily extended.
Host!
Need another excuse to get together with friends? Just host a qualifying party with at least $330 in sales during Sale-A-Bration and you'll earn $35 more in Stampin' Rewards! You can even apply your Stampin' Rewards toward a Starter Kit and become a demonstrator yourself!  Ask me about virtual catalogue parties or "You Host Your Home" get-to-gethers. 

Friday, March 28, 2014

Make a Wish...........Birthday Banner Card

Every now and again we all need a little push to try something out that isn't in our comfort zone.  Last week I entered that "twilight zone" by choosing to make a gender neutral birthday card using banners and brighter colours than I normally would.

The decision to change up my usual card making style gave me an opportunity to try out some of my new products from the Spring Occasions catalogue. 

Supplies:
Stamp Sets:  Perfect Pennants #133230(cm) or wood #133227and Bring on the Cake

Framelit:  Banners Framelit Dies #132173  Note: You can save 15% by bundling the Banner Framelit Die and Perfect Pennants Stamp set.  See details on Page 27 of the Occasions Catalogue.

Ink:  Real Red, Coastal Cabana

Card Stock:  Real Red, Crumb Cake, Coastal Cabana, Whisper White

DSP:  Fresh Prints Designer Series Paper Pack #132996, pg 33 Occasions Catalogue

Accessories:  2 1/2 Circle Punch, Starburst Framelits Die #132967, 1/2 inch circle punch, Stripes Embossing Folder, Decorative Dots Embossing Folder (Free in Sale-a-bration Catalogue with $60 purchase until MARCH 31st) adhesive, Big Shot Machine,

Bring On The Cake - Clear-Mount Stamp set #121958 Price: $33.95 or Wood Mount # 128490 $47.95

Perfect Pennants Clear-mount Stamp Set #133230 Price: $26.95 or Wood Mount #133227 Price: $36.95

Perfect Pennants Clear-Mount Bundle   #134816 Price: $50.95 or Wood Mount #134815 Price: $59.50    If you want to create that "just because" project for a friend or loved one, the Perfect Pennants Set is perfect! And the Banners Framelits Dies make cutting the Perfect Pennants images quick and easy.  Buy the Perfect Pennants clear-mount stamp set and coordinating Banners Framelits Dies together at a 15% discount. 

Here's My Finished Card:


TIP FOR USING BANNER FRAMELIT DIES:
Tip #1.  I find it really helpful to put a label on each package of dies that I have in my stockpile of Stampin' Up Tools so I can find them quickly when I'm searching for it in the drawer.  
Tip #2:  I like to number my nesting framelits starting from the inside and working to the center.  As you can see from this picture there are 6 dies in this framelit set.  I just use a Sharpie Black Marker.

Tip #3:  When I get a new die cut I like to cut a template for reference.  The template(s) can be stored in the packaging for the die cut and I find it helps to write the number of the Framelit and the framelit measurements on each of the templates in a set. When I'm working on a sketch or designing my own card I can play with the templates to get positioning and sizing worked out before I cut my actual card layers.  


The next layer on this card is really fun to make.  For the Coastal Cabana banner simply cut a 2 1/2" x 8 1/4" piece of card stock and score this piece at 4 2/8 and fold on the score line.   


  Using framelit #2 from the Banner Framelit dies, place the fold line of the Coastal Cabana card stock just below the cutting edge of the framelit and run through the Big Shot.  

To make sure the fold line isn't cut off place the card stock a little below the cutting line.  See the gap above.
Emboss the full banner with the Stripes Embossing Folder.  Adhere this banner to the right hand side of the large dsp banner.

Using Framelit #3 cut out a banner from Whisper White card stock and stamp it with the "Wish Big" sentiment from the Bring on the Cake stamp set.  Adhere this smaller banner to the inside of the folded Coastal Cabana banner.


For the layered Starburst portion of the tag, stamp the sentiment "Make a Wish" from the Perfect Pennants stamp set in Real Red on Whisper White and punch out with a 2 1/2" circle punch.  Stamp the sentiment again in Coastal Cabana ink and punch out the "a" with the 1/2" circle punch.  Mount this small "a" with a dimensional to the real red image.   

Die cut a piece of Real Red card stock with the Starburst Framelit die and adhere to Coastal Cabana banner with dimensionals.  

For the inside of the card I adhered the top of a 5 14 x 4" piece of Whisper White card stock to the card base.  I added a 1/4" wide strip of the Fresh Prints Designer Paper to the right hand side of this card layer and stamped the sentiment "Sending Good Thoughts Your Way" in Real Red ink.

This card could be made in many colour combinations, just pick a piece of DSP or make your own designer paper by combining at least 3 colours. I really liked using the Banner Framelits for this card and the Starburst framelit and think they added a modern twist. 

Thanks for joining me today and checking out this brief tutorial.  Hope you enjoyed it.  I would really appreciate your comments and any tips you can leave about how you organize or work with framelits and your thoughts on this card.  Is it one you would re-create?  Let me know.

 Penny  


Sunday, March 18, 2012

Monkey Challenge #100: Celebrate! + Sketch.

Congratulations are in order!  100 Challenges...............wow!

That's cause for celebration and the Design Team (Terry Blais and Shirley Sumption) at A La Card Monkey are doing just that. 

This week they're offering up another great sketch and some fabulous BLOG CANDY

You can get in on the fun simply by following their blog challenges, leaving a comment on this week's post or uploading your own rendition of their cute little sketch. 
So, what are you waiting for, you could win this adorable handmade (by Shirley Su's own little hands) Owl, 2 stamp sets, Daffodil Delight Pom Pom Trim, Cherry Cobbler Dazzling Details, Scallop Trim Border Punch, Pearls, a handmade and decorated dispensing container of Whisper White Baker's Twine (made by Terry's own big man hands), chunky glitter, Sweet Stitches buttons, a Thank-You Note kit with stampin' spot and stamp, flower keychain, and an album to alter!

And here's this week's simple sketch and my rendition of the Monkey Challenge #100:  Celebrate & Sketch. 


I was asked to be a Guest Designer this week and what a thrill that was..........I love being in on special occasions and helping my friends celebrate! 

So here's to you Shirley and Terry and all you Monkey fans.   

Sorry for this poorly lit dark picture, but it was all I could produce at the moment and  will replace when I see the light of day!


Stamps:
Sprinkled Expressions Stamp Set - Sale-A-Bration 2012
Outlined Occasions Stamp Set - Sale-A-Bration 2012
Take It To Heart - Occasions Mini Catalogue 2012
 
Ink:
Pool Party
Calypso Coral
 
Cardstock:
Very Vanilla, Pool Party and Calypso Coral
 
Designer Series Paper:
Attic Boutique #125407 - Occasions Mini Catalogue
 
Accessories: 
Basic Rhinestones, Edgelits Adorning Accents Die Cuts #125595 (Occasions Mini), 1 3/8" and 1 3/4" Circle Punches, Finial Press Embossing Folder, Dimensionals
 
Happy Stamping!
Penny

Tuesday, March 13, 2012

Sale- A- Bration Joy Fold Card


Just a reminder that the Stampin' Up! Sale-A-Bration clock is ticking down for 2012.  If you're interested in hosting a virtual party or placing an online order with me, you'll be eligible for free products, but you must do so before March 31st, 2012.

For every $60.00 spent on Stampin' Up! products from either the Idea Book and Catalogue or the Occasions Mini Catalogue you can choose an item from the Sale-A-Bration line-up. Click here to see the catalogues and learn more about this fabulous opportunity.

Join My Team and earn even more free product.  Contact me now to see how you can be a Stampin' Up! Demonstrator.  There's never been a better time to join:
  • Join during Sale-A-Bration for only $150.00
  • Get a free paper pack or digital downloads every month for the rest of the year, just by joining now. 
  • Joining anytime is great but during Sale-A-Bration the rewards are fabulous!

Square Joy Fold Card:

I  made this Joy Fold Card  with Everyday Enchantment Designer Series Paper and an element from the Fresh Vintage Stamp set both featured in the Sale-A-Bration catalogue.   What a pairing! 

I've matched this fabulous two-sided designer paper with Soft Suede, Pool Party and Calypso Coral cardstocks to create this fun card.  It would also work with Peach Parfait, Poppy Parade or Very Vanilla cardstocks.  You can't get much more versatile than that.
The measurements for this card are:
  • Cut card base from Soft Suede cardstock.  Measurement is 41/4" x 6 1/4"
  • Cut layer of Pool Party 4" x 4" and adhere to Soft Suede card base
  • Cut layer of Designer Series Paper 3 3/4" x 3 34" and adhere to Pool Party layer
For bottom front flap:
  • Cut 1 3/4" x 4" piece of Pool Party and adhere to Soft Suede base
  • Cut 1 1/2" x 3 3/4" piece of Designer Series Paper and adhere to Pool Party piece
  • Punch out a 4" strip of Calypso Coral cardstock with the Lace Border Punch and weave a 1/8" piece of Lucky Limeade Organdy Ribbon (see Everyday Enchantment Ribbon and Brade Pack in Sale-A-Bration catalogue), through the Lace Border Punch and tie a bow at the end.
  • Punch out a Soft Suede 1 3/8" circle and layer it with a 1 1/4" Pool Party circle.  Stamp a sentiment on a 1" circle and layer onto the Pool Party circle.  Mount with double dimensionals to the front of the card.  This piece will hold the Joy Fold card to the base. 
Joy Fold Card:
  •  Cut a 3 x 3 piece of Soft Suede cardstock and score in the center. 
  • Layer with a 2 3/4" x 2 3/4" piece of Pool Party cardstock
  • Layer with a 2 1/2 x 2 1/2" piece of DSP
  • Punch out a Scallop Circle in Soft Suede, a 1/38" Pool Party circle
  • Stamp the image from the Fresh Vintage Stamp set in Lucky Limade onto Very Vanilla cardstock and punch out with 1 1/4" circle punch.  Add Basic Pearls to the center of the design.
  • Layer onto Pool Party circle and then mount with dimensionals onto scalloped circle.
Inside of the Joy Fold Card:
  • Cut a 2 3/4 x 23/4 piece of Very Vanilla cardstock.  Stamp birthday sentiment in Lucky Limeade and Calypso Coral ink.  Sponge edges of cardstock with Calypso Coral.  Adhere to Joy Fold card base. 


Wednesday, March 7, 2012

A La Card Monkey Challenge #98

A La Card Monkey posted their " We're All Kinds of Happy for Monkey Challenge #98 on Friday March 2, 2012. 

This is a fun sketch with just a couple of elements and ribbon.  Wow, it couldn't be easier!    Here's their awesome sketch:

My version of this sketch was made for a friend's birthday. She's a very elegant lady so I wanted to make something to match her style. 

Here's a full view of the front of the card.  I absolutely love the velour print on the Mocha Morning Specialty Designer Print Paper I've used as a background.  It's so beautiful! 

Closeup of the basic pearls that were added to the Fresh Vintage Stamp Set from the Sale-a-Bration Catalogue.  You can earn this beautiful set for FREE by placing a $60.00 order during the Sale-a-Bration campaign.   

Here's a view of the inside of the card where I'll hand write a personal message.

Tuesday, January 24, 2012

Sale -A-Bration Promotion - Join Stampin Up Today


  • Sign up as a New Demonstrator on my Team during Sale-A-Bration and you'll get a FREE package of Designer Series Paper ($13.50 or less) or digital download (any price) beginning the month after you join Stampin' Up!
  • As a new demonstrator you'll be able to alternate your choice between either Designer Series Paper or Digital Download each month.
Contact me today to find out how you can take advantage of this exciting and exclusive to Stampin' Up! offer. 

Last Free Shipping of the Year - December 9, 10 11, 2024

Heads up, it's time for the last FREE SHIPPING promo of the year! From December 9–11, you can shop and save on all qualifying orders of...