Friday, July 13, 2012

Convention Swaps Sneak Peak

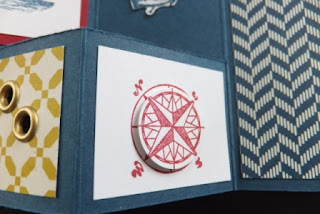
The countdown is on! I leave for convention in just five more days! Before I go I thought I'd share a few more sneak peaks of my convention swaps.  I hope you enjoy them. Don't worry, I'm doing a full card reveal on Monday the 16th, so be sure to come back and see the finished cards.


Here's a peak at a card I've created for Patty Hargrove's 10+1 Full Card Swap Group 2 on Wed July 17, 2012. She's invited me to be captain for Group Two during the swap, and I'm so looking forward to this. What fun! 
Patty has worked really hard to pull this swap together and she's done a great job!  She's organized five groups of 10 swappers and a "No Show" group for this swap. 

This is a full card swap.  Each card must have at least 2-3 layers and one or more embellishments.  Only new stamp sets from the 2012/2013 Idea Book and Catalogue will be allowed and the list is fantastic.  I can't wait to post pictures of the swap and card samples. I know you're going to love them! 

Before I go on, I just wanted to say that for her "first time ever organizing a swap", Patty deserves a really big round of applause!  Being the Swap Organizer requires a lot of energy and organization and she's really worked on this one.  She's provided us with regular updates on who's participating the sets being used, as well as instructions we'll need once we're at Convention.  She's even collected all our phone numbers so we can be in touch before the session if anyone's late or whatever.  It's so exciting I just can't wait!. 

Click on this link to check out Patty's wonderful blog.  She's already posted pictures of some of her completed swaps she's and they look fabulous.  Great ideas here folks!

Okay here's a peak at my second swap: 

This is also for Patty Hargrove's 10+1 Full Card Swap - "No Show" List on Wed July 17, 2012.  This is an overflow group Patti set up just in case someone didn't show up for the swap. She calls us her "Angels in the Wings".  I guess it's appropriate I have wings on my card!  There are now seven of us in this group, and if none of the groups are shorted we'll be swapping amongst ourselves.  What fun!

 
And, last but not least, here's my third and final peak:  
These cards are for the Late Night Stampers 80+1 Swap on Friday July 20, 2012.  That's right 80+1.  This is a dinner event and will be one of the big highlights for the week.  I can't wait to see all the commotion as everyone gets together to swap!  

I had fun making these little birdies and you'll be surprised when you see them on the card.  One thing I can tell you is that after doing 80+ of these little suckers I was sure glad I own Stampin' Ups! Bird Builder punch!  LOL.  I simply couldn't imagine fussy cutting all these.


Tuesday, July 10, 2012

Fruit and Flowers Thank You Cards

They say all good things must come to an end, and for my husband and I one of our favourite weekly get together places has done just that. For several years now we've met with friends on Wednesday mornings for a wonderful and inexpensive breakfast get together at the Skillet Restaurant.  Unfortunately as of this week, the Skillet  which is located in Zellers in Langley is no more. This store is being taken over by "Target" in the coming months and the restaurant is not part of the renovations.  All of the restaurant staff will be looking for new work.

What a great little place this has been for us and for many other seniors in the Langley and surrounding district.  We had our regular table and each week as we were getting seated we'd see familiar faces. The breakfast special of two eggs (any style), 2 sausage links or 2 pieces of bacon, and two pieces of toast for $3.95 was always fabulous.  Our servers, Sandi, Dolly, Crystal, Janet and Krista were also fabulous.  For us, the Skillet was like Cheers.....everyone knew our names, and our orders. 

This past Wednesday we went for our last time and it was really sad. We met our friends and over our last breakfast we shared our memories and stories about our experiences at the Skillet.  Fortunately we were able to say good bye to all the great gals who served us so well over the years and to mark the occasion I made some thank you cards to let them know just how special they were to us.

Here's a picture of some of the cards I made for this occasion.  I used a retired Stampin' Up set called Tart and Tangy that was my "to go to" summer stamp set for a while.  I was very sad when it was retired and I've been reluctant to give it up, but like I said before "all good things must come to an end", and so it is with this set. 


I actually made five cards but had two of them sealed in the envelopes before I remembered to take a picture of them.  The missing cards had a similar layout but the had a green apple on one and cherries on the other. 

In this closeup you may be able to see that the orange has a high glossy finish on it.  To get this effect I used a Stampin' Up! product called "Crystal Effects". This is a very inexpensive and simple way to take a good card up a "notch" to a WOW card.  If you'd like to know more about Crystal Effects and its many uses please contact me.  I'd be happy to provide some information on this great product.

 
Although the Tart N' Tangy set is no longer available, another set called "Fruit and Flowers" on page 82 of the 2012-2013 Idea Book and Catalogue would have worked just as well. 

In fact, 3 of the stamps in the "Fruit and Flowers" stamp set are very similar to the Strawberry, Cherry and Apple featured above.  As a bonus you also get six additional stamps with this set so you could recreate the flower patterns from the DSP I used.  What great value, nine stamps in total for $19.95 for the Clear Mount(122607) and/or $25.95 for the Wood Mount (122605) versions.  Hope you check this set out. 

Okay well that's it for today and my old time ramblings.  Get stamping!

Sunday, July 8, 2012

Convention Swaps


Ten days and counting down!  That's right!  My long awaited trip to convention is just around the corner and I've been busy, busy, busy preparing my swaps, getting my gear together and chatting with other convention goers. 

I'm officially entered in 3 swaps which include an 80+1 and two 10+1 swaps based on cards using stamp sets and products from the new Idea Book and Catalogue.  How exciting is that!  I'm also making some 3 x 3 card swaps and some 3-D swaps to trade on the convention floor. 

I'll be travelling to convention with Adel Klassen a member of the Colourful Impressions Stamping group I belong to.  Adel and I are both very excited about this adventure and we've managed to get together twice now to work on our swaps.  What fun we've had!  Working together really helped us stay focused and plan out our time in Salt Lake City.

Without giving away what I'm making, here's a sneak peak at my Convention Swaps.


Wish you could be there with us too!  2013 Convention will be even bigger, as Stampin' Up! will be celebrating their 25th Anniversary! Contact me to find out how you can become part of my team and eligible to attend the 2013 festivities!  And, stay tuned for more convention news as it happens!

Reason To Smile

I love promotions, especially ones like this.  During the month of July you can purchase the Reason to Smile Stamp set for just $5.00 when you spend just $60.00 on Stampin' Up! products.

The Reason to Smile stamp set is exclusive to this promotion and will not be available after July 31, 2012. 

Whether you order online, at a workshop or through me directly, you can take advantage of this special offer.  The only restriction is that there's a limit of one (1) set per customer.

Note:  When you're placing your order online, you won't be automatically prompted to enter the $5 Item Number for a qualifying purchase.  The best way to ensure you get this promotion is to enter one of the codes below when your order reaches $60.00 (before S&H and sales tax) to qualify.

Wood Mount 131274  $5.00
Clear Mount  131275  $5.00

If you're placing your order directly through me or at a workshop, no worries.  I'll ask you if you're interested in taking advantage of this offer, and if you are it'll be added to your order in the choice of setting (wood/clear mount) that you'd prefer.  

To see the stamps included in this great value just click on the July Promotion button on my sidebar or on the Reason to Smile link in the first paragraph of this note.  Happy Stamping!

Wednesday, June 27, 2012

Masculine Card Birthday Card


I don't know why, but summertime seems to be the time of  year when I need masculine cards the most, and I never seem to have enought on hand.

This year I'm trying to stay ahead of the demand and want to share some of the quick masculine cards I've created.

POCKET CARD:
This first card is a two-pocket birthday card but it would also make a wonderful graduation, retirement or congratulations card for a boy/man. 

An 8 1/2 x 11 sheet of designer series paper is used for the base.  To make the card you simply fold the DSP in half, then open and fold in half in the other direction. 

Now open up the paper and fold the top left corner of the paper over to the center fold and crease the outside edge.  Then turn the paper 90 degrees and repeat this procedure with the opposite corner.  Fold the DSP in half from the bottom then fold again at the center crease.  You will now have a front and an inside pocket.

Once the folds are completed then the front and inside of the card can be decorated with whatever embellishments you want to jazz up the card with to make it occasion appropriate. Nothing could be easier. 

To dress up the front pocket, I cut and adhered a 5 x 4 piece of Cherry Cobber cardstock to the DSP.  Before gluing it down I embossed it using the Perfect Polka Dots Embossing folder.  Since I plan on tucking some scratch and win tickets in this pocket I've left it plain, but you could make a tag for this pocket too.  Before gluing the pocket down, I added a strip of Whisper White that I had punched out with the Scallop Border punch.  I stamped the globe from the Open Sea  stamp set in Midnight Muse on Whisper White card stock and punched out with the 2 1/2" Circle Punch and added a 2 3/4" Circle layer in Cherry Cobbler and a 3" Circle Originals Bigz Die cut layer in Midnight Muse.

For the inside pocket I made a simple pull-out tag for addingby layering Whisper White on Cherry Cobbler.  I stamped the beautiful sailing ship from the set The Open Sea with the new Midnight Muse In Colour and the Happy Birthday sentiment in Cherry Cobbler.  I also stamped the anchor from the On the Sea set on Whisper White and cut it out with the Oval Scallop Punch.  It was adhered on the left side of the card with dimensionals. 

TRI-FOLD CARD:

The second card I want to share with you is a simple tri-fold card.  Usually these are made with 12 x 12 card stock but I cut down the dimensions so I could use an 8 1/2 by 11 sheet of cardstock for the base.  Here are the instructions:
 
·         Start with an 8.5 x 11 sheet of cardstock and cut to 8 .5 x 5.5”
·         Score at 1 ¾, 3 ½ , 7’, and 8 ¾”
·         Cut lines horizontally at 1 ½” and 3 ½” from 1st and last score lines
·         Your finished card will measure 3 ½ x 5

I used "Comfort Cafe" DSP #126898 for the DSP and Midnight Muse, Raspberry Ripple and Summer Starfruit cardstock.  Images from the Open Sea stamp set are inked with Raspberry Ripple and Midnight Muse inks.


Additional Non-Stampin' Up Cards:

We recently celebrated our friend Steve's 60th birthday and I wanted to make a special card for him.  My husband asked me to use a non-Stampin' Up! stamp set because this particular set would appeal to Steve. 

So with that in mind I made the following cards for my husband to choose from.  What I want to emphasize here is that these cards are made with Stampin' Up cardstock and inks and could  very easily have been made with SU stamp sets too. 
Made with Pacific Point, Daffodil Delight, Wild Wasabi, Real Red. Basic Black and Whisper White cardstock.  Basic Black ink and Versamark were used to emboss the images and sentiments

View of the inside of the cards


Sunday, June 24, 2012

More Ornament Punch Flowers

Yesterday after I told you how much I loved roses and showed you how easy they were to make, I began thinking of ways to use them.  They could be used in place of bows on gift wrap, on a card front, on the lid of a gift can or box.  They would also make perfect place setting holders for the dining room table.   

With that thought in mind, it occurred to me that I might have some great ideas just lurking around the corner in my china cabinet. 

I have a full set of "Old Country Rose" dishes that I've been collecting since my husband and I married 40+ years ago that are used for special occasions.  Here is one of the beautiful porcelain rose ornaments that I set on the table when I'm having a special tea or luncheon.  Don't you just love the rich colours?

I was inspired to make a yellow rose using our regular "So Saffron" cardstock and Primrose Petals ink.  Here's what I came up with: 

Here's my completed rose. It uses the same method as the one in the tutorial however I've punched the petals from So Saffron Cardstock and inked "both" sides of the petal with Primrose Petals Ink.  I added three leaves that I punched from Wild Wassabi cardstock using the Scallop Oval punch.  I also embossed the leaves with the Dots Embossing Folder to give some texture.  In retrospect I should have sponged the edges ............ oh well next time!


I plan to make these beautiful roses for each place setting and add a decorative label with the guest's name on it.   I know they're going to love this!

Here's the finished rose from a different angle. 
From start to finish this rose took about 10 minutes to make and it was so much fun waiting to see what it would look like when assembled.  Personally I love it and I hope you do too. 

Happy stamping and creating and let me know whether you like this one or not. 

Saturday, June 23, 2012

Ornament Punch Flower Tutorial


I recently saw a sample of a paper rose on Stampin' Ups!  Stampin' Connection, SU's very cool website just for SU Demonstrators.   This free website is a wonderful place for demonstrators  to share their Stampin' Up! tips and creations, have discussions about their businesses and what's new.  It's just one of the great perks of being a Stampin' Up Demonstrator.

When I saw the sample, I was instantly smitten and had to find out how to make these beautiful flowers.  Fortunately there was a very easy to follow video on You Tube posted by Scrappin Mama entitled Magnolia Flowers.  Once I watched the video I thought okay that was easy now to create my own and share with you. 

Supplies I used:
8 1/2 x 11 Glossy White Card Stock ( you can substitute other cardstocks if you wish)
Ornament Punch
1 3/8" Circle Punch
Ink of Your Choice (I used Primrose Petals one of the new In-Colours for 2013)
Sponge Dauber

Punch out 20 ornament shapes using the Ornament Punch and one 1 3/8" Circle shape.

Using the sponge dauber sponge the edges of the circle and ornament shapes.
Use a dowel or paper piercer to add some definition to the petals by rolling them gently towards the center of the petal.

I rolled all my petals before I began but you may want to roll them as needed so they aren't so tight.

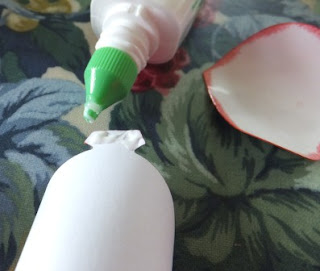
Apply Tom Bow Blue or other adhesive to the back of the ornament tab.  Don't use too much. 

Glue the first layer of petals down to the circle in a four-leaf clover type shape. 
The first layer of flower will look like this.  It's easy to line up the tab on the ornament shape with the circle

Add your next layer, gluing the tabs down in between the first layer tabs.

As you add layers you'll need to use the end of your paper piercer or tool to push the tabs down into place.  Keept adding the layers until 19 of the  petals are adhered.  Roll the last petal fairly tightly add glue to its tab and the insert into the center of the flower, pushing down until you're satisfied with the placement.  I cupped the finished flower in my hand until I liked the shape.   

Here's the finished flower.  I might add dew drops with Crystal Effects to give it some added life. 

 Hope you enjoyed this little tutorial today.  I know I'm going to be making more of these flowers as they were so quick to make and look fabulous.  Have fun!

Penny

FREE SHIPPING - ONE DAY ONLY

  MAY DAY!  MAY DAY!  MAY DAY! If you have something on your wish list, or are thinking about stocking up on some essentials, now is your ti...