I recently saw a sample of a paper rose on Stampin' Ups! Stampin' Connection, SU's very cool website just for SU Demonstrators. This free website is a wonderful place for demonstrators to share their Stampin' Up! tips and creations, have discussions about their businesses and what's new. It's just one of the great perks of being a Stampin' Up Demonstrator.
When I saw the sample, I was instantly smitten and had to find out how to make these beautiful flowers. Fortunately there was a very easy to follow video on You Tube posted by Scrappin Mama entitled Magnolia Flowers. Once I watched the video I thought okay that was easy now to create my own and share with you.
Supplies I used:
8 1/2 x 11 Glossy White Card Stock ( you can substitute other cardstocks if you wish)
Ornament Punch
1 3/8" Circle Punch
Ink of Your Choice (I used Primrose Petals one of the new In-Colours for 2013)
Sponge Dauber
 |
| Punch out 20 ornament shapes using the Ornament Punch and one 1 3/8" Circle shape. |
 |
| Using the sponge dauber sponge the edges of the circle and ornament shapes. |
 |
Use a dowel or paper piercer to add some definition to the petals by rolling them gently towards the center of the petal.
|
 |
I rolled all my petals before I began but you may want to roll them as needed so they aren't so tight.
|
 |
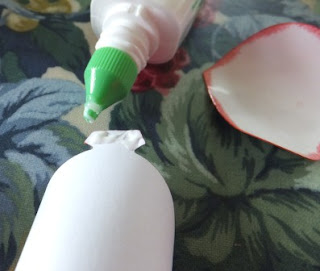
| Apply Tom Bow Blue or other adhesive to the back of the ornament tab. Don't use too much. |
 |
| Glue the first layer of petals down to the circle in a four-leaf clover type shape. |
 |
The first layer of flower will look like this. It's easy to line up the tab on the ornament shape with the circle.
|
 |
| Add your next layer, gluing the tabs down in between the first layer tabs. |
 |
| Here's the finished flower. I might add dew drops with Crystal Effects to give it some added life. |
Hope you enjoyed this little tutorial today. I know I'm going to be making more of these flowers as they were so quick to make and look fabulous. Have fun!
Penny


