Showing posts with label Watercooler Wednesday Challenge. Show all posts

Wednesday, January 3, 2018

Watercooler Wednesday Challenge #151 - Charlotte's Feminine "Anything Goes" Challenge

Happy Wednesday everyone!  I hope you've had a terrific Christmas and New Years.  Life's been hectic around our house with lots of seasonal activities and not much time for stamping, but now it's time to shake out the cob webs and start a whole new season of challenges at Watercooler Wednesday.  Are you ready?

Before we get started I want to give a shout out to Helen Finlay from Queensland, Australia, who is joining us this challenge as our newest design team member.  Welcome on board Helen!

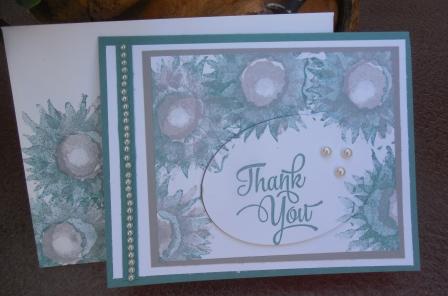
Our very talented Charlotte Ehrukainen, is our first hostess of the year and is challenging us to create a "Feminine" Anything Goes project, so we hope you'll play along with us.


Here's My Project:
One of my 2018 New Years resolutions is to "buy less and use more" and my goal is to incorporate more designer papers into my projects and use up some of the scraps that I seem to be hoarding. 

Today's monochromatic feminine birthday card is based on that resolution.
By cutting a series of DSP scraps into squares and mounting them on matching card stock I was able to cover the front panel of the card.  The pattern layout works for either a side or top fold card. 
The birthday wishes have been stamped on the inside. All in all, this was a super fast and easy card that can be put together in assembly line fashion and would make nice cards for card gift boxes or packages. I plan on making a lot more of these cards.

Supplies:
Stamp Sets:  Half Full, Beautiful Bouquet
Ink:  Old Olive 
Card Stock:  Old Olive and Whisper White
Designer Series Paper:  Merry Little Christmas DSP
Accessories:  Big Shot, Rectangle Stitched Dies,  Paper Trimmer, Dimensionals,  Sticky Strip, Wink of Stella, Sponge Dauber.

How It's Made:
1.  The Old Olive Card base measures 8 1/2" x 5 1/2" and is scored at 4 1/4".

2.  I cut two 5 1/4 x 4" pieces of Whisper White for the first and inside layers.

3.  Cut 1 1/2" x 1 1/2" squares from Designer Paper.  Use 3 patterns and cut two from each design. Cut one  3/8" x 5" strip of DSP. Use a sponge dauber and Old Olive ink to sponge the edges. 

4.  Cut 6 squares of Old Olive card stock measuring 1 5/8" x 1 5/8" and one strip 1/2" x 5".  Sponge the edges of these pieces with Old Olive and then glue the DSP squares and strip to same. 

5.  Attach the squares and strip to the card front with adhesive leaving a small amount of white space between the squares and sides of the white panel.  Before attaching decide how you want your patterns on the squares to align.

6.  On a scrap of Whisper White stamp the "Wine Improves with Age...." image in Old Olive ink. Colour the grapes with Wink of Stella to add a little sparkle. Fussy cut around the label's edge.


7.  Cut a 3" rectangle from Old Olive and attach the label with dimensionals.  Add sticky strip to the back of the rectangle and attach to the center of the card.

8.  On the inside Whisper White panel stamp the "Happy Birthday" sentiment from the Beautiful Bouquet set towards the top of the panel.  Stamp the sentiment and wine bottles towards the bottom half of the panel.  Attach to the inside of the card.


And, that's all there is to this card.  Very easy.  I hope you'll try out this paper piecing technique.       
Just a reminder to stop by and check out the rest of the Watercooler Wednesday Design Team's contributions to this challenge. For details on how the other Watercooler Artists created their projects, just click on the name underneath each photo and you will be taken to that blog post.  This challenge ends on Monday January 8th at 5:00pm MST. 

Happy Stamping!
Penny Tokens Stampin Spot

Wednesday, December 6, 2017

Watercooler Wednesday Challenge #148 -Heidi's Feminine "Anything Goes"

Hi Stampers.  Wow the time is zipping by and once again it's time for the Watercooler Wednesday challenge.  This week's challenge is hosted by Heidi Weaver and she's challenging us to make a Feminine "Anything Goes" card or project. 
We hope you'll join in the fun and enter one of your own creations.   All you have to do is make a Feminine themed card or project and link it through your  post to our Linsky and follow a few simple rules.  What could be easier?  All the stuff you need to know about playing along is located on the Watercooler Wednesday Challenge Main PageOur Linksy is open until 5:00pm  Mountain Time on Monday December 11th.  


Here's My Feminine Card:

Supplies:
Stamps: Painted Harvest, One Big Meaning
Ink: Lost Lagoon, Smokey Slate
Card Stock: Lost Lagoon, Smokey Slate and Whisper White
Accessories: Big Shot, Paper Trimmer, Ovals Framelits, Stitched Rectangular Dies, Basic Pearls, Dimensionals, Tom Bow Glue.


Some Details:
1. The card base is an 8 1/2" x 5 1/2" piece of Lost Lagoon card stock scored and folded at 4 1/4". Lost Lagoon is a retired In Colour from Stampin' Up!

2. The first layer of this card is a piece of Whisper White card stock measuring 4" x 5 1/4" and adhered to the card base.

3. The third layer is a 4 3/4" x 3 3/4" piece of Smokey Slate card stock adhered to the top right hand side of the card leaving a 1 5/8" gap on the left hand side.


4.  The final layer is a 3 1/2" x 4 1/4" piece of Whisper White.  This layer is stamped with the Painted Harvest two step sunflower around the outer edges and top of the panel.  The first layer of the flower is Lost Lagoon followed by Smokey Slate for the second flower and the inner part of the flower is Smokey Slate.  
5.  Before adhering the panel in step 4, stamp the "thank you" sentiment from One Big Meaning in the middle white space on the panel.  Cut out this piece with a 3" oval from the Oval die cuts set.  Once the main panel is adhered to the Smokey Slate panel, attach this oval with Dimensionals in its original slot.  Add three medium sized Basic Pearls to the side of the oval. 


6. Cut a 1/4" x 4" strip of Lost Lagoon and adhere it to the center of the white margin on the left hand side. Run a strip of Basic Pearls down the center.

7.  For the inside of the card cut a 5 1/4" x 4" panel of Whisper white.  Stamp the sentiment "Your Kindness...." and a couple of the flowers in Lost Lagoon and Smokey Slate inks.  Make an envelope to match.
I have to apologize for the poor quality of these photos.  They simply don't do the card justice.  Apart from that I hope you've enjoyed this card.  I simply love these flowers and the soft muted images you can obtain by matching two coordinating colours.  I'd love to hear from you so please let me know if you like these images too.  

Make sure you check out the other design team artists and their beautiful creations in this week's challenge. 
Before I go just a reminder that we're looking for a new Design Team Member to replace Libby Fenn's on our team.  If you're interested all the details on how you can be considered are on the beginning of this post.  Check it out here.
Happy Stamping!
Penny Tokens Stampin' Spot

Wednesday, November 29, 2017

Watercooler Wednesday Challenge #147 - Charlotte's "Anything Goes"

Welcome to this week's Watercooler Wednesday Challenge, hosted by Charlotte.  This challenge is open to any theme or project - no holds barred.  What fun!

We hope you'll join us in the fun and enter one of your own creations.  You could be our next "Rock Star" winner.   All you have to do is make a card or project - any theme is okay - and  link it to our site via your post and follow a few simple rules.  All the stuff you need to know about playing along is located on the Watercooler Wednesday Challenge Main Page.  Our Linksy is open until 5:00pm on Monday December 4th, 2017.

Here's My Anything Goes Project:
Thanksgiving is behind us now and I'm switching to Christmas mode this week. My husband spent Black Friday getting the outside of the house decorated while I was inside lugging out the Christmas ornaments.  One of the things that was missing from my collection of Christmas paraphernalia was a Christmas mantle piece, so for this week's challenge I decided to make an Accordion Card featuring the word "holidays".  

The above picture shows the deck of card sized accordion card I made all bundled up in it's belly band and here it is unfolded: 


Supplies: (All products are Stampin' Up! unless noted)

Stamps: Merry Patterns (Hostess Promo 144973), Merry Little Labels(144795), Jar of Love (141587)

Ink: Dapper Denim, Pacific Point
Card Stock: Whisper White and Dapper Denim
DSP/Specialty Papers:  Color Theory Pack (144193), Silver Foil (132178)
Accessories:Big Shot, Paper Trimmer, Tom Bow Glue, Dimensionals, Sticky Strip, Glitter Enamel Dots (144200), Clear Faceted Gems (144142)
Big Shot Accessories:  Stitched Shapes Thinlets (145372), Card Front Builder (144674), Home Town Greetings Edgelit Dies (144671), Lots of Labels (138281), Sleigh Ride Edgelits (139670 Retired), Everyday Jars (1414900
Non Stampin' Up Accessories:  Tim Holtz Snowflakes 661599, EK Tools Alphabet 54-80032, EK Tools Christmas 54-80018


How It's Made:

All of the details and measurements needed to make an Accordion Fold card are listed in my November Creative Circle Blog hop post so I won't repeat them here. Just click on this link for the details.

To make this Accordion Fold card I began with Whisper White and Dapper Denim card stocks for my card base and first layers. I super liked the way the Color Theory Designer Series paper worked out in my Thanksgiving Accordion fold, so I chose the Dapper Denim coloured papers from this paper pack for my DSP layers. I especially liked how the blue crackle design paper worked perfectly for show casing the mason jars from the Everyday Jar stamp set.

The hardest part of making this Accordion Fold card was deciding what word to showcase and how I wanted the alphabet letters to be displayed.  My  display only had room for an 8 letter word so "holidays" worked for me.  


I also chose to go with the mason jars from Everyday Jars because they conjured up all kinds of ideas for displays like mini lights or candle holders.  To get that effect I sponged Dapper Denim ink around in the middle of the jars and then added glimmer swirls to catch the light and look like tiny lights.  Here's a look at the individual sections of the card.
 
This is the belly band that holds the Accordion Card together when not on display.  I also set it to the side of card on my mantle because it adds to the overall decoration.  When designing this cover, I tried to incorporate all the elements of the accordion card - the deer, houses, mason jar etc.  See my supply list for the wide array of die cuts I used in this project.  I also used a ton of basic rhinestones, silver foil and glimmer. 

This is a back view of the Accordion Card in the Belly Band prior to my adding the "Let It Snow" tag.  To make it look finished and professional, I covered the back side of the tag with  a Dapper Denim layer cut out with the Lots of Labels  die cut. 


In this view you can see what the back of the Accordion Fold card looks like.  I added card stock and dsp to the two end pieces, because they are the front and back sides that show when the card is folded and held in the belly band. 

I really like how the Dapper Denim dark crackle design paper adds such a cool effect to this back panel.  I stamped the "Let It Snow" label from the Merry Little Labels set in Dapper Denim ink and added glued it flat to the back panel. 
The first panel features a horse and winter sled from an old SU Edgelit set called "Sleigh Ride".  This die cut works perfectly with the Home Town Greeting Edgelits I used on the front and back panel of this card.  The large snowflake was cut out using the Tim Holtz snowflake dies and I've added a rhinestone accent to the center. 

Each of the panels and the alphabet letters have been sponged around the edges with Pacific Point ink to add some depth.  The jar lids were stamped in Dapper Denim ink on Whisper White and I've added glimmer to give them some sparkle.  The beautiful foil poinsettia, holly leaves and Christmas baubles come from an EK Tools Die cut set called Christmas.  I've also added lots of basic rhinestones, glitter enamel dots and faceted gems to each panel for added bling and blitz.  What fun!
I love how the last panel turned out.  The scene is comprised of various die cuts from the Home Town Greetings and Sleigh Ridge Edgelits.  The Color Theory background paper added to the overall feel of a cold frosty night.  
Well that's it for this week's challenge.  I hope you liked my Accordion Fold Card and that you'll try this out yourself.  It's really a lot of fun deciding what will go on each panel.  Let me know how you like this one, I love receiving your comments.  And, as always before you go make sure you check out the other projects submitted by our wonderful Watercooler Wednesday Design Team Artists.  You won't be disappointed. 
 

Happy Stamping!
Penny Tokens Stampin Spot

Wednesday, November 15, 2017

Watercooler Wednesday Challenge #145 - Judy's Masculine "Anything Goes"

Hi Stampers!  Welcome to our Watercooler Wednesday weekly challenge.  This week our hostess is Judy Markowitz and she's challenging you to make a Masculine themed card or project and link it to our challenge site.  

What could be easier, hope you'll join us.  The Linksy is open until 5:00pm on Monday November 20th.  All you have to do is make something masculine and link it to your post through our Linsky and follow a few simple rules.  All the stuff you need to know about playing along is located on the Watercooler Wednesday Challenge Main Page. 

Here's My Masculine Card:


Supplies:
Stamps: One Wild Ride, Happy Birthday Gorgeous and Route 66 (Carta Bella)
Ink: Crumb Cake and Early Espresso
Card Stock: Crumb Cake, Very Vanilla and Early Espresso plus a scrap of card stock with a straight edge for Retiform sectioning.
Accessories: Paper Trimmer, Detail Scissors, Post It Notes, Sponge Daubers

Some Details:
1. The card base is a 4 1/4" x 11" piece of Crumb Cake scored at 5 1/2".

2. The first layer is a 4" x 5 1/4" piece of Early Espresso.

3. The second layer is a 3 7/8" x 5 1/8" piece of Very Vanilla.

4. For the motorcycle layer, I cut rectangles from Crumb Cake, Chocolate Chip and Very Vanilla using my Pinpoint Rectangles dies.  The largest rectangle measures 2 1/8" x 3 1/8" and graduate down in size. 


The edges were sponged with Crumb Cake ink and the sentiment "Birthday Wishes to the Leader of the Pack" from the One Last Ride Stamp set and the tire tread were stamped in Early Espresso ink. The motorcycle was stamped twice on scraps of Very Vanilla ink, fussy cut and the images were put together with Dimensionals. Before layering the motorcycle across this panel, the edges were sponged with Early Espresso ink.

5.  The inside panels are a 4 x 5 1/4" piece of Early Espresso topped with a 3 7/8" x 5 1/8" piece of Very Vanilla. The "Happy Birthday" sentiment is from the Happy Birthday Gorgeous Stamp set.  I inked up the motorcycle with Crumb Cake and then stamped off on a scrap of paper before stamping the image on the bottom of the panel.


The technique used for the background of this card is called Retiform. Click here to see a video by Randi Collins that shows the step by step process to create this type of background.

 
You'll need two sponge daubers, 3 or 4 Post It Notes and a strip of scrap card stock that has a straight edge. For the pattern on my Retiform background I randomly stamped images from One Wild Ride and Route 66 stamp sets.


Well that's all there is to this simple card.  I hope you enjoyed it and will try this technique with your own stamps.  It works best with a stamp set that has more imagery than words.  I'd love to see what you create or hear your thoughts on this technique.

If you haven't checked out the entries from the other Watercooler Wednesday Design Team members just click here to return to the home page.
Happy Stamping!
Penny Tokens Stampin Spot

Wednesday, November 1, 2017

Watercooler Wednesday Challenge #143 - Gail's Feminine "Anything Goes"


Gail Allen is hosting our Watercooler Wednesday challenge this week and is challenging us to make a Feminine card.  It can be for any occasion or event and it can even be a 3-D, so long as it captures a feminine element.   The challenge is open until 5:00pm MST on Monday November 6th , so if you're interested why not join us and link up your creation.  


Here's My Card:
I haven't had much of an opportunity to use the new Powder Pink Incolour since it came out in June, so I thought this week's Feminine challenge would be the perfect time to try it out.   I also needed a few "Thank You" cards for female friends so the timing was perfect.


This was a super easy card to make, it just required stamping and paper trimming.  What could be easier.

Supplies:
Stamps:  Painted Harvest #144783
Ink:  Smokey Slate and Powder Pink
Card Stock:  Basic Gray and Powder Pink
Accessories: Paper Trimmer, Acrylic Blocks, and Tom Bow Glue

Details:
I am so pleased with this two-step Photopolymer stamp set because it stamps beautifully every time and is very versatile. The Powder Pink and Smokey Slate combo created a very dreamy, feminine looking floral image. I absolutely love it!

 I started with an 8 1/2" x 5 1/2" Basic Gray card base, scored and folded at 4 1/4".  I added a 4" x 5 1/4"  layer of Powder Pink, followed by a 3 3/4" x 5" layer of Whisper White.  I cut a 4" x 5 1/4" piece of Whisper White for the inside panel.  


I began stamping three of the large floral images in Powder Pink on the left hand side of the Whisper White Panel. The flowers do not overlap and I didn't require a mask.

Next I inked up the smaller floral image with Smokey Slate ink and stamped over top of the first three images.  To add just a bit more definition and colour to the flowers I re-inked then re-stamped the image shifting the placement just a tad clockwise.  Perfect! 

The center of the flower is stamped in Powder Pink and the small dotted image is in Smokey Slate.  The sentiments are stamped in Smokey Slate.  I stamped two flowers on the inside panel and added the sentiment. 
I stamped envelopes with the floral image too, but forgot to take a photo. My friends loved these cards.

Another Card:
I also want to share another Thank You card and envelope made with the same stamp set but in fall colours.  

These were stamped with Crushed Curry, Old Olive and Tangerine Tango inks and layered on matching card stock.  I used my rectangle stitched dies (non SU) to cut out the layers, which adds much more sophistication to the card. Using a sponge dauber and Crushed Curry ink, I also stenciled the back ground after the floral images were stamped using the diamond patterned stencil from the Pattern Party Decorative Masks set.  
I loved the colour combination and the addition of leaves and stenciling design in this card and making these cards almost became addictive.  Here are some more images of this card and envelope.


Love the way this stamped on the envelope and picked up  the fibers from the paper.  Beautiful!
Okay, that's it for today.  I hope you liked my thank you cards using the Painted Harvest Stamp set.  I'd love to hear your thoughts on these cards.  If you haven't seen the wonderful selection of cards from our Design team yet don't forget to check them out.  Click here to return to the Watercooler Wednesday Home page.  

Happy Stamping!
Penny Tokens Stampin' Spot 

Wednesday, September 27, 2017

Watercooler Wednesday Challenge #138 - Marsha's "All About Christmas"

Welcome to this week's "All About Christmas Challenge" hosted by Marsha of the Watercooler Wednesday Challenge blog.  In my book, it's never too early to think about making Christmas cards.  So this week's challenge is right up my alley.  

Marsha Reed our very talented Assistant Coordinator is starting us off with a stunning gate fold winter scene. Just seeing Marsha's beautiful snowy winter scene put me in the Christmas spiritI know you're going to love Marsha's card too and be very inspired by the rest of the WWC Design Team who've also contributed inspiring designs.  Believe me when I say everyone's pulled out all the stops to bring you some great Christmas card inspiration!  

Before we get to my entry for this week, I just want to remind you that the Watercooler Wednesday Card Challenge DT welcomes new participants to join in our challenges. Don't be shy!

It's super easy to link up your entry and play along.  Just make sure to enter no more than eight challenges including this Watercooler Challenge, and link up your photo before 5:00pm MST on Monday October 2nd and you're good to go.  See, super easy! Who knows, your entry might "Rock the Watercooler" or join our "Rockers" who have received honourable mentions. No matter, we love having new participants join in our challenges. So, why don't you play along?

Here's My Card:
I seem to be hooked on Navy Blue, Silver and White for this holiday season.


Supplies:
Stamp Sets: Musical Season #144811
Card Stock:  Whisper White, Night of Navy, Silver Glimmer Paper
Ink: Night of Navy
Accessories: Big Shot, Paper Trimmer, Card Front Builder Thinlet Dies #144674, Circles Thinlets, Winter Wonder Embossing Folder #144686, Dimensionals, Tom Bow Glue, Basic Rhinestones.
Card Front Builder Thinlet Dies # 144674 coordinates with the Carols of Christmas stamp set.
Musical Season Stamp Set #144, 811, coordinates with the
Musical Instruments Framelits Dies
Winter Wonder Embossing Folder #144686

Details:
1.  The 8 1/2" x 5 1/2" card base is cut from Whisper White card stock and was scored at 4 1/4".

2.  The 1st layer is Silver Glimmer Paper and measures 5 3/8" x 4 1/8".  Note: to reduce the bulk and not waste my glimmer paper, I cut away the center with a rectangular die cut.  I made sure I left a half an inch on all sides, so that the die cut in the next layer covers the glimmer paper. 

3.  The 2nd layer is Night of Navy card stock that measures 5 1/4" x 4".  I lined up the Card Front Builder Thinlet die on each side to add the cut work design.  

 4.  For the next layer I used my old circle die cuts to make a  3 1/2" circle from Silver Glimmer Paper for the base of the snowflake. 

5.  I embossed a 4" x 4" scrap of Whisper White card stock with the Winter Wonder Embossing Folder and then fussy cut around the embossed image with my detail scissors. I sponged over the embossed image and around the edges with Night of Navy ink.  Basic Rhinestones were attached to the circles between each of the snowflake points. The snowflake was glued flat to the Silver Glimmer paper circle with Tom Bow glue.  This piece was mounted to the center of the card front with Dimensionals. 

6.  I stamped the Peace.Joy.Love sentiment from Musical Season on a 3 3/8" by 3/4" piece of Whisper White and then mounted it on a piece of Night of Navy that measured 3 1/2" x 1".  The sentiment was adhered with Dimensionals to the center of the snowflake.  

7.  For the inside of the card I kept it simple by stamping on the card base instead of adding a layer.  The beautiful sentiment and mandolin from the Musical Seasons stamp set was enough to enhance this panel.  I simple stamped them in Night of Navy Ink.  

I hope you liked my snowflake Christmas card.  It certainly was an easy one to do and is very pretty to look at with all the sparkle.  How do you like the inside of the card? Does it's simplicity offset the outside, which was my intention?  I hope you'll leave me a comment as I really enjoy receiving your feedback and your ideas. 

If you came to my site first and haven't had a chance to check out the rest of the WWC138 Christmas Anything Goes DT cards just click here to return to the home page.  See you next time....
Happy Stamping!
Penny Tokens Stampin' Spot

MAY 2024 HOSTESS CODE

Welcome to my site and Happy May everyone!    Here is my new Hostess Code for the month:  Every papercrafter needs stuff, but not everyone c...