Showing posts with label Friendship Card. Show all posts

Sunday, May 19, 2024

Latte Love Friendship Card for TSOT 646

Sketch #646 at Try Stampin' On Tuesday is open until May 19th, 2024.  I thought I would give it a go and I'm hoping you will too.  Sketches are a fun way to get your mojo in gear, especially if you're stuck and unsure of what you want to do.   

Here's My Card: 

Who doesn't love coffee or even better, getting together with a friend for a fresh brewed cuppa.

This card features stamps, dies and designer paper from the Latte Love  suite which is available as part of Stampin' Ups! Online exclusive product line.

Supplies Used:

Stamps, Dies and Paper:  
  • Latte Love 15 piece stamp set #163455 Stampin' Up!- sentiments and large coffee mugs
  • Latte Love Dies 20 pieces #163460 Stampin' Up - large and small coffee mugs
  • Designer Paper - A Little Latte 12 x 12 #163453 - 2 1/2" x 2 1/2" square cut on diagonal for corner mats and a 4" x 5 1/4" piece for inside mat 
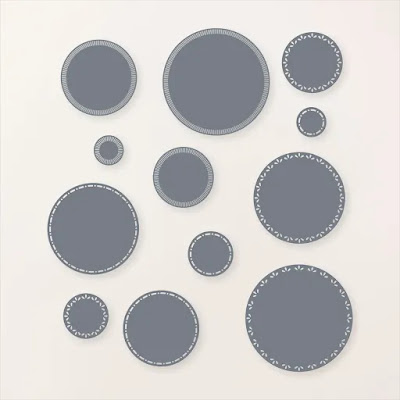
  • Spotlight on Nature Circle Dies 12 dies - #163580 AC pg 69
A Little Latte DSP 

A Little Latte Suite - OnLine Exclusive #

Spotlight on Nature Dies #163590 pg 69 AC24/25

Cardstock:
  • Whisper White 8 1/2 x 5 1/2 Scored at 4 1/4 for card base
  • Whisper White 5" x 3 1/2" for inside layer and scrap for sentiment circle on front
  • Pecan Pie 4 1/8" x 5 3/8" first layer 
  • Lemon Lolly 3 " x 3" circle mat for front 
  • Calypso Coral 2 3/4 x 2 3/4" cut on diagonal for dsp mats
  • Calypso Coral 3 1/2 x 3/12 scrap for Spotlight on Nature circle
  • and die cut cup for card inside 
  • Lost Lagoon scrap for 1 1/4" stitched circle 
Accessories: 
  • Opaque Faceted Gems #162979 Stampin' Up! 

Edit May 21st, 2024:  
I was just checking out the TSOT site looking for the next sketch challenge and I was delighted to see that my card was picked as one of the Top Three for Sketch Challenge #646.  Wow! That simply made my day!  

A big shout out to TSOT for choosing my card and all the wonderful comments.  Also a big congratulations to Cheryl and Cindy the other Top Three Winners.  Nice to join you in the circle! 

HAPPY STAMPING!
PENNY TOKENS STAMPIN' SPOT

Penny Hanuszak, CDN Stampin' Up! Demo since 2006

Visit my 24/7 Web Store by Clicking here: 


Tuesday, September 2, 2014

Tea Party Friendship Card

 I'm starting off September with a sketch challenge by the Paper Craft Crew PCCCS107 and a Colour Challenge by Create with Connie and Mary CCMC318.

Here's The Sketch:
 Here's the Colour Challenge:


Here's My Card:


Supplies:
Stamp Set: Tea Party, Friend To Friend (R)
Ink and Markers:  Basic Gray, Pool Party, Hello Honey
Card Stock:  Basic Gray, Pool Party, Hello Honey
DSP:  All Abloom
Accessories:  Oval Collection Framelit Dies, Big Shot, Perfect Polka Dots and Delicate Designs Embossing Folders, Basic Rhinestones, 3/8" Basic Gray Taffeta Ribbon (R), Trimmer 

I have to apologize for this fuzzy picture of the inside of the card.   I'm embarrassed that it's not in focus, however I think you can tell enough through the blurriness that I coloured the flower vase with markers.  The sentiment is from a retired stamp set called Friend to Friend. 

I love using the Tea Party Stamp set and trying different colour combinations with the main image.  For this one I stamped the image twice - once in basic gray, and a second time in Hello Honey ink.  I then fussy cut around the central part of the image and glued it to the basic gray one.  I used Tom Bow glue so I had a little bit of lee way in making sure that the Hello Honey image centered perfectly.  
This versatile collection of five stamps comes in Wood or Clear Mount, and coordinates with the Oval Framelits, Large Oval Punch, Large Tag Punch.  Great value for the money!
Because the Oval Collection Framelits are not true nestabilities with a 1/4" or less between ovals, I wound up fussy cutting around both the stamped images.  This enabled me to layer them onto the Hello Honey oval.
 
I added three rhinestones in various sizes from medium to large in the left hand corner of the image to comply with the sketch.  There are also a couple of other rhinestones on the circular designs in each of the corners.........just can't get enough bling!  

Well that's it for today folks.  I hope you enjoyed this card and will stop at the challenge sites to check out all the great cards that've been posted.  I'm leaving you with one last look at my card.


HAPPY STAMPING!
PENNY TOKENS  
03/09/14  Post Script: I just found out that I was one of the Top Three Picks for this card on Connie and Mary's Sketch Challenge CCMC318.  I hope you'll check out the fabulous cards made by the other two picks Julie and Laurie. 

This card also got me on the Artisan's Picks for the Paper Craft Crew challenge, which is awesome. I was honoured to be chosen along with Heidi Weaver and  Cynthia Richards who made awesome Halloween theme cards. Make sure you go and check out both sites.
 

Monday, August 25, 2014

You Make Me Happy - PPA216

What a beautiful summer we've been so fortunate to have!  Our weather's held for the past few weeks in the mid-20's giving us just the perfect summer.  

Today I'm starting off the week with a bit of a twist.  I created a card using the Paper Pals Art CAS sketch designed by Margaret Moody.  

While choosing my card stock and designer series paper, I decided to go with a Mossey Meadow print from the paper stack and use the paper colour for a monochromatic scheme.  

I made my card and I really liked it but then, and here's the twist, I decided to remake the card using the colour challenge from Just Add Ink, and I did it not once, but twice!  

Here's the Sketch and Colour Challenge:


Here Are My Cards:

For my Monochromatic card, I used a Whisper White card base with a layer of Mossey Meadow and then a second layer of Whisper White card stock.  I used 31/2" tags made with the Scallop Tag Topper Punch instead of panels for my card.  

I also used the Scalloped Tag Topper punch to create a panel measuring 4 1/2" x 1 3/4".  I stamped this with leaves from the the Blooming with Hope stamp set, before adding the "You Make Me Happy" tag from the Perfect Pennants stamp set.  This was cut out with the Banner's Framelits. 

I stamped  9 floral images from the Petite Petals stamp set and cut them out with the co-ordinating Petals punch and adhered them to the front and inside of the card.  Some basic rhinestones finished off the card. 

My monochromatic card for the Paper Pals Challenge/218.

Here is my card for the Just Add Ink colour challenge.  It features Blackberry Bliss, Calypso Coral and Mossey Meadow.
This is the third card I made, also using the Just Add Ink colour combo challenge.   I switched out the banner and the flower colours and flipped the two tags to change this card up a bit.  Also did the inside panel a bit different. 
Each of the cards has a slightly different set up for the panel in terms of the positioning of the border stamps and the flowers.  

Inside the Blackberry Bliss card

Inside the Monochromatic card. 
Here are the three cards together. 


Hope you enjoyed this challenge and will visit both Paper Pals and Just Add Ink to see all the other great cards by the designers and participants.

Before I go just a reminder don't forget about the Short and Sweet Starter Kit promotions! Only four more days until this great promo ends on August 28th.  As a new demonstrator you'll receive $190 worth of products in your Starter Kit for just $125! Click Here for details!

Happy Stamping!
Penny Tokens

Thursday, August 7, 2014

Paper Craft Crew #102 - 1 of 3 Featured Artisan's

I just found out that I was one of the featured artisans on Paper Craft Crew Sketch Challenge #102.  this fun sketch challenge.  Click here to see Heidi Weaver and Crystal Komora's great cards!  Nice to be in such great company!

Happy Stamping!
Penny Tokens

Wednesday, August 21, 2013

Tutorial - Friendship Flip Card Using Thinlet Dies

Today I want to share a tutorial with you on this Flip Card I've made using the new Label Card Thinlits Dies.  The theme for this card is friendship and what could be more friendlier than a tea party!

Supplies Used:

Stamp Set:    Tea Party 129138
Card Stock:   Crisp Cantaloupe, Calypso Coral and Very Vanilla
DSP:             Venetian Romance 
Ink:              Calypso Coral 
Tools:           Big Shot Machine, Magnetic Platform, Label Card Thinlits, Labels Collection Die Cuts (the smallest label), Elegant Butterfly Punch, Perfect Polka Dots Embossing Folder, Oval from Oval Framelits.
Accessories:  Basic Pearls, 3/8 Ruffle Stretch Trim in Crisp Cantaloupe, Sticky Strip, Snail Adhesive, Sponge Dauber

Cutting Out the Card Base:
I personally like the look of the Flip Card when you use 8 1/2" card stock  instead of the recommended 5 1/2 x 6 size.  I like having the extra 2 1/2" of card stock to write on and when the card is closed, the message area is hidden behind the extra fold.  For me, that's really cool and I think it adds even more of a "wow" factor.  

STEP ONE CUTTING YOUR CARD BASE:

Cut a 5 3/8 x 8 1/2" piece of Crisp Cantaloupe card stock.  With the cutting edge of the Thinlits Die facing down, insert the card stock under the flip part of the die and extend the additional card stock over the top of the die.   
TIP:  Just a note about the width of the paper for this version of a Flip Card. if you have difficulty fitting it through the die, it may be just a smidgen too wide.  I found that when I cut my card stock at 5 1/2" and tried to fit the card stock through the die, it was crooked and wouldn't lay flat.  To remedy that and make sure that the finished card base was aligned properly with the die, I cut an additional 1/8" inch off the width.  As soon as I did that, the card stock fit perfectly through the die, and all was well.  So experiment with the size before you start on your actual card to make sure you have the right cut.

 
In this view you can see everything aligned perfectly, before I roll it through the Big Shot.  Make sure before you do any cutting on the new Magnetic Platform and on the regular platform, that you put down a standard plastic cutting pad.  Your sandwich from the base up should be:

1.  Magnetic Platform/or regular platform
2.  Standard Cutting Pad ( a flat one works best)
3.  Thinlit placed over single piece of card stock
4.  Standard Cutting Pad (a flat one works best)
 
When you take the card stock out of the Big Shot it will look like this. Although the picture is faint, you can see the fold lines for the flip portion of the card quite clearly.  There is also a fold line, albeit a faint one, 2 5/8" from the right side of the card.

STEP TWO:  FOLDING THE CREASE LINES
 
Fold the right hand side toward the center of the card and using your bone folder make a crease. Later on you'll add some card stock and designer paper to make this side of the card look terrific.


Fold the left side of the card towards the center from the second fold line and use your bone folder to make a crease.

Finally fold the first fold towards the card center and use your bone folder to run a crease down the fold.  The flip portion of the card will fold towards the center.

 
This is what your card will look like when everything is folded together.  It will be a perfect A2 size card.  Wasn't that easy?

STEP THREE:  DECORATING YOUR CARD 

Here are the basic elements for decorating this card.  You will need to cut a 2 1/2 x 5 2/8" piece of Calypso Coral card stock and a piece of Venetian Romance Designer Series Paper 2 1/4x 5 for the panel on the right hand side of the card.  Stamp the images from the Tea Party set in Calypso Coral ink on Very Vanilla card stock.  You'll need to cut two labels in Calypso Coral ink using the smallest label in the Label Collection Framelits.  Before assembling these pieces I used a sponge dauber to distress the edges of all the design pieces.
I embossed both side folds of the card with the Perfect Polka Dot Embossing Folder and left the center part of the card plain except for the stamped image of the teapot which is in Calypso Coral Ink.  In this view you can see the small label attached to the swing or flip part of the card.  I used the smallest label from the Label Collections Framelits set.  It fits perfectly. 

In this view I've attached the You're Just My Cup of Tea stamped image from the Tea Party set with dimensionals to the back of the Flip.  The image was stamped in Calypso Coral on Very Vanilla card stock.  I added a single basic pearl to the center of the flower at the top of the image.  Wow this card is really starting to come together!

In this view you can see how I've added the designer paper and Calypso Coral card stock to the front right fold.  I also added a strip of 3/8" Ruffle Stretch Trim in Crisp Cantaloupe. Before attaching the trim I ran a strip of Sticky Strip down the outside edge of fold.  This ribbon is so gorgeous and on this card adds just the perfect feminine touch.
 
I stamped a piece of Calypso Coral card stock with the Tea Party image before cutting it out with the Elegant Butterfly punch.  Four small basic pearls were attached in the center.  Before mounting the butterfly  to the front of the card, I used the bone folder to give some dimension to the wings.


In this picture you can see the front Flip with the Tea Party image added on top of the Calypso Coral label.  I cut this image out using the second oval in the new Ovals Collection Framelits........ perfect!  To add some interest I actually stamped this image twice and then hand cut out the Tea Party banner part of the image and attached it with dimensionals to the face of the image.  Three small basic pearls were spaced along the banner to emphasize the words. 


To finish the card I added a small strip of Calypso Coral card stock on the front left hand side of the card.  I think it adds some balance.

And that's all there was to assembling this very feminine friendship card.  I hope you enjoyed it and learned a little more about using the Label Card Thinlits.  

I'd love to hear your comments.  Thanks for dropping by! 


Thursday, September 20, 2012

MOJO Monday 259 Challenge Card

Julee Tilman of Poetic Artistry Blogspot created this week’s sketch #259 for Mojo Monday.

When I first looked at this sketch I thought, wow this looks too much like work.  This sketch has way too many layers and embellishment areas for me, but the more I studied it, I started to see movement and the semi-circles reminded me of wheels.  Once I began visualizing that concept I decided to make a friendship card using the Moving Forward stamp set which includes a bicycle. 
I love red, white and blue and when I look at this card, I'm glad I chose this combination. 
 
I used Midnight Muse one of this year's fabulous In Colours, and Real Red from the Brights Collection for the stamped images and elements on this card. To show case these bold colours, I chose Whisper White cardstock for the card base and background to stamp the images on. I used an additional 5 1/4" x 4" piece of Whisper White cardstock that I embossed with the Stripes Textured Embossing folder, to add a little more drama to the background.  I think it worked. 
 
The small tags on the bottom front were punched out with the jewelry tag punch and tied together with some Cherry Cobbler Baker's Twine.  A small basic pearl was used for the center of the tiny flower and for the circle outline on the Midnight Muse circle layer.  I really love the small size polka dots on the strip of Designer Series paper I added for the middle layer.  The DSP is from the Summer Smooches collection. 
 
I've used a combination of stamp sets to create this card.  The panel image highlighting the bicycle parts is from a set called "Moving Forward".  This is a very versatile set and beyond the great graffics, $3.00 of every Moving Forward stamp set sold by Stampin' Up! goes to the Ronald McDonald House Charity. 
 
For the large wheel in the background I stamped a lovely paisley medallion in Midnight Muse ink on the Whisper White layer.  This image is from from the Lacy and Lovely stamp set. The layered circles were cut from the BigZ Circle #2 die.
 
In keeping with my motion idea for this card, I decided to only showcase portions of the bicycle image and mount them on a layer of Real Red cardstock cut out with the 1 1/4" punches.  To get this effect I simply stamped the full image on a piece of Whisper White Card stock moved the window on my 1 inch square punch until I got the image I wanted and then punched them out. The layered squares were then added to a piece of 2 x 3 3/4" Midnight Muse that was distressed around the edges with Midnight Muse ink and a sponge dauber.
 
For the circular layer on the bottom of the card, I stamped a "Friend" sentiment in Midnight Muse. This wonderful little stamp is from a hostess set called Mixed Medley.  I got my stamp for free when I attended Convention this summer, but you can earn it as a Hostess Set from the Holiday  Catalogue, simply by placing an order of $200 through my on-line store, or hosting a party. Ask me how!   

I kept the inside of the card very basic just adding the Moving Forward full image of the bicycle and it's darling sentiment "hello dear friend".
I hope you like my creation and would like to hear back from you if you have any comments. 

Black and White Anniversary - FMS #669

I'm up for another sketch challenge card, how about you?  Narelle Farrugia is the sketch designer for  Freshly Made Sketches #669  this...