Saturday, May 17, 2014

Fabulous Florets and Secret Garden go Triple Time


Stampin' Up! is retiring two of my favourite floral stamp sets in the next couple of weeks.  The first set I will truly miss is called "Fabulous Florets".  This six piece stamp set offers a lot of versatility with it's gorgeous line stamps.  Whether you're combining these stamps to make a bouquet or using them individually you'll be amazed at how creative you can be with this set.
 
This six piece set comes in wood mount #128574 $28.95 or clear mount #123027 $21.95
The second retiring floral set is Secret Garden, another of my favourites.  This seven piece stamp set is also versatile and teamed up with the Secret Garden Framelits, it leaves other stamp sets in the dust.  For this card I used the leaf image. 


Before these sets retire I want to share a card I cased from Sandi MacIvor of Stampin With Sandi.  Sandi used Fabulous Florets and Summer Silhouettes for her card which features the Triple Time Stamping technique.  I really liked the rich colour combination Sandi used so didn't make any changes there, but I subbed out the leaf image from Secret Garden for the one she used from Summer Silhouettes and changed the sentiment.
I used the "Many Thanks" sentiment from "Another Thank You" Photopolymer Stamp Set.  This beautiful stamp set has sold out in the past few weeks.  Fingers are crossed it comes back in the Annual Catalogue.
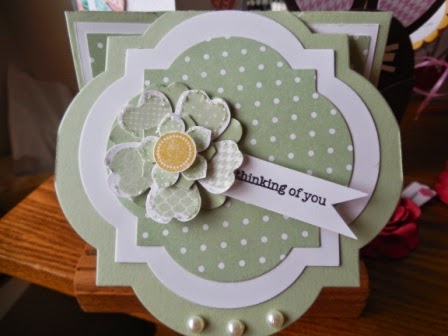
Here is my Card:

Supplies:
Stamp Sets:  Fabulous Florets, Secret Garden, Another Thank You
Ink:  Versa Mark, Pool Party, Crumb Cake, Pear Pizzazz, Real Red, Early Espresso
Card stock: Crumb Cake, Whisper White 
Accessories:  White Embossing Powder, Heat Gun, Trimmer, Sponge Dauber, Adhesive

How It's Made:
1. Cut card base from Crumb Cake to measure 4 1/4" x 11. Score at 5 1/2".
2.  Cut two layers from crumb cake measuring2 1/4 x 3 1/2" and 3 1/4 x 4 1/2".
3. Cut three layers from Whisper White card stock measuring 2 x 3 1/4", 3 x 4 1/4" and 4 x 5 1/4".  Also cut a piece measuring 5' x 3 3/4" for the inside of the card.
4.  Use repositioning tape on the back of the two smaller Whisper White layers and attach them to the largest Whisper white layer, so they are stacked. 
4.  Stamp flower image from Fabulous Florets in Versa Mark ink three times from the top right hand corner to the bottom left hand column.  Cover with White Embossing powder and heat set.  
5.  Using Pool Party, Crumb Cake and Real Red randomly stamp additional flower images around the card layers being careful to leave some white space in between and to not overlap flowers.
6.  Stamp the leaf image from Secret Garden or Summer Silhouettes (pg 127 IB&C) three times in Pear Pizazz and twice in Crumb Cake around the perimeter of the card in the white space between flowers.  
7.  Ink up a sponge dauber with Crumb Cake and rub it over the embossed flower images on each of the layers. Later when card is assembled you can daub in other areas of the card that may need some additional colour or blending.
8. Separate the Whisper White layers and adhere the largest one to the Crumb Cake card base.
9. Adhere the other two Whisper White layers to the Crumb Cake layers and then layer these matted pieces to the card front.  Make sure your stamping images line up.  
10. Stamp sentiment stamp image on the front of the card.  
11. Adhere 5 x 3 3/4" piece of Whisper White card stock to the inside of the card.  Stamp floral images on this piece. 
12. Step back and admire your art work!  

I sponged around the edges of the layer for the inside of the card and stamped a couple of the flower images in the lower left hand corner. 

Make sure when you add your layers that all your stamped images lines up perfectly.
I found the embossing really adds a  "wow" factor to this card.  It was amazing, once the flowers were sponged with the Crumb Cake ink they virtually popped off the page. 
 
This card is absolutely stunning when you see it in real life.  The flowers are vibrant and alive with colour and yet by sponging the Crumb Cake around the heat set flowers, you attain a softness that pulls everything together on this card. 

If you like the Fabulous Floret stamp set you'll have to act fast because it will be retiring in a couple of weeks.  Check it out on my on-line store. If you liked this card or want information on the technique, please leave a comment.  Thanks for visiting and come back again real soon!

Penny

Friday, May 16, 2014

Double Gate Fold Card Tutorial


You may have seen cards like this on Pinterest or Split Coast stampers recently.  It's called a Double Gate Fold card.  

I copied my card after watching the excellent video by Dee Slater's  of Create With Dee.  Dee is so creative and always does a great job of explaining the mechanics of her cards.  I liked this card so much I couldn't wait for the video to be over so I could make one myself. 

Using this design, I made two cards, one for Mother's Day and the other for a Birthday.  Both are super cute and really give that WOW factor when they come out of the envelope.  Thanks Dee!

Here's My Cards:
This is how the Double Gate Fold card looks coming out of the envelope.  What a beautiful card front.  I absolutely love, love, love it!  It's so feminine and girly-girl that it simply puts a smile on your face.

I used Pistachio Pudding cardstock and matching InColour 2013-2014 designer series paper with Whisper White cardstock.  The Flower Shop and Petite Petals stamp sets and coordinating punches make it easy to assemble this lovely flower. 


When the card is closed on the inside it looks like this.  You can almost feel the anticipation building while the recipient takes off the belly band and opens the card. Sorry for the bad lighting on this photo.

Okay, the suspense is over.  Here's the inside view of my card.  The hinged part of the gate fold top is achieved using the Window Frames Collection framelits and Big Shot Machine and the carryover of the card front design is perfect.  For the inside flower I stamped the base flower and added a single punched Pistachio Pudding flower using the Petite Petals punch.  The Daffodil Delight center is mounted with a dimensional.  


Supplies:
Cardstock:   Pistachio Pudding, Whisper White
Stamp Sets:  Flower Shop,

DSP:  InColour 2013-2014 Designer Series Paper in Pistachio Pudding

Ink:  Pistachio Pudding, Daffodil Delight, Staz On Black Ink
Accessories:  Simply Scored Scoring Tool, Paper Trimmer, Big Shot Machine, Pansy Punch, Petite Petals Punch, 1/2" Circle Punch Dimensionals, Adhesive, Window Frames Collection Framelits, Pansy Punch, 


Here's my birthday version.  I added a few more flowers on the front of this card and some additional basic pearls on the flower centers.  When I finished the card I wasn't too crazy about my sentiment choice, so I later swapped it out for the "happy birthday" banner from the Itty Bitty Banners stamp set.  Much better!


HOW IT'S MADE:
  1. Using Simply Scored score at 2 1/8" turn the card stock 180 degrees and score again at 2 1/8".
  2. Now turn the piece and score at 4 1/4".  This score line will become the hinge part of the card.
  3. Line up one of the 2 1/8" score lines in trimmer and trim to 4 1/4" line.  Then turn and trim on the 4 1/4" line 2 1/8".  Remove and set aside trimmed off piece for flower petals (see step 12).  Repeat on other side.
  4. Set up your magnetic plate or platform in the Big Shot machine and using the 2nd from largest Window Frame Die place it over the square flap at the top of the card.  Adjust so the bottom of the die is just beneath the 4 1/4" score line.  (if you're above the line and you pass through Big Shot you'll cut off the flap.  If you're too far below the score line, the card flap won't close properly).  
  5. Place the acrylic plate from the Big Shot over top of the cardstock and die, so it's lined up just to the hinge line and run through the Big Shot.  
  6. Trim off the two excess pieces of card stock on either side of the window frame shape with scissors once the die has been removed.  
  7. For the front and inside of the card you'll need to cut two Whisper White and two DSP patterned window frames using the next two smaller dies (refer to the picture).  Layer these die cuts with adhesive and attach to the front and the inside front panel. 
  8. Cut two pieces of Whisper White card stock for the front panels to measure 1 7/8" x 4" and attach to the gate fold panels.
  9. Cut two pieces of DSP for front panels to measure 1 5/8" x 3 3/4" and adhere over the front panels.
  10. Cut a Whisper White panel for the inside of the card to measure 4 x 4.  Stamp the panel with a sentiment of your choice and one of the flowers (see picture above for tip on the flower assembly).
  11. For Belly Band cut a 9 1/2" by 1 12" piece of cardstock to match the card base and then cut a 9 1/2" x 1 1/4" piece of DSP and glue to the cardstock piece.  Once the belly band is assembled wrap it around the card so one piece overlaps the other and secure together with sticky strip.  Make a flower and attach over top of the seam.  This band should slide easily off the card - don't make it too tight.
  12. To assemble the flowers for the card front, inside flap and belly band:  
    • Stamp 3 Flower Shop gingham flowers and punch out with the Pansy Punch. 
    • Stamp 3 Petite Petals flowers and punch out with the Petite Petals Punch
    • On scraps of Whisper White card stock stamp randomly stamp 3 of the gingham flowers with Daffodil ink and punch out just the center of the flower with the 1/2" circle punch.  Note: because you only want the centers, you don't need to stamp the entire flower.
    • Punch out 3 plain cardstock flowers with the Pansy Punch and 3 with the Petite Petals punch (use the two pieces of cardstock removed from the top of the card for these flowers)
    • Using glue dots stack from the base up a plain card stock Pansy flower, a Gingham Flower, a plain card stock Petite Petal Flower and a stamped Petite Petal flower.  Mount a Daffodil Delight center piece with a dimensional.  Attach flowers with sticky strip to the front, he inside cover and belly band.  Note:  I wanted a little glimmer on my flowers to give them some added pop, so I outlined all the petals with Dazzling Details #124117 pg. 166.
  13. Stamp a sentiment of your choice on Whisper White card stock and cut out like a banner.  Attach with glue dots beneath the petals.
Okay you should now be able to create your own Double Gate Fold card.  Remember to watch Dee Slater's video so you can see how she placed the Window Die, it's much easier to understand visually than my trying to explain it in steps 4,5 and 6 above. 

I'd love to hear from you if you made this card or simply a comment on the two that I've made.  It's always exciting to hear back from someone who actually used my instructions, as to whether they were understandable and helpful.   Have a great stamping day and thanks for visiting my blog!
Penny

Thursday, May 8, 2014

Saying Good Bye - Sympathy Cards

It's been a sad time for me over the past few weeks as I've lost another two friends and an aunt to cancer, heart disease and old age.  I'm glad to have had these wonderful people in my life and to have shared in their journey.  I'm so sad for their loss and my heart goes out to their families. 

These occasions always necessitate making sympathy cards, which I find as difficult to make as masculine cards.  One is never sure what level of comfort a card will bring. 

For my cards, I try to keep the design and messaging simple, yet comforting.  I want the family to know they are in my thoughts and to have enough space on the interior of the card to share a memory or two.  

Here is the latest sympathy card's I've made:

Supplies:
Stamp Set:
The Two Kind item #130447 (Wood Mount) or #130450 (Clear Mount) is a very reasonably priced stamp set featuring 7 stamps including two lovely sentiments.  This is what's called a two-step stamp set.  The fist image is stamped in a light colour and then the second bolder image in stamped in a darker colour.
 
I love the sentiments in the Wetlands stamp set and use them often.  For this card I used the "Thinking of You" rather than a sympathy sentiment, to express my feelings. 

Cardstock:  
  • Perfect Plum for card base 8 1/2 x 5 12"
  • Whisper White - 5 1/4 x 4 for first layer
  • Pear Pizzazz - 5 x 3 3/4" for second layer
  • Whisper White - 4 3/4" x 3" for stamped layer and 5 x 3 3/4" for inside layer.
Ink:
  • Perfect Plum
  • Blackberry Bliss (NEW 2014/15 InColour)
  • Pear Pizzazz 
Accessories:Decorative Dots Embossing Folder, Big Shot, Gold cord (enough to wrap around Pear Pizzazz card stock 3 times and knot), adhesive and trimmer.


The Pear Pizzazz layer is embossed with the Decorative Dots Embossing Folder (Sale-a-bration cattie).  I used enough gold cord (retired SU product) to wrap the green layer three times and tie a knot. 
 Penny

Sunday, May 4, 2014

Owl Friendship Cards


Recently some very good friends of ours came for dinner.  They arrived with this absolutely stunning white bouquet, to thank us for our hospitality.  I can't even begin to describe how wonderful a gesture that was.  

For me, there is something so absolutely special about receiving flowers in the first place, but when I get an all white bouquet it simply takes my breath away.  

These beauties lasted for over a week and brought me joy each and every time I walked in the room.  What great friends and how thoughtful!  

During their visit my girlfriend spent some time in the card room with me and she got a big kick out of this owl card I made while CASing one of Dawn Griffiths projects (see original post here).  

She liked it so much in fact, that she asked me to make her five cards to give to her friends.  I changed up a few of the colour details, but basically kept the same design features.  I thought I'd share the cards I made for her, because they are just so darned cute.  

The highlight of this card is the Owl Builder Punch.  This unique punch is a two-step punch that cuts out all of the pieces you need to build an owl. The punch includes an owl body, detailed eyes (not just one circle size but three so you can create dimension), and a small heart. All you have to do to start creating just punch and then layer the pieces.
 
Owl Punch #118074  Price $22.95

The card base is done in Night of Navy with Whisper White and Cherry Cobbler layers.  The Night of Navy DSP is from an old retired DSP pack I had and worked really well on the front of the card.
Here's a view of the inside of the card complete with this dressed up little owl.  Isn't she cute!
 
I've added some google eyes and her dress is cut from beautiful red glimmer paper. The flower was cut from Silver glimmer paper and is topped off with a basic white rhinestone. 

Hope you enjoyed this post.  The owl builder is such a versatile punch.  There's no end to the characters you can make with it.  

Penny

Thursday, May 1, 2014

2014 Catalogue Premiere & Sneak Peak

This isn't going to be my usual post today because I want to share an exciting event I attended last night in North Vancouver.  

When you get a chance to be the first to see the 2014-2015 annual catalogue you jump at it, and I did! 

Yesterday Canadian demos from across the country were made to feel just as if we were attending a star-studded Hollywood movie premiere.  For the first time ever, Stampin' Up premiered their annual catalogue through video simulcast across North America to over 7000 Stampin' Up! demonstrators. 

While the LIVE premiere and simulcast was actually held in Long Beach California on April 28th, Canadian demos had to wait two extra days to participate due to a booking glitch.  Regardless, it was no less exciting to join other British Columbian and Canadian demos and get an early sneak peak at the new catalogue and brand new products.
 
A group of ten of us who use to be part of Kristina Koch's Colourful Impressions group met at Boston Pizza on Esplanade in North Vancouver.  This was no small feat as we came from as far away as Richmond and Hope and areas in between.  That's lots of bridges to cross, believe me!  Once we arrived in North Vancouver were able to sit, relax and enjoy a wonderful meal on the Boston Pizza patio overlooking Vancouver's waterfront.  The weather gods were certainly smiling down and blessing us with clear skies and 22 degree Celcius.  Sunscreen weather for sure!

This is the beautiful patio location before we took it over.
We had lively discussions at dinner trying to guess what the new InColours would be and what changes had taken place in the catalogue. Most of us had avoided looking at Stampin' Connection and other sites where US blogs might post some spoilers!  
My beautiful friends and stamping demos: Debbie, Maureen and Sheri.


Following dinner the anticipation was growing.  We walked over to the theatre with 20 or 30 other demos we met up with.  Upon entering the Landmark Theatre we were thrilled to see Shannon West and Katy sitting at the registration table.  Personally I was blown away to see these Stampin' Up! reps.  Both gals are beautiful, talented and genuine nice people and of course great ambassadors for Stampin' Up!.
Shannon West and Katy taking a break after registration.
When the production began it was exciting to see Shelli Gardner, Stampin' Ups! matriarch and founder on the big screen.  She really made us feel welcome and excited about the 2 1/2 hour presentation we were about to see.  It was as though we stepped through a time warp and were back at Convention once again.  Presentations by Bonnie Thurber, Brian Pilling, Carrie Cuddnie, and Donna Griffiths were also entertaining and inspiring. It didn't take long for us to be hooting and hollering, especially when Prize Patrols were announced.
My new "Work of Art Stamp Set" we received for attending the event. See the beautiful images it creates.
There were lots of breaks for prizes and Prize Patrol was very generous!  Our group of five demos each won a prize. Diane, Debby and myself each won three of the brand new In Colour ink pads...........can you say exciting!!!!  And, Sheri and Maureen won beautiful new stamp sets they simply can't wait to ink up.

Through on-screen demonstrations and sneak peaks we received heaps of information and inspiration.  Over the coming weeks I'll be sharing some of that information with you so stay tuned.  

As we exited the theatre we were presented with our brand new 2014-15 annual catalogues and an awesome free stamp set.  What fun!  I just wanted to sit on the floor and pour through my cattie but couldn't.  Instead, I had to wait through an excruciatingly long drive home before I could do so. What can I say, I was the driver. And, as you can well imagine, I saw the other side of midnight examining it when I got home.  It was well worth it though.  
The 2014-2015 Annual Catalogue and Stampin Connection Magazine.  If you look carefully you may be able to see some of the new products..........just saying!

For all my loyal customers who have placed orders throughout the year, you'll be able to join me in the excitement soon because your "free" catalogues have been ordered and will arrive on your doorstep before it goes live on June 1st.  If you're a new customer and would like to get your copy of the new catalogue contact me, and I'll help you get one.

You're going to love this catalogue.  Although I can't show it to you on line you're welcome to drop by and take a peak in my studio.  Some of the great features of this catalogue are:
  • 03 New Stamp Sets  
  • 9 New Punches, including 3 New Handheld punches
  • 7 New Hostess Exclusive sets
  • 5 New In Colors
  • 49 New Ribbons
  • 5 New Embossing Folders 
  • QR codes to "how to videos"
  • Copy and Case information
  • Indexes including sections and Picture index of all the Word Stamps

Made with the three new InColours I was lucky enough to win:  Hello Honey, Lost Lagoon and Blackberry Bliss
  
This is the theme for Stampin' Ups! 26th Annual Convention being held in Salt Lake City in July.  Did you know that if you sign up now to be a demonstrator under me that you can get to go to the Convention for free!  Ask me how. 


Penny


Tuesday, April 29, 2014

Girls Night Out - Stamping!

Last Wednesday I had the pleasure of getting together with two fellow demos from the Lower Mainland area, Debby Evoy and Maureen Pollock.  We decided to do shoebox swaps and so each of us came prepared with kits to make cards.  What a great relaxed and fun evening this was!  We even had a visitor we all knew from previous stamping get-togethers drop in, so it was like "old times".  

Debby's Card Swap:

Debby's Mother's Day card featured the Pansy, Petite Petal and Itty Bitty punches.  The technique used to texturize the flowers on the card is called Faux dry embossing.  We used sponges to apply the colour to the die cut flowers before gluing them to the card layer and running them through the Big Shot machine. I'd forgotten this technique so it was fun to re-learn the steps and create this wonderful card. 
 

Maureen's Card Swap:
Maureen showed us how to make a box card.  What fun!  I loved making the balloons but found it quite tricky getting them attached to the box.  Can you say patience!  I think I had more glue dots stuck to me than to the transparencies. 
These little banners are made with the banner punch and stamp set from this year's Sale-a-bration catalogue. 


My Swap Card:

For my swap card, I decided to make a card using the same design as in my post "Make A Wish - Birthday Banner Card" tutorial.  The only change I made was in the colour layout.  We had fun making this card


If you're making this card be careful with  the placement of your dimensionals.  As you can see in this photo, I should have centered the dimensionals so they didn't hang off the sides of the banner.  Fortunately I was able to fix this problem.

Hope you enjoyed seeing the cards we made.  It was truly a fun night.  I'll be looking forward to getting together with these gals again soon.

Penny

Catching Up on Easter - Part Two

Here's another Easter "catch-up" post showing the Easter card I made for my mom.  She was thrilled and I'm sure you'll like it too.  

I watched a video by Dawn Griffith using the Watercolour Stamp Set and Fringed Scissors that inspired me to make this card.  You can check out Dawn's video at this link for measurements and tips on cutting out the half circle on this card. 

For my card I used Pool Party card stock for the base, topped with Whisper White.  Since I loved, loved, loved the egg in the EGGstra Spectacular stamp set I decided to make it the main image showcased by the half circle on the card front.  The addition of the other stamped images, the ribbon and the embossing really made the whole card come together in a pleasing way. 

This next pictures shows off the inside of this great card. I'm going to be adding this technique to my "Fancy Fold" technique classes because it's one everyone should know about. 

The cute little bunny on the inside cover is another of the great stamps from the EGGstra Spectacular stamp set.  The vine and eggs are from  a retired stamp set called Flower-Filled.  It was one of the first stamp sets I ever bought from Stampin' Up! and has seen some serious ink. I think the images really compliment the EGGstra Spectacular set and the theme of this card.


On the right you can see all the stamps in this 9-piece two-step stamp set.  It was always an awesome set.  If you're wondering why I'm showing you the stamped images instead of the wooden blocks, it's because I found in the old Stampin' Up! days, before they added Clear Mounts and changed the packaging for their stamp sets, that it was sometimes difficult to imagine how a stamp image would look before it was stamped. To remedy this and make it easier for me and the folks I stamped with, I began stamping all the stamp images from the set on a piece of cardstock which I glued to the inside of the box lid with glue dots. Voila, you could really see what was in the box!
In this view you can see the front and back of the card. The Pool Party piece measures 4 1/4 x 5 1/2"  and the Whisper White piece measured 5 1/4" x 9 1/2" before it was scored at 2 1/2 and 5 1/2" and folded back on itself. 
 
I stamped the egg in Staz On Black Ink and then used Coastal Cabana, Crisp Cantaloupe and Pistachio Pudding markers to underline the writing.  Small and medium sized basic pearls were glued to the top and bottom of the egg.  This added such a soft feminine touch.  The vine was stamped in Pistachio Pudding and the small eggs were added with dimensionals. 

How do you like the Coastal Cabana Ruffled Stretch ribbon on this card front?  I'm really sad to see this ribbon retiring as it always adds such a delicate fun flair to whatever I'm making and it's so easy to attach with sticky strip.  I like it paired up with the Crisp Cantaloupe Designer Series Paper too.  The final touch for this card front was to emboss just the front panel of this piece with the Perfect Dots embossing folder.  

I wish you could see this card in real life because it is fabulous..........even if I do say so myself.  

Penny

Rock Star Masculine Birthday Card

We finally have some good weather and have spent the week tidying up in the garden and the garage.  Visits to the recycling plant to get rid...