Showing posts with label Penny Tokens Stampin Spot. Show all posts

Wednesday, October 25, 2017

Watercooler Wednesday Challenge #142 - Charlotte's All About Christmas Challenge


If you haven't started getting your Christmas cards together, this week at the Watercooler should be very inspiring for you.  After all it's now just two months today until Christmas.  I know, i know!  Kick me for reminding you of that! 

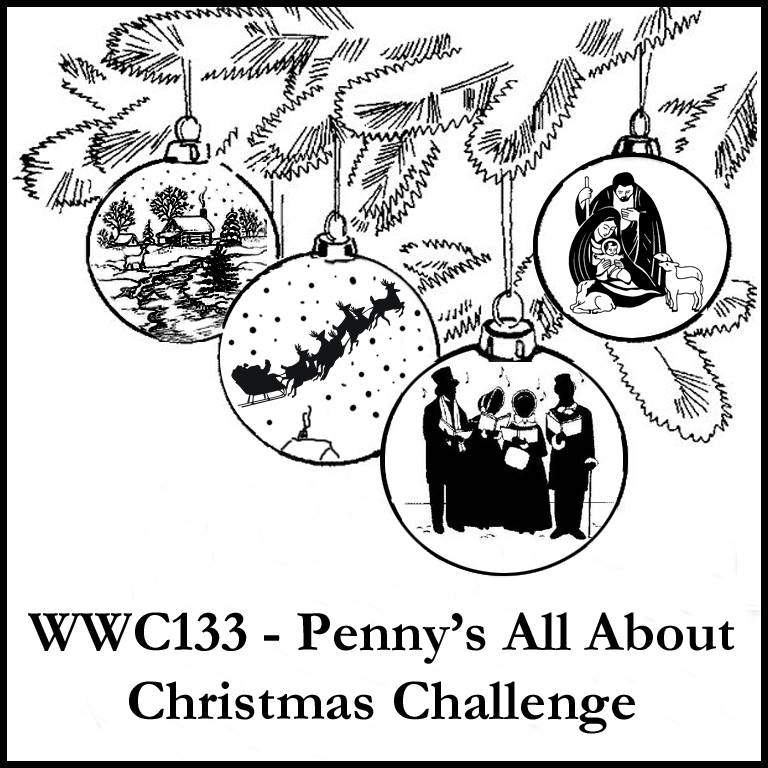
Our challenge this week is being hosted by Charlotte out newest Design Team Artist, and it's "All About Christmas". You may know Charlotte by her blog name, "Lady Joyful".  She leads us off with a beautiful snowflake card.

Our Design Team simply loves seeing the creativeness of our participants and having new stampers join in our weekly challenges.  If you're planning on sharing your Christmas Themed card or project on this week's challenge, you'll want to do so before 5:00pm on Monday October 30th, 2017 when our Linsky closes.  

Our challenge rules are simple and are listed on our Watercooler Wednesday home page.  Please take time to review them so you're not disqualified from our winner and runner up draws. It's super disappointing for us when a beautiful card has to be passed over because it was entered in too many challenges.

Here's My Card:
One of my favourite products from the Stampin' Up! Holiday Catalogue this year was the Merry Music Specialty Designer Series Paper, and so my card is all about showcasing how wonderfully these papers mix and match.


Supplies:
Stamp Set:  Musical Season
Ink:  Momento Tuxedo Black
Card Stock:  Whisper White and Basic Black 
Specialty Paper:  Merry Music Special DSP, Silver Foil
Accessories:  Big Shot, Paper Trimmer, Pinpoint Rectangle Layers Dies, 1 1/4" Circle Punch, Hot Glue Gun,Tom Bow Adhesive, Simply Scored, Sponge Dauber.

Details:
1.  Cut an 8 1/2" x 5 1/2" Basic Black card base and score at 4 1/4".

2.  Cut a 5 1/4 x 4" layer of Whisper White and adhere to base.

3.  Cut a 3 7/8" x 5 3/8" piece of Black & White Writing DSP and adhere to the 1st layer.

4.  Cut a  3 1/4" x 4 1/4" piece of Silver Foil.  For my card I die cut this piece using my Pinpoint Rectangle Layers Dies (non SU).  Center and adhere to the DSP layer.
In this view you can see the beautiful  mixture of papers with the silver foil.  These papers are ultra light compared to regular DSP packs, so it doesn't add much more additional weight to the card having a series of layers.

5.  Cut a 3 1/8" x 4 1/8" piece of Black and White Snowflake design DSP and adhere to the center of the foil.  

6.  For the Lolly, cut a 12" x 1 3/4" strip of the Merry Music DSP  and score at 1/4" intervals from end to end.  Use a sponge dauber and Tuxedo Black ink to sponge the edges.  Fold alternately on the 1/4" score lines.  Punch out a 11/4"  circle from Basic Black card stock to use as a base.  Join the ends of the strip together and then form a lolly by gathering the edges together and pushing down gently onto the black circle.  Put a dollop of hot glue in the center of the and press down so the circle holds the lolly's shape.   Punch out another 1 1/4" circle from Black and White DSP and cover the front center of the lolly. 
Note:  If you've never made a lolly before here's a link to Shelley Godby's blog where she shares instructions and a video on how she makes hers (a bit different from mine, but same concept).  These are great for all kinds of projects like banners, rosettes etc.

7.  To finish off the lolly, stamp the sentiment Peace, Joy, and Love from the Musical Season stamp set on to a 3 1/4" x 1/2" strip of  Whisper White card stock and adhere to the center of the lolly.  Use a generous amount of Tom Bow glue to adhere the lolly to the center of the card front.

8.  For the inside of the card cut a 4" x 5 1/4" piece of Whisper White card stock and adhere to the card base.  Stamp the sentiment "May the spirit....." from the Musical Seasons stamp set in Momento Tuxedo Black ink.  

9.  To finish the inside panel adhere a 3/4" x 3 3/4" strip of the handwriting DSP to the bottom of the panel.  Die cut a  trumpet from Silver Foil with the Musical Instruments Thinlet dies.  Adhere, and as Frenchie would say, "Voila you're finished". 


Well, that's it for today's challenge.  Hope you enjoyed this black and white Musical Season themed Christmas card.  I know I had fun making it and plan to make a few more of these before the card exchange is upon us.  For this type of card I will definitely make a box style envelope so the lolly isn't compressed in the mail.  Enjoy!  

If you started at my blog and haven't see the rest of this week's creations by the Watercooler Design team make sure you go back and check them out.  What an awesome array of seasonal cards.  Love them.


Happy Stamping!
Penny Token's Stampin' Spot   

Saturday, October 7, 2017

World Card Making Day - BOO

Did you remember that today is World Card Making Day, a day celebrated throughout the world by stampers and scrapbookers.  It's a day for remembering those you love with a card.  A day for relaxing with friends and being creative.  Hope you get your card on today!  

Here's Mine:
Happy Halloween!   Love this fun background paper I designed.

I used Foam Adhesive Strips to pop up the lettering because they're a tad higher than Dimensionals. 

The Crushed Curry moon is the large surface circle (not quite) image from the Swirly Bird Photopolymer Stamp set.  I covered the entire surface of the moon with Wink of Stella.  Although this is the inside of the card, it could easily be a card front.  What do you think?
 
Swirly Bird


I've been wanting to try the eclipse technique for a while now, but I didn't have the large alphabet dies that everyone's using so I put it off.  But a friend was visiting the other day and she brought an alphabet die set with her (Non-SU), and I thought what the heck!  

The background paper for the front of my card was created with the Spooky Cat stamp set.  I stamped randomly all over a piece of Whisper White card stock until I had a pattern I loved and then I cut it down to fit my card. 
I love those owls.  What fun to stamp.  You can't see it but there's lots of shimmer on this card from my Wink of Stella.
This stamp set is part of the Spooky Night Suite in the new Holiday Catalogue.  It's a very reasonably priced Photopolymer stamp set on it's on or it can be purchased as part of a bundle with the fantastic Cat Punch.
 
Enjoy!

Happy Stamping!
Penny Tokens Stampin' Spot

Wednesday, August 23, 2017

Watercooler Wednesday #133 - Penny's All About Christmas Challenge


It's time for another Watercooler Wednesday "All About Christmas" Challenge, and guess what?  I'm hosting this week.  

I thought I would start off the Christmas Challenge using the one stamp set that is currently available prior to the Holiday Catalogue going live on September 1st, called "Carols of Christmas".    You're going to see a lot of cards made with this stamp set and matching die cuts and the reason is simple, combined they create a remarkable range of combinations and beautiful stamping experiences.   

Here's My Card:


Supplies:
Stamp Sets: Carols of Christmas #144804, Colorful Seasons #143726, Six Sayings Hostess set #139852(R)
Card Stock: Dapper Denim, Whisper White
DSP: Color Theory Paper Pack - Dapper Denim and White Crackle
Inks: Dapper Denim and Versa Mark
Accessories: Big Shot, Paper Trimmer, Card Front Builder Framelit #144674, Stitched Shapes Framelits (Circle), Snow Flurry Punch #139680, White Embossing Powder, Basic Rhinestones

Details:  
1.  Cut Dapper Denim card base to measure 8 1/2" x 5 1/2" and score at 4 1/4".

2.  Cut a 5" x 4" piece of Whisper White for the next layer and cut out the corner pattern with the beautifully efficient Corner Builder Framelits.  Line up the die close to the edge of the card stock and make sure its even before running through the big shot. Tip:  When you need to make sure a cut is precisely in place use a bit of Washi Tape to hold the die down before cutting.  Works like a charm.  Glue the panel to the card base using a fine detail liquid glue around the edges of this layer and make sure the lines and corners are adhered.  

3.  Cut a 2 1/4" x 4 3/8" Dapper Denim panel and top with a 2" x 4 1/8" piece of the dapper denim crackle design paper from the Color Theory paper pack.  Randomly stamp the small and large snow flakes from the Colorful Seasons stamp set in Dapper Denim ink.  Glue to center of Whisper White layer. 


4.  Cut a 3 1/4" circle from Dapper Denim card stock and a 3" Stitched Circle from Whisper White card stock.  

Here you can see the snowflakes stamped on the designer series paper. 
5.  Stamp the Peace on Earth sentiment in the center of the circle and randomly stamp the small snowflake from Colorful Seasons around the edges of the sentiment.  Note:  I stamped my sentiment and snowflakes* prior to cutting it out with the die and the images were too far apart to show up properly on the cut image.  In future I'll cut my circle first and then stamp on it. Lesson learned. 
*Oops, you can barely see those small snowflakes stamped around the edges of this circle.  Next time I'll cut out the circle before stamping additional images.

6.  Stamp two small snowflakes on a scrap of Dapper Denim card stock with Versa Mark ink and emboss with White Embossing powder**.  Cut out the snowflakes with the Snow Flurry Punch and mount to card face and circle with dimensionals.
When I was stamping this snowflake for my Perpetual Calendar project last month I made a great discovery. The small snowflake in the Colorful Seasons stamp set is almost the same shape as the small snowflake in the Snow Flurry punch.  What do you think?  Pretty close and gives a different look from the die in the matching framelits.   Just sayin'......

**Okay, who put the Very Vanilla Embossing Powder cap on the Whisper White jar?   I didn't really notice this color variation until I was taking pictures of my card.  When I checked my Embossing Powder bottles sure enough there had been a switch-up with the caps.......... another oops?
7.  Cut a 5 1/4" x 4" piece of Whisper White card stock for the inside panel.  Stamp a sentiment in the center.  I used the Merry Christmas to You and Yours from the retired "Six Sayings Hostess Stamp set".  I really love the size and style of the fonts in this set and use them often.  To finish off the inside panel I randomly stamped a couple more snowflakes.
Well there you have it, the first of many cards I'll be making and sharing with you featuring the Carols of Christmas stamp set and Card Builder Framelits. I hope you like it as much as I do and will leave me a comment.

If you haven't already checked out the rest of the Design Team Artists creations this week, I suggest you do so. What a fantastic range of cards and inspiration.
Happy Stamping! 
Penny Tokens Stampin' Spot

Wednesday, June 14, 2017

Watercooler Wednesday #123 - Marsha's "Fireworks" Theme Challenge

The Watercooler Wednesday challenge this week, hosted by Marsha is a Clean & Simple Challenge with a "Fireworks" theme.
After getting off to a super slow start with this "CAS Fireworks" challenge, I believe I came up with a pretty good interpretation of it with this card.   

I initially had a lot of difficulty because I was really stressed over the fact that I didn't have any fire works stamps.  I knew what I wanted to make and spent a lot of time trying out several different floral, star and splotch stamp images in my search for something that resembled fireworks even if it was in an abstract way.  In the end, I lucked out at the Clipper Street Garage sale this past weekend when I  found a gently used fireworks stamp from Great Impressions that worked for me and got my mojo going.  

Here's my card: 


Supplies:
Stamp Sets:  Holiday Home (R-135095), Great Impressions - Fireworks (Non SU), Beautiful You (143637)

Card Stock: Whisper White, Real Red

Inks: Basic Gray, Momento Tuxedo Black, Smokey Slate, Night of Navy, Elegant Eggplant, Marina Mist inks; Real Red, Old Olive and Daffodil Delight SU Markers, and Red, Yellow and Green Sharpie Markers

Accessories: Big Shot, Paper Trimmer, Bitty Banner (R) and Bunch of Banners (144488) Thinlet Dies, Post It Notes for Masking, Aqua Painter, Wink of Stella, Dazzling Details in Cherry Cobbler, Stickles in Green and Yellow, Basic Rhinestones, Cherry Cobbler, Crushed Currie, and Crushed Cucumber Embossing Powders,  Sponge Daubers, Coffee Filters, Heat Gun and Post It Notes for masking.

Details:
1.  4 1/4" x 11 piece of Real Red card stock scored at 5 1/2" for a Top Fold card base. 

2.  4" x 5 1/4" Whisper White panel  adhered to card base.

3.  3 3/4" x 5" Whisper White panel:
a.  Begin by stamping the house images from the retired Holiday Home stamp set in Momento Tuxedo Black ink along the bottom portion of the panel. 

b. Stamp and fussy cut three more images from Post It Notes and use these to mask off the houses.

c. I began sponging, starting at the top of the panel and working downwards,   starting with Basic Gray ink.  This was followed with Night of Navy, Marina Mist, and Elegant Eggplant inks to create the night sky.  I sponged around the edges of the entire panel with Momento Tuxedo Black ink, so the Whisper White card stock didn't show through. 

d. After sponging the panel I removed the masks and coloured the houses with Smokey Slate, Basic Gray and Daffodil Delight inks and an aqua painter.

e. I stamped the fireworks image with Versa Mark ink and covered each of the three bursts with embossing powders in Cherry Cobbler, Crushed Currie and Cucumber Crush and then heat set.  Tip:  I stamped the first image which has three bursts and carefully poured the embossing powder individually over the images trying not to overlap the colour.  I used coffee filters to capture each of the inks separately.  Once the Embossing Powder was spread I heat set the image with my heat gun and then repeated this process for the next image.
 

f. I finished off the star bursts with medium sized Basic Rhinestones that were coloured with Sharpie MarkersUsing Dazzling Details and Stickles I outlined each of the star bursts to add some shine.  I coloured the small bits in the background with Wink of Stella.
 
4.  For the inside of the card I cut a 4" x 5 1/4" piece of Whisper White card stock. Instead of embossing the image I coloured the fire works stamp with Real Red, Daffodil Delight and Old Olive markers and stamped the image in the bottom left corner.  Note:  I didn't add a sentiment to the inside as this card could be used for many different types of celebrations.


5.  For the sentiment I stamped the "Celebrate" stamp from Beautiful You on a scrap of Whisper White, cut it out with the Itty Bitty Banners dies and then mounted it to a Real Red banner from the Bunch of Banners thinlet diesI used Tom Bow glue to adhere it flat across the house images.
  

Well that's it for this week's card challenge.  I hope you'll leave me a comment and let me know if this card works for you. I'd also like to hear what you would substitute for fireworks if you didn't have a stamp. 

If you want to play along with this challenge (and I hope you will), it's open for link up until 5pm Mountain Time on Monday May 19th.  All the rules and information for posting are on the home page.  

If you haven't checked out the other Design Team creations pop on over to the Watercooler Wednesday challenge blog.  Trust me there are some amazing renditions of fireworks to be seen.

Until next time.........

Happy Stamping!
Penny Tokens Stampin' Spot

Wednesday, June 7, 2017

Watercooler Wednesday #122 - Libby's Feminine "Anything Goes" - Isn't It Lovely

Welcome to this week's WWC122 Watercooler Wednesday challengeLibby Fenn's our queen of Clean and Simple is our host this week and is challenging us to create a Feminine "Anything Goes" project.

The WWC122 challenge is open until 5:00pm Mountain Time on Monday June 12th, 2017.  We hope you'll enjoy this challenge and join us by sharing your creation.  Rules and instructions for the Linsky are on the Watercooler Wednesday Home page.

Here's My Card:
My card this week was inspired by my recent participation in a beautiful destination wedding in Puerto Vallarta, Mexico. The wedding itself was fairy tale fantastic and the setting just couldn't have been any better.


Everywhere you looked you were assailed with all the magnificent vibrant colours of nature.  Reds, pinks, oranges, yellows, greens and blues all mashed together and bombarding the senses.  The Bougainville were the true inspiration for this card.


 Here's my card - "Isn't It Lovely":


Supplies:
Stamp Sets:  Floral Phrases #141767
Card Stock:  Whisper White, Sweet Sugarplum, Powder Pink*, Berry Burst*, and Fresh Fig*
Ink:  Fresh Fig 
Accessories:  Big Shot, Paper Trimmer, Hexagon Embossing Folder, Lovely Words Thinlet Dies #143733, Seasonal Layers Thinlets #143751, Hearts Thinlet Dies, Basic Rhinestones, Dimensionals, Tom Bow Glue.

These Adirondack or Muskoka chairs (as they're known in Ontario) from the Seasonal Layers Thinlets set captured my heart the moment I laid eyes on them in the new Annual Catalogue.  They smack of romance, relaxation and togetherness. 

How It's Made:
1.  Card Base:  Cut a 8 1/2" x 5 1/2" piece of Sweet Sugarplum card stock and score at 4 1/4".
2.  1st Layer:  4" x 5 1/4" piece of Whisper White card stock embossed with the Hexagon EF.
3.  2nd Layer: 3 3/4" x 4" piece of Sweet Sugarplum card stock.  Note:  I removed the center of this layer with a 3 1/2" die from the Hearts Thinlet collection.
4.  3rd Layer: 3 1/2 x 4" Berry Burst card stock with the "lovely" thinlet from the Lovely Words Thinlets Dies centered and cut out.  This was adhered to the 2nd layer with Tom Bow Adhesive, making sure the hearts were centered.  The combined layers were adhered to the 1st layer with Dimensionals.
5.  Finishing: Cut out the branch from Fresh Fig and the flowers from Powder Pink using the Seasonal Layers Thinlets and mount to the top of the card.  Add Basic Rhinestones to the flower centers. Cut out a Powder Pink and a Fresh Fig chair and attach below the heart with Tom Bow glue and Dimensionals.
 6.  Inside: Floral Phrases is such a wonderful stamp set and the sentiment "May Your Love Grow Stronger, Deeper and More Beautiful with Every Passing Year" seemed so appropriate for this card.  The inside panel of Whisper White measures 4" x 5 1/4".  The sentiment and floral image from the same set are stamped in Fresh Fig ink.  A 1/2" x 4" piece of Fresh Fig was adhered below the floral image leaving an 1/8" gap.
I hope you've enjoyed today's card.  This card is my own design and I'd love to hear your thoughts on it, comments always inspire me.  And, if you liked this design and want to re-create it please feel free to CASE it providing you acknowledge me by linking to this post.   Thanks again for joining me and the other Design Team members for this challenge.

Happy Stamping! 
Penny Tokens Stampin' Spot 

Wednesday, May 24, 2017

Watercooler Wednesday #120 - Gail's Christmas Challenge


Our new lineup of weekly challenges includes a Christmas Challenge and the talented Gail Allen is leading the first one with her WWC120 - Christmas Challenge.  Her inspiration photo is so cute, who could resist.  What fun! 

So even though it's not quite summer the Watercooler Wednesday Design Team have mustered up their Christmas Spirit and come up with some really great seasonal cards to share with you.  I know you're going to enjoy them too.   

And, hopefully you'll feel inspired too and get an early start on your seasonal cards and share your creation by linking up with us for some fun too!  This challenge is open from May 24th through 5pm Mountain Time on Monday May 29th, 2017.  

My Card:

One of my most stamped Christmas sets last year was Cookie Cutter Christmas. I absolutely adored every single imageWhen I found out it was carried over into the new 2017-18 Annual Catalogue, I whooped for joy and did a happy dance!  It was like welcoming back an old friend. 

So, for this first ever Christmas Challenge at the Watercooler, it will probably come as no surprise that I chose this set and my favourite image from it for today's card.  Hope you love it as much as I do! 

Supplies:
Stamp Sets: Cookie Cutter Christmas #132043, Here's to Cheers (R)
Card Stock and DSP: Cherry Cobbler, Garden Green, Crumb Cake and Warmth and Cheer DSP Stack(R)
Ink: Momento Tuxedo Black ink
Accessories: Big Shot, Trimmer, Cookie Cutter Builder Punch (140396), Shaker Shapes Framelits (R), Stitched Shapes Framelits (145372, Jingle Bell (R) 

How It's Made:
Card Layers Inside and Out:  
1.  Card Base - Cherry Cobbler 8 1/2" x 5 1/2" scored at 4 1/4" 
2.  First Layer - Garden Green 4" x 5 1/4".  Cut out the Oval and Circle from this piece before adhering it to the card base. 
3.  Second Layer - Basic Black 3 3/4" x 5" - Cut out oval before adhering to first layer. 
4.  Third Layer - Warmth and Cheer DSP - 3 5/8" x 4 7/8" adhere to second layer.  Note:  I purchased this paper pack on the current Clearance Rack and it's going to be perfect for making this season's Christmas projects.  Love it!
Warmth and Cheer DSP  is currently on sale for more than 50% off on the Clearance Rack


Oval Layers: 
Note:  As you probably know from past tutorials, I number my Stitched Shapes Thinlets from the inside (smallest) to the outside (largest).  The following directions list the number (#) of the thinlet instead of the size.
Stitched Shape Thinlets There are 12 dies in this set of Thinlets, and I number them from the smallest die through to the largest 1 - 4:
Circle: 4 dies, largest image 2-7/8"
Square: 4 dies, largest image 2-5/8”
Ovals: 4 dies, largest image 3-1/4” x 2-5/16”
Use with Big Shot, Big Shot Platform, and Standard Cutting Pads
 

1. 1st layer:  #4 Oval - Garden Green oval (cut from First Panel).
2. 2nd layer: #3 Oval - Basic Black oval (cut from Second layer).  Cut another #3 oval from a scrap of DSP, and then cut it into thirds.  Throw away the two ends and glue the remaining piece across the center of the Basic Black Oval, lining up the stitch marks.  Mount the black oval with Dimensionals to the green one. 
3. 3rd layer:  Stamp the Deer image from Cookie Cutter Christmas in Momento Tuxedo Black ink on Crumb Cake card stock and punch out with the Cookie Cutter Builder PunchAdhere to DSP with Dimensionals.  Die cut a small bow from Shaker Shapes in Cherry Cobbler card stock and mount with Mini Glue dots below the deer head.  Attach a silver jingle bell to the center of the bow with Mini Glue dots.  Attach the oval to the top left corner of the Third Layer approximately a 1/2" below the top and to the side.  Glue flat with Tom Bow Glue to the DSP layer. 
 
Cookie Cutter Builder Punch cuts out all the characters from the Cookie Cutter Christmas Stamp set, plus a cute little bow tie and heart. 

Sentiment Layer:
1.  Stamp the "Just Spreading Cheer This Christmas" sentiment in Momento Tuxedo Black ink onto Crumb Cake card stock.  Cut out with 1 5/8" circle die and layer onto the #2 Stitched Circles Garden Green circle with Dimensionals. Glue flat with Tom Bow glue to the bottom right hand corner of the card face overlapping the panels. 

Inside Panel:
1.  Cut a 4" x 5 1/4" panel from Garden Green card stock and adhere to card base. 
2.  Cut a 3 3/4" x 5" panel from Crumb Cake card stock and adhere to Garden Green panel. Stamp the sentiment " Warm Heartfelt Greetings....." from the Cookie Cutter Christmas stamp set in Momento Tuxedo Black ink.  Stamp the deer's head in lower corner of the panel.  Add a small Cherry Cobbler bow under deer's chin with Mini Glue dots.  
3.  Cut a 1/2" x 5 piece of the Warmth and Cheer DSP and glue to the left side of the Crumb Cake panel leaving an 1/8" gap between the edge and DSP.


Well that's it for my Christmas share today.  I hope you like this card.  I know I do and I've got plans to duplicate it several times over using other papers from the Warmth and Cheer paper pack.  I just know that my relatives and friends will get a kick out of it too! 


If you haven't had a chance to see the cards from the rest of the DT make sure you stop by and check them out.  And, if you feel like it, leave me a comment and let me know if you enjoyed Gail's Watercooler Wednesday Christmas Challenge and how early you start making your seasonal cards.  I'd love to have your feedback, it makes my day! 
Happy Stamping!
Penny Tokens Stampin' Spot 

Masculine Birthday - Adventurous Sky FMS#

Welcome back and thanks for visiting my blog.  Today I have another masculine birthday card to share with you that features a soon to be rel...