Tuesday, October 30, 2012

FREE Festive Paper-Piercing Pack Promotion


Just a reminder, October is coming to an end, if you want to take advantage of this FREE offer.   

The clock is ticking and there's less than two days left to get your FREE Festive Paper-Piercing Pack when you purchase the Ornament Keepsakes Set and Candlelight Christmas Specialty Designer Series Paper Bundle.  Check out the details here:


Monday, October 29, 2012

Digital Scrapbooking Day - Oct 29 to Nov 5, 2012


What do you get when you combine Digital Scrapbooking Day and My Digital Studio? A week of FREE downloads and 50 percent off ALL digital kits!  
 
What: FREE downloads. 50% off ALL digital kits. Mega blogging on MyDigitalStudio.net all week!
 
When: October 29-November 5, 2012

Where: Check out this information
  • Get your FREE downloads here (US/CAN).
  • Get your digital kits-ALL 50% off-here (US/CAN).
  • See project ideas and tips all week on MyDigitalStudio.net.Share the digital love, and get even more in return! Tell your friends (and hey-even your enemies) because if we get all the free items downloaded 18,000 times, we'll give a fourth one to everybody for FREE.
 

Sunday, October 28, 2012

October 29th Spooktacular One Day 15% Off Sale


 What's So Special About Oct 29????


Thu, 25 Oct 2012 12:36:57


Stampin' Up! is having their first-ever SALE on STAMPS!!!  And, it's happening for only one day - October 29th!
 
If you've been holding off on your WISH LIST, now's the time to act because you can buy almost every stamp in the current catalogue and get 15% off.  So don't delay Stampin' Up!s Spooktacular-24-Hour-Sale ends at 11:50pm MT October 29th!
 
GET 15% OFF ON:
 
  • Background Stamps
  • Personalized name stamps pg:
  • Cookie Press Stamps
  • Single Image Stamps
NOTE:  This special offer DOES NOT INCLUDE hostess sets, bundled stamp sets, digital stamp brush sets.
So shop now! There’s no minimum purchase, and no limit to the number of stamps you can order.


Halloween Treats


Fall is definitely here.  There's a chill in the air and the beautiful coloured  leaves have fallen from the trees. It won't be long until that magical time when little ghosts and goblins are roaming the streets.  What fun!

Today I received my first Halloween card in the mail, a subtle reminder it's time to get busy making my own cards and treats.  
My sister Heather made this delightful card featuring the Frightening Feline single stamp from the Holiday Catalogue (pg. 26). When I pulled this card from it's envelope I  just had to giggle. I'm sure you'll agree it's simply the cutest!  I couldn't wait to call her and let her know how much we loved it.  What a great touch those feathers and sentiment are!


Heather typed her "What Bird?????????????" on the computer and then printed it out on Whisper White cardstock.   Sometimes when you can't find the right sentiment this is really the way to go.  If you're short of sentiments you should check out MDS 11 because the new programs have unlimited sentiment choices.  You can try out MDS II for FREE for a 30 day trial, just click here to find out more!


Saturday, October 13, 2012

Every Stamp in the Book Swap -Spotlight Cards

A few weeks back I told you about Wanda Dodds a Stampin' Up Demo from the Pas Manitoba and the 2012: Canadian All Catalogue Swap that she orchestrated single handedly. 

I simply don't know how she did it.  She received over 4700 cards that had to be sorted and distributed to all the players.  Imagine every space in her house covered with cards.  Wanda did a marvellous job and got the swaps safely off on their way. 

Tonight I'm going to share the cards I received for Nature 16 +1.  Unfortunately some folks didn't put any identifying information on their cards, but if they read this note or if you know who they are send me their information so I can give proper credit for their creation.


Ginger Morgan of Oh My Stamps blog created this absolutely "joyful" Christmas card in Cherry Cobbler and Gumball Green card stock and inks. She's used the Perfect Punches stamp set for her sentiment and punched it out with the Scallop Circle punch. I love how she used the Labels Collection Framelits to give focus to the center of her card and the beautiful stamped image from the Best of Everything stamp set. She's added a bit of bling by adding berries on the leaf spray with tiny dots of Cherry Cobbler Dazzling Details and on the little bird's wing. Nice touch Ginger!
And, I absolutely love the background treatment on this card front. She's embossed a 5 1/4" x 3 inch piece of Whisper White card stock with the Petals a Plenty Embossing Folder, and then cut 3 1" strips to layer on the card front. By colouring the dots in the center of each flower with a Cherry Cobbler
marker, she's added an additional interesting focus, without going over the top. Just a delightful card. Thanks Ginger.


You can see a bit of the glimmer on the bird's wing and on the leaves in this photo. The new ink pads make such a great impression.
 
  
This great masculine card was designed by Shari Howetts and is created with the Countryside stamp set.  She's done a great job of layering her card stocks and the Dotted Scallop Ribbon Border punch outs. Shari has done some very light colouring of the image with markers and then she made the trucks' windows look so realistic by adding Crystal Effects to the panes.
 
Another great feature of this card is the small scallop circle punch that puts the spotlight on a single apple which is mounted with dimensionals on red card stock on the inside of the card. 
 

Beth Schreiber designed this very cute card using Bright Blossoms and Wacky Wishes one of this year's great Hostess sets.  Contact me to find out how you can earn this set for FREE

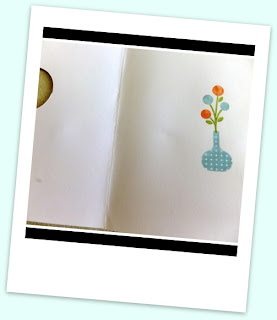
This cheery little card has the portal layering done with  1 3/4" and 1 3/8" circle punches, so you can see the cute little bouquet of flowers on the inside of the card.  She's use Floral District Designer Paper for the  bottom of her card and a piece of Baja Breeze seam binding.  A very quick and easy card that has a cute wow factor. 


This beautiful card did not have any information with it so I am unable to give credit to the designer.  I can't think of the name of this style of card either but the base card stock measures 8 1/2" x 4 1/4" and its folded at the top.  The layer with the stamping on it measures 4 3/4" x 3 1/2" and decreases by 1/4" on each layer. 
 
This card is made with Elegant Eggplant, Wisteria Wonder and Whisper White card stocks.  The beautiful flower and sentiment are from the Blooming with Kindness stamp set.  The background layer was dry embossed with the new Fancy Fan Folder embossing folder.  All in all this is a well-stamped and designed card.  I love it. 
 
This card created by the very talented Heidi Weaver from Blackfalds, Alberta showcases the Cherish Friendship Stamp Set.  I loved the colour mix of So Saffron, Lucky Limeade and Calypso Coral and the embossed outline which was created with the Framed Tulips Folder.
Here's a view of the inside of Heidi's card where she's stamped the sentiment from the Cherish Friendship set,  "Friends are kind to each other's hopes and cherish each other's dreams", and a small flower image from Mixed Bunch.  Nicely done.  When you're checking out Heidi's blog Stampin With Heidi,  be sure to read her post on Swap Intervention, it's hilarious, and oh so true!


This gorgeous triple stamp technique card was made by marylondic@hotmail.com.  She's used two stamp sets for the background and sentiment on this card.  The background is stamped with the 6 piece By The Seashore set. The "Thanks a Million sentiment is from the 12 piece stamp set Word Play.  If you like this stamp check out this promotion for Single Stamps, it could be yours for very little outlay.
 
What I liked about this card was the mix of colours for the shells - Pool Party, Tempting Turquoise, Island Indigo and Midnight Muse.  This combo really gives you the feeling of being at the ocean.  I also loved the Large Pearl Basic Jewel.  Thanks Mary this is a great card!


This lovely card was created by Rochelle Hewitt. The background card stock is Baja Breeze and the sand was created by tearing Crumb Cake card stock and layering it.  The seashells are from the By The Seashore set.  Each of the seashells has been hand cut and mounted to the card front with dimensionals.  Two layers of Early Espresso Baker's Twine were wound around the card stock.  The "happy birthday" sentiment is from the Teeny Tiny Wishes stamp set and is stamped on a piece of crumb cake card stock and then cut out with one of the banners from the new Bitty Banners Framelits set.  .

This beautiful "Thank You" card by Diane Lebrun from Ponoka Alberta simply took my breath away.  The floral stamp is one of 7 images in a set called Field Flowers which is available in wood and clear mount styles.  I like the way Diane chose to use the "Thank You" sentiment from one of my all time favourite sets, Perfect Punches.  

This beautiful bow was created with 3/8" Taffeta Ribbon.  I like the two-toned weaving - lighter tone on the inside and darker tone on the edges.

Amber Meulenbelt of StampwithAmber, created this really elegant fall card using the Gently Falling and Tiny Tags stamp sets.  The card base is Soft Suede and a layer of Early Espresso has been embossed with the new Woodgrain Embossing Folder.  She's used a combination of inks including Soft Suede, Daffodil Delight, Pumpkin Pie, Cajun Craze and Cherry Cobbler to colour the leaf.  A card with a real fall feel to it.  Thanks Amber.
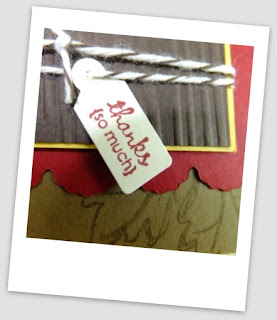
This beautiful little tag is punched out using the Jewelry Tag punch after the sentiment has been stamped on it.  Love the way Amber used the Early Espresso Baker's Twine to wrap this card layer. 
 
 
Patricia Nobuto created this bold and bright birthday card with the Build a Blossom stamp set and the Blossom Petals Builder Punch.  She's also used the Extra Large Oval Punch in a unique way on the front of this card.  I love the combination of Elegant Eggplant and Summer Starfruit cardstock and ink. 
 
I really liked the way Patricia punched the oval from the front cardstock piece and then adhered the "happy birthday" sentiment from the Perfect Punches set on dimensionals on the inside of the card.  It's like a really nice treat.  Great card Patricia and one I plan to demonstrate in a card class in the Spring.
 
This card didn't have any information on it so I'm unable to give kudos to the creator.  Too bad, because this is an outstanding card.  The yellowy gold background cardstock was created using the Shaving Cream technique on Shimmery White Card Stock.  The sweet  little bird is from a $10.95 stamp set called Blissful Bird and it has been punched out using the Bird Builder Punch
The bird is stamped in Tangerine Tango and mounted on Soft Suede cardstock.  A small basic rhinestone was used for the bird's eye. 

Isn't this torn paper technique wonderful for show casing a small sentiment?  I really liked the way the "thinking of you" words are showcased.  This is just one of 24 sentiment stamps in a set called Teeny Tiny Wishes, a fabulous set that covers almost ever occasion.  

I really enjoyed this French Foliage card by Hetty Jones of Alberta, Canada.  She's done a stunning job of colouring the leaves in More Mustard, Bravo Burgundy, Tangerine Tango and Always Artichoke inks.  Hetty has also made good use of the Window Frames Collection Framelits and the Woodgrain Textured Impressions Embossing Folder.  To achieve a realistic wood grain look she's sanded the embossed die cut. 
This close-up shows off some of the beautiful detail in the colouring and stamping.  Hetty has layered the stamp images to  create a beautiful montage effect.  Simply lovely!  Thanks Hetty.
 

This terrific card has a lot going on for it, unfortunately I don't have the name of who made it.  The Flock Together stamp set was used to stamp the wonderful cage in Night of Navy.  The birds were stamped in Delightful Daffodil.  The background DSP is from the Birds of a FeatherThe medallion in Midnight Muse is die cut with the new Delicate Doilies Sizzlits die.  Really awesome.  The banners are made with the new Bitty Banners Die Cut and matching stamp set Itty Bitty Banners.  Really cute!

 
I fell head over heels for this stunning fall card made by DiAnne Hill from Nanoose Bay, BC.  DiAnne cased this card from Loll Thompson at http://stampingwithloll.blogspot.ca
 
The Gently Falling Stamp set was used to create these beautiful leaves which were hand cut.  Old Olive, Pumpkin Pie, Cajun Craze markers were used along with a water spritzer bottle to colour the leaves which were stamped in Early Espresso onto Watercolour Paper.  The other finishing touches on this card are the Linen Thread wrap at the top of the card, a piece of Neutrals Colour Collection DSP for the background paper and the beautifully scrolled "Thinking of You" sentiment stamp from the Curly Cute set.  Although I don't have a picture of the inside of this card, it has the image of one of the smaller leaves from the Gently Falling stamp set cut out and mounted on the bottom right hand inside corner of the card. 
 
DiAnne used the Watercolor Spritz technique to perfection.  I love the white spaces she's left on these leaves, which really lends a sense that they're real.  Beautifully coloured DiAnne.  Take a bow!
 

This beautiful vibrant card actually put a smile on my face the moment I laid eyes on it.  It was created by Chris Hnatiuk from Calgary Alberta.  It seems like there are a lot of really talented stampers in Alberta, and Chris is one of them.  No wonder Stampin' Up located their Canadian Head office there. 

Chris used an extremely popular set called Betsy's Blossom for her friendship card.  From the giant Chrysanthemum to the  small flower images, bird and leaves, this six piece stamp set is one to have in your collection! You'll find it on page  72 of the 2012-13 Idea Book and Catalogue.  The card base is in Calypso Coral, followed by a strip of  Pool Party that's been cut with the Large Scallop Edgelit and stamped in Pool Party with one of the smaller floral images.  The next layer, a strip of Lucky Limeade DSP that's been embossed with the Vintage Wallpaper Embossing folder adds a beautiful contrast and texture to the card.  But, Chris wasn't finished her layering yet, she's topped all of this with Basic Black and Whisper White card stocks that have been cut out with the Apothecary Accents Framelits.  The bold Chrysanthemum was stamped in Calypso Coral on Whisper White and then punched out with the 2 1/2" circle punch.  A small piece of 1/8" Basic Black Taffeta Ribbon has been mounted on a small circle of basic black to showcase thecenter of this flower.
 
Here you can see more of the detail Chris has added including a strip of Calypso Coral Ruffled Ribbon, an Antique Brad, a sentiment from the Petite Pairs 18 piece stamp set.  These have been layered on a piece of basic black cardstock punched out with the Scalloped Oval punch. Beautiful details that make this card so special.

The inside of Chris' card is just as professionally done as the outside.  I love the flower design from Betsy's Blossoms, a unique way to use the stamp that adds such a nice touch!
Heather Leech created this very bright and happy, birthday card.  The card base is Daffodil Delight card stock topped with a layer of Whisper White and a strip of Summer Smooches DSP and a piece of Real Red cardstock that's been embossed with the Perfect Polka Dots Embossing Folder.  Heather added a piece of Lucky Limeade Ruffled Ribbon around the center of the card.  The wonderful little flower stamped on the Whisper White circle is from the Bright Blossoms stamp set.  She's added a Basic Pearl to the center of the flower for some pizzazz.  This simple image is layered with a 1 3/8" circle of Daffodil Delight and a Lucky Limeade Scallop Circle.  The happy birthday sentiment was stamped in Lucky Limeade ink on Whisper White  and then cut out with the Word Window punch.  This piece was then adhered to a Lucky Limeade piece of cardstock that was cut out with the Modern Label Punch.  This is a sweet card!


Well that's it for the cards I exchanged in Wanda's swap.  I'd just like to say that I'm very pleased with all the cards I received. Here's a parting look at my card.  All the details are in this post:


Tuesday, October 9, 2012

Treasure Hunt Countdown

 
There's still time to join the LNS Treasure Hunt.  You could be the Grand Prize Winner of $150 in Stampin' Up! Products! 
What are you waiting for?  
 
It seems like a long time ago since I posted about the Late Night Stampers Treasure Hunt and gave you the rules and my clue.  Have you played along yet? 
 
Time's flying so if you don't want to miss out on prizes and fun start playing the Treasure Hunt for Clues now! 
 
You've only got until midnight October 30th to send me your blog and clue list, so I can make sure your entry is in the barrel for the LNS Grand Prize draw of $150.00 and for my Penny Tokens draw for a Free Stamp set!  What are you waiting for............here's the rules:
 
Here's how to play along:
 
  • Open the page 'Late Night Stampers Web Ring at the top of my blog.
  • Look for names with an (*) beside them.  These are LNS blogs that are participating in the Treasure Hunt. Simply click on that blog link to go directly to the blog.
  • Once you're on the blog hunt for the clues by scrolling back through the posts as far back as August 20th. Look for this picture it should be somewhere on the post.


  • Look for their clue (hint: it will be a Stampin’Up!®. product see my example below).  Check to see if the blog you're visiting is giving out prizes for comments left, or if you just see something you like when you're browsing, leave a comment, it will be most appreciated.
  • Make a list of the 50 blogs you’ve visited and their corresponding treasure hunt clues.
  • Once you’ve collected 50 clues, email me your list to pennyhanuszak@telus.net.
  • And, this is important, click on the Treasure Hunt badge at the top of my side-bar to go to the original Treasure Hunt post and leave me a comment saying you've completed the hunt and sent me your list by email.  I will send you a confirmation that you've been entered for both draws.
The names of Treasure Hunters who have sent me a correct listing of blogs and clues will have their name submitted to Sherrill Graff for inclusion in the Grand Prize drawing on October 31st. The Winner of the draw will get $150.00 in Stampin’ Up!®.products of their choice.  Sherrill will post the winners name on November 1st, 2012.

You'll also have your name entered in my October 31st drawing for a FREE Stamp Set.  So don’t miss out.  Start hunting for those clues today! 

Just a reminder here’s my clue - you'll want to write this down, and the name of my blog:

Scentsational Season Clear-Mount Bundle 129946 Price: $40.95
Purchase the Scentsational Season Stamp Set and Holiday Collection Framelits Dies together. Priced to save you 15%!


Saturday, October 6, 2012

World Card Making Day - October 6th, 2012


World Card Making Day
What are your plans for World Card Making Day?  Are you getting together with friends or family to make cards? Are you and your stamping group getting together to make cards for a charity like Ronald McDonald House?  

Are you joining a Blog Hop for World Card Making Day or holding your own?

Whatever is going on in your life today, I hope you'll have the opportunity to do something you love for someone you love. 

Today I'm making a sympathy card for my nephew who's dad just passed away. I'm also working on making two birthday cards and an anniversary card for friends whose special occasions happen next week.  I'll post my cards tomorrow.  Have a good one!


Friday, October 5, 2012

Tacoma Regional Swaps - Christmas Theme

As promised yesterday the following are Christmas cards I received as swaps during the Tacoma Regional My Way Meeting.  What a great collection, I'm sure you'll enjoy them! 

Several of these swap cards have no identifying information on them, so I'm not aware who created them.  They are "unnamed" cards and if anyone knows who the originator is let me know so I can pass a long some credit. 


CHRISTMAS:
This very simple card is made with the Scentsational Seasons stamp set from the Holiday Catalogue.  This is one of those "unnamed" swap cards, so I can't pass along any credit.  What do I like about it:  The color combo.  The base is Bashful Blue and the layers are in  Raspberry Ripple and Gumball Green.  The two inks used are Raspberry Ripple and Gumball Green as well.

This next beautiful card was created by a demo  who goes by txtornado on her yahoo email account.  She used Greetings of the Season for the sentiment on this card and it's stamped in Early Espresso Ink, on Crumb Cake cardstock.  A very simple Whisper White lace border was punched out with the Dotted Scallop Ribbon Border, however only half of the strip has been added to this card.  The beautiful big snowflake was die cut from Shimmer White cardstock using the Bigz Die - Snow Flurry.  The center medallion which is stamped again in Early Espresso is from the Mixed Medley stamp set in the Holiday Mini hostess section.
 
 
The next two fabulous cards were created by Maureen Pollock a very talented stamper from Surrey, BC. Maureen is a member of the Colourful Impressions group and is well know for her talents as well as her boisterous laugh. It was so good running into you Maureen and I loved both your cards! 

If you love the Ornament Keepsakes Christmas stamp then this card is definitely for you. The ornament has been die cut using the Holiday Ornament Framelit Dies, which match this stamp set.  You can save 15% if you buy this as a bundle.  Check it out here, or you can get a free Festive Paper Piercing set if you purchase this stamp set bundle and the Candlelight Christmas Speciality designer series paper.  Check out this link for the current promomotion. 
 
The ornament Maureen chose is stamped in Pacific Point Ink which looks very bold striking against the Whisper White background, which has been embossed with the Holiday Frame Embossing Folder. The ornament has been adhered with dimensionals to the center of the frame.  Although you can't see it in this picture, Dazzling Details was added to the raised impression on the Holiday Frame to give it an irridescent glimmer.  The last two touches are a Basic Pearl in the center of the ornament and a small strip of 1/8" Real Red Taffeta Ribbon.  Beautiful card Maureen. 
 
Maureen's second card is just as captivating as her first one. She's combined a number of different elements.  Maureen began by stamping the oval image from the Joyous Celebrations stamp set on Very Vanilla cardstock in Real Red ink.  Then she stamped a small ornament image from the Ornament Keepsakes Stamp set in the center of the oval with Lucky Limeade ink.    The ornament was embellished with a small Rhinestone Basic Jewel and a bow made from Lucky Limemade Baker's Twine.  
 
For her next part of her design she die cut a piece of Real Red cardstock with one of the 6 layering dies from the Labels Collection Framelits and embossed this piece with the oval shape from the Designer Frames Folders textured embossing folders.  The ornament image was adhered to the center of this oval making a very lovely element to layer over the card base. 
 
The base of Maureen's card is Lucky Limeade cardstock that has been topped with a 4" x 31/4" piece of Very Vanilla Cardstock that was embossed with the Lacy Brocade Embossing Folder.  A piece of Real Red cardstock was punched out with the Scallop Trim Border punch and sandwiched between the very vanilla layer and a 4" x 2" piece of Candlelight Christmas Specialty DSP. 

Look at the work in this beautiful "unnamed" card.  It was made with Soft Suede and Cherry Cobbler cardstocks.  The top layer of Soft Suede was embossed with the Holiday Frame Embossing Folder.  The raised oval was glammed up with Champagne Mist Shimmer Paint and Cherry Cobbler Dazzling Details.  The Ornament from the Ornament Keepsakes stamp set was stamped in Cherry Cobbler ink onto Cherry Cobbler cardstock and embossed with Clear Embossing Powder before it was cut out using the Holiday Ornament Framelits.  The finishing touch is a beautiful Crumb Cake Seam Binding  Ribbon.

Another beautiful "unnamed card" was made with Always Artichoke, Cherry Cobbler and River Rock cardstocks.  Layers were embossed with the new Fancy Fan Fold Embossing Folder.  The large snowflake from the Snow Flurry Bigz Die was cut in Silver Glimmer Paper, and then layered up with the ice skates image from the Winter Memories stamp set.  The ice skates and flower image were coloured with markers and adhered with dimensionals to the snowflake.  The sentiment "Warm Winter Wishes" is from the Winter Memories stamp set too. 

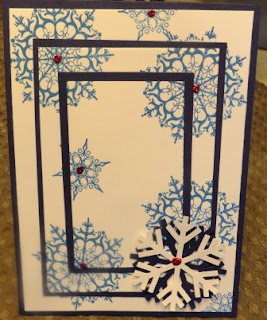
Diana Scott-Pasco of Washington State made this lovely winter card using the Triple Stamping Technique.  What a beautiful job she did on this card.  The card base and layers are in Night of Navy and Whisper White cardstocks.  She stamped the beautiful snowflakes from the Snowflake Soiree stamp set in Pacific Point Ink.  The center of the snowflakes were glammed up with Cherry Cobbler Dazzling Details.  The layered snowflakes are from a retired snowflake die. 

OTHER OCCASIONS:
I absolutely loved this Masculine Card by Candee Smith.  Candee combined two of my favourite stamp sets The Open Sea and Word Play to create this delightful card.  She has used the new InColours Summer Starfruit, Midnight Muse, Gumball Green and Raspberry Ripple for her colourful stamping.  The card base is Basic Gray layered with Basic Black and Whisper White cardstock.  A small piece of Neutrals DSP was used on the side.  This is a great card that could be used for a graduation, new job or male birthday. 

This stunning card was created by Jillibling.  The card base is Lucky Limeade covered with a layer of Island Indigo thats been randomly stamped in Whisper White with images from the Clockworks stamp set. The Very Vanilla layer is stamped with the wonderful Postage Due stamp set in Midnight Muse ink and has been torn across the bottom.  The beautiful postage images are stamped in Lucky Limeade, Perfect Plum and Cherry Cobbler inks.  Simply a great card!
 
This card by Cathy Parise of Washington State, is one of those truly great CAS (clean and simple) designs you want to have on hand.  The cardstocks are Elegant Eggplant and Whisper White.  She's  used Clear Embossing Powder to heat set the flower image which has been coloured with Elegant Eggplant, Wisteria Wonder, Lucky Limeade and Versamark inksThe images are from the Love and Sympathy stamp set.

This delightful card was created by Trina Gentry of Benton City, WA.  The card front is comprised of 3 layers of Whisper White Card stock.  Strips of Polka Dot DSP in Primrose Pink, Gumball Green, and Midnght Muse measuring 1 1/2" x 3" have been added to the last layer.  The flower stem image was stamped in Midnight Muse on Whisper White cardstock then layered with Scallop Oval, Large Oval and Bohp Blossoms punches.  A beautiul 5/8" Organza Bow adds some more dimension to this card.  The sentiment and floral stem are from a retired stamp sets.   
 
That's it for my Tacoma Regional Swaps.  Hope you enjoyed them and they've inspired you to get creative!    Please note that all the links for the stamp sets were for clear mounts.  If you're interested in ordering any of the products used to make these cards please click here to go to my On-Line Store.  Happy Stamping! 


Black and White Anniversary - FMS #669

I'm up for another sketch challenge card, how about you?  Narelle Farrugia is the sketch designer for  Freshly Made Sketches #669  this...