Wednesday, October 5, 2016

WWC88 - Heidi's Sketch Challenge

  This week at the Watercooler our awesome and talented Heidi Weaver is presenting us with a great sketch challenge, and we encourage you to join in.  

The great thing about sketches is that you can interpret them in your own way, provided they 
have some resemblance to the original sketch.


Here's My Card: 
I took a bit of creative license with my take on Heidi's sketch for this week's challenge by omitting the scalloped circle element and substituting it with my family of bears.  I also used the background trees to replace the splatter. 
Supplies:
Stamp Sets:  Bear Hugs, Time of Year, Thoughtful Branches, Cookie Cutter Christmas
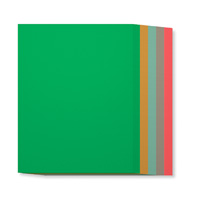
Card Stock:  Cherry Cobbler, Very Vanilla and Garden Green card stock
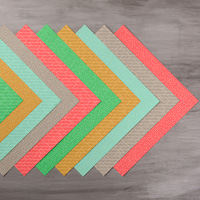
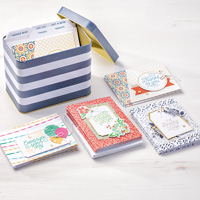
Paper:  This Christmas Specialty Designer Series Paper
Inks:  Cherry Cobbler, Garden Green, Soft Suede, Crumb Cake 
Accessories:  Big Shot, Trimmer, Dimensionals, Tom Bow Glue, Holly Embossing Folder, Bear Hugs Framelits, Bunch of Banners Framelits and Balloon Framelits 

When I saw the ribbon candy designer paper included in the "This Christmas" DSP pack it took me back to my youth, reminding me of the beautiful Norwegian knit sweaters we saw in the store windows at Christmas time.  I thought it would be fun to dress up these bears in that design and I was thrilled with the end results.   

Assembly:

1. The card base is a piece of 8 1/2" x 5 1/2" Cherry Cobbler card stock that was scored at 4 1/4". 
2. The Garden Green layer measures 5 1/4" x 4"
3. The Very Vanilla layer measures 5" x 3 3/4".  The three trees from the Thoughtful Bunch stamp set were stamped randomly and overlapping in the center of the card.  Three Rhinestones were attached to the top left hand corner.
4.  The three Bears were stamped on Very Vanilla card stock with Momento Tuxedo Black Ink. NoteI stamped and cut a second large bear image for the Mama bear.  The images were cut out using the Bear Hugs Framelits and they were sponged with Crumb Cake and Soft Suede inks.
For these next few pictures you won't see any sponging or colouring on the bears.
This adorable stamp set is available in the Annual Catalogue

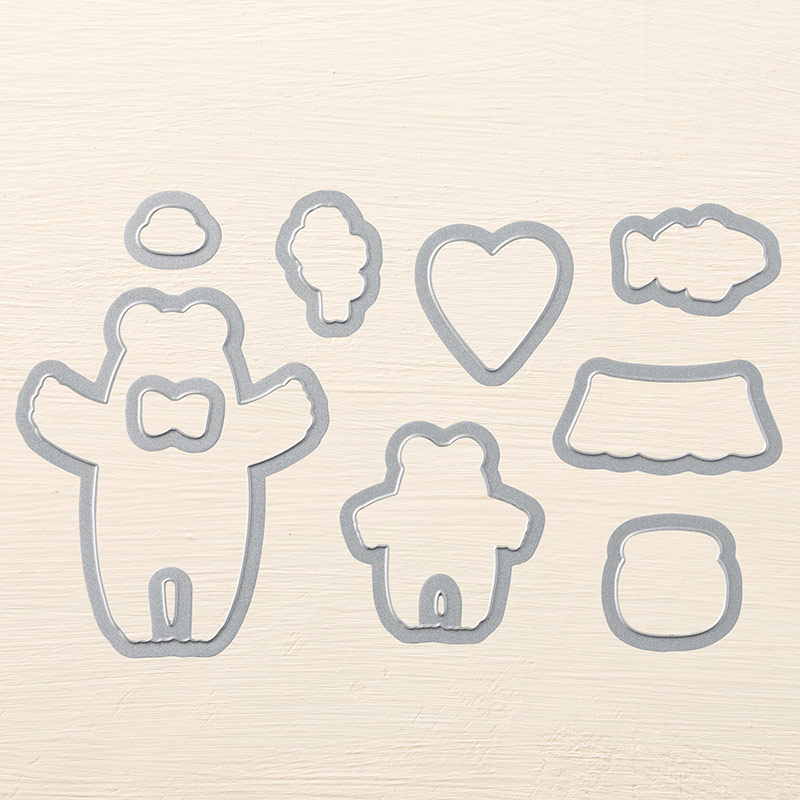
These are the matching Framelits

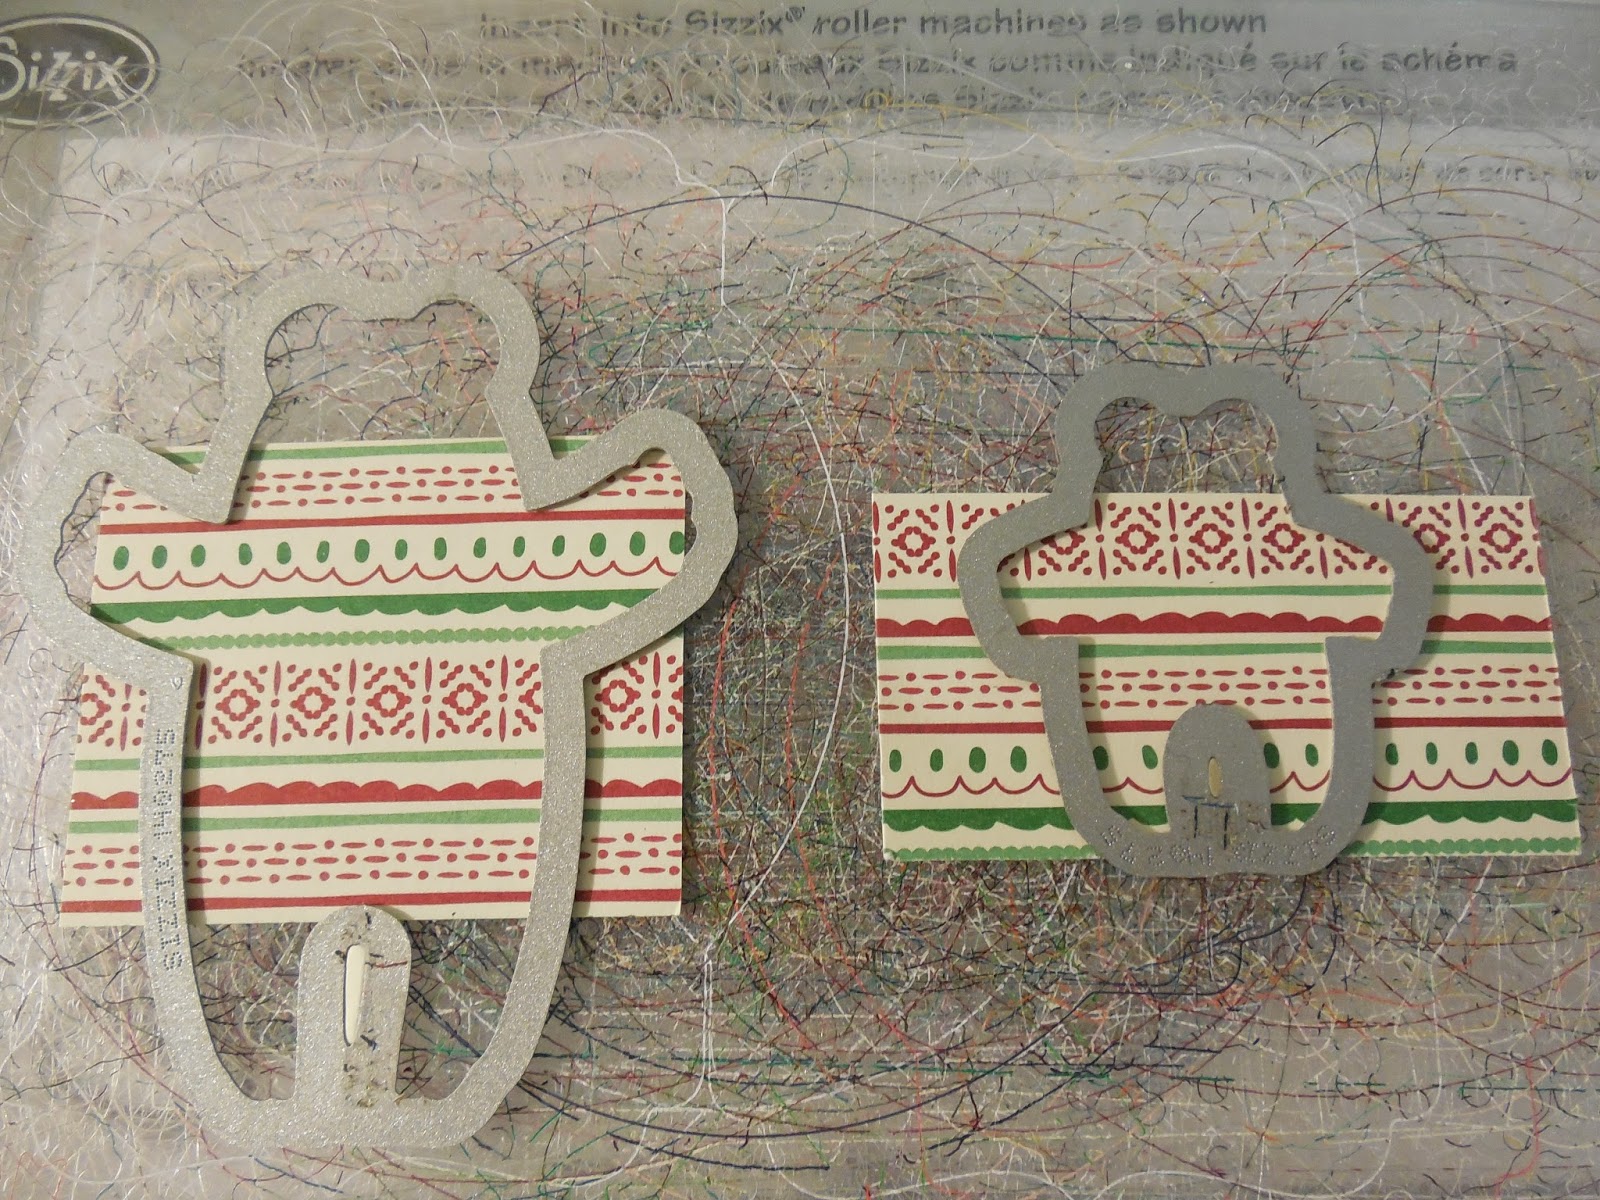
5.  To make the sweaters for Papa and Baby Bear, I used some small scraps of designer paper and cut out just the sweater part with the Bear Hugs Framelits.  

For Mama Bear's dress I cut out the skirt Framelit using the same designer paper and I used a large scallop circle and a 1/2" circle punch to make the top of her dress and Baby Bear's collar.


In this photo, you can see the sweaters don't actually fit the bears well.  In Papa Bear's case, the neck is too high and the sleeves too long.  Not too worry though, as I adjusted the sizes easily by trimming away the excess dsp from the collar area and on the arms.

The arms of the sweater were trimmed back and cuffs and collars cut from small strips of Cherry Cobbler card stock were attached with adhesive. I added the bow tie from the Bear Hugs Framelit set

In this picture you can see that I actually reversed the onsie.  The collar for the onsie was made by cutting a 1/4 circle with the 1/2 circle punch.  The scallop circle for Mama Bear's outfit was attached with dimensionals and in the final version has a pretty green bow cut using the Balloon Framelit Dies


 6.  Once the clothes were adhered to the bears I used adhesive to attach the Papa bear to the left of the trees.  I used Dimensionals to attach the Mama Bear and her image overlaps the Papa Bear.  I used double mounted Dimensionals on the Baby Bear so you can tell he is out front.  

7.  The Christmas Banner was stamped with the Time of Year stamp set and cut out with the Bunch of Banners Framelits.  Love those banners.  It was mounted with Dimensionals.

8.  If you look at the sketch, there isn't a panel on the bottom of it, but I managed to get ink on the bottom of my Very Vanilla card stock, so covered it up with a 1" x 4" piece of Garden Green card stock that was embossed with the Holly Embossing Folder.  My goof up actually worked out nicely as this additional piece of card stock seemed to anchor the picture.  

9.  Three Basic Rhinestones were added to the top left hand corner of the card front.  

9.  For the inside of the card I cut a 5 1/4" x 4" piece of Very Vanilla card stock and stamped the sentiment "Warm Heartfelt Greetings for a Very Merry Christmas" in Cherry Cobbler ink.  The sentiment was from the Cooking Cutter Christmas stamp set.  A 1/4" strip of dsp was added to the right side of the panel. 


This was a really enjoyable card to make, so hats off to Heidi for a great sketch challenge this week!  I hope you enjoyed my version of it and will leave me a comment.   Hopefully my small tutorial will be of help if you decide to make sweaters for your bears 


Don't forget to check out the rest of the Watercooler Wednesday design team's cards.  They are truly wonderful.

Happy Stamping!
Penny Tokens Stampin' Spot  

Saturday, October 1, 2016

World Card Making Day Promo

October 1st is World Card Making Day - and it's time to celebrate by making and sharing a card with someone you care about.  

I'll be making and posting some cards today and I hope you'll join me by sending me a picture of the card you've made "today".  If you're posting to your blog or face book page, send me a link and I'll link to you from my blog.  Then, even though we can't physically get together today, we can still share the fun of participating!   What fun!  

At the end of the day, I'll randomly select from any entries I receive and send you one of my special cards. 
Stampin' Up! also wants to share in the fun of World Card Making Day and are offering some specials from October 1st to October 5th, so if you're planning on submitting an order check out these special deals first.   

2015-2017 In Color 8-1/2 x 11 Cardstock
2015-2017 In Color 8-1/2" X 11" Cardstock
Price: $10.00 $8.50
2015-2017 In Color Envelope Paper
Price: $14.50 $10.88
2016-2018 In Color 8-1/2 x 11 Cardstock
2016-2018 In Color 8-1/2" X 11" Cardstock
Price: $10.00 $8.50
2016-2018 In Color Envelope Paper
Price: $14.50 $10.88
Designer Tin of Cards Project Kit
Designer Tin Of Cards Project Kit
Price: $36.00 $27.00
Envelope Punch Board
Price: $27.00 $20.25
Fuse Fast Adhesive
Fuse Fast Adhesive
Price: $13.50
Buy one Fast Fast and get a Refill for free.


Paper Sale - Buy Three Get One FREE

October 1 through 31 buy three packages of
 Designer Series Paper (DSP)  
and get one FREE! 
During this sales period you can purchase your favourite Designer Series Papers from both the Annual Catalog and Holiday Catalogs.  Note:  this promotion does not include the Specialty Designer Series Paper or Designer Series Paper Stacks.
Details
•    Promotion runs from October 1–31, 2016
•    All order types qualify for this promotion - online shopping, workshop
•    There's no limit to how many times you can buy three packages of Designer Series Paper and get one free during this promotion.
 

The Fine Print - Or, What Doesn't Qualify:
  • Specialty Designer Series Paper and Designer Series Paper Stacks do not qualify for this promotion and cannot be redeemed through this offer. 
  • Designer Series Paper purchased with Stampin’ Rewards or the Stampin’ Rewards 50%-off perk does not qualify for this promotion. 
  • Designer Series Paper purchased as part of a Starter Kit does not qualify for this promotion.

Happy Stamping!
Penny Token's Stampin Spot

Wednesday, September 28, 2016

WWC87 - Masculine Challenge

I'm very excited about today's WWC87 Watercooler Wednesday challenge.  Why?  Because it touches an area that I think we don't do enough of, and that's create masculine cards.  

Kath our host this week has also defined the style for this challenge as "Masculine - Anything Goes" which makes it even better because it opens up a broad spectrum of possibilities! Yippee!!! 
Here's My Card:  

One of my guy friends John Clark, who recently passed away was really in to model trains.  Because it would have been his birthday on the 27th he's been on my mind a lot and so I decided to dedicate this masculine birthday card featuring the locomotive from the Traveller stamp set to him.  

The Traveler set is my "go to" for a lot of masculine cards, and I'm so happy that Stampin' Up! decided to carry it over into the Annual CatalogueI am CASEing a card by Pat Mayer featuring this set when it was first released back in 2014.
This set comes in Wood Mount #13450 or Clear Mount #134513, see pg 116 of the Annual Catalogue.
The method  used to layer the train on this card is called a "Telescope" Technique. To create the multiple layers I used the new Layering Squares Framelits.  Here's a link to a video by France Martin  where she demonstrates her "Telescope Out Card".  France aptly demonstrates how simple this card is to assemble, so I hope you'll try it out.

Assembly:
1.  Begin by cutting a 10" x 5" card base from Basic Black card stock and score it at 5" for a top or side fold. Mine is a top fold card.
2.  Cut a 4 1/2" x 4 1/2" piece of Whisper White for the first layer and adhere it to the card base with Tom Bow Glue.  
3.  Cut a 4 x 4" piece of Basic Black for the second layer and a 3 3/4" x 3 3/4" piece of Whisper White for the final layer.  Stamp the image you want to telescope in the center of the 3 3/4" square.
2.  Choose which framelits you are going to use and then layer three consecutive square framelits over your image and run them through the Big Shot.  I chose to use the Scallop Squares on the top left in the Framelit set. 
Layering Squares Framelits # 141708 pg. 193 of the AC.  There are 19 dies in this set.
3.  Adhere the 3 3/4" square of Whisper White to the Basic Black layer with Tom Bow adhesive. 

4.  I attached the largest frame section with dimensionals to the inside of the cut out square on the 3 3/4" Whisper White piece.

5.  The next square needs to stick out a little bit further so I used Foam Adhesive Strips which are 1/8" thicker than Dimensionals to attach it.

6.  To raise the third and final square even higher, I mounted three stacked dimensionals to the back of the center square.  Remember to remove the protective layer in between each Dimensional so they will stick to each other. 

7.  I stamped the birthday banner from the "Time of Year" hostess stamp set on a scrap of Whisper White card stock, in Momento Tuxedo Black ink. This image was cut out with the Bunch of Banners framelit dies. I adhered the banner with Dimensionals to the top left corner of the card. 

 8. I cut another 4 1/2" x 4 1/2" piece of Whisper White Card stock and adhered it with Tom Bow Glue to the inside of the card.  I stamped the Happy Birthday sentiment from the "Stylized Birthday" stamp in Momento Tuxedo Black ink in the center of the card stock.  
 

Supplies:
Stamp sets:  Traveler, Stylized Birthday, Time of Year (Hostess)
Ink:  Momento Tuxedo Black ink
Card Stock:  Whisper White and Basic Black
Accessories:  Big Shot, Layering Squares and Bunch of Banners Framelits, Trimmer, Tom Bow Glue, Dimensionals, Foam Adhesive Strips.    

Well that's it for this week's challenge.  I love this card.  It has such clean lines and kind of a Wow Factor going on.  If you like cards that come together quickly, have some Wow Factor and would work with a broad range of stamp sets then this is a technique to add to your "to do list"Let me know if you like this card and whether you've tried out my version of this technique. I'd love to hear your thoughts and share your experience.

Along with leaving me a comment (I love comments) I also hope you'll take a look at what the other members of the design team have created for this week's challenge.  There are some awesome cards available to view.  

And before I leave, "how about you"? Feeling up for this challenge?  Why not create a masculine card of your own and link it to our Watercooler Wednesday challenge WWC87.  We'd love to have you join usThe linky at our site is open until 11:00 MT Monday October, 3rd, 2016.  Until then,

Happy Stamping! 
Penny Tokens Stampin' Spot

Tuesday, September 27, 2016

World Card Making Day - October 1st


Hi Stampers!  One of the wonderful things about paper crafting is being able to share your creations and brighten someone's day. Did you know there's a special day to do just that?  It's called World Card Making Day (WCMD) and it's held on October 1st every year!

Now that you know a little bit more about WCMD I hope you're planning to join in the fun and make and share a card with someone.  Gather your friends at your home or favourite stamping hang out, join a class, or stamp with an on-line group.  There's lots of ways to celebrate!  Here's a little video to inspire you to join World Card Making Day:
 

To help with your celebration of WCMD, Stampin' Up! will be offering some specials from October 1-5th. Although I don't know all the details right now, I've heard they're offering discounts  of up to 25% on the Designer Tin of Cards Project Kit, Fast Fuse, and some other cardmaking basics during that time.  I'll share the details as soon as I know more, so you don't miss out.  

Happy Stamping!
Penny Tokens Stampin Spot

September Hostess Code:   2KDCKBQE
Don't forget to apply the Hostess Code if your order is under $200.00 and I'll send you a gift for shopping with me.  Click here to go to my On-Line Store.

Wednesday, September 21, 2016

WWC86 Gail's Simply Stamping Challenge - FALL

Whew, what a weather change over the weekend! We went from sunshine and warmth to gray skies and rain!  Not to be deterred, my friend and I decided to go to the wonderful Fall Country Fair in Mt. Lehman and see what they had to offer.  Normally when I've gone the the sun is shining, there's that cool crisp feel in the air.  Not today!  The poor vendors and visitors were subjected to Monsoon type rain.  

And, as if the weather wasn't enough a transformer or something blew and all the inside venues were in the dark.  Outside it was absolutely pouring cats and dogs, so folks were huddled under tents or running from one event to another.  I saw a lot of smiles though, so people were enjoying themselves.

When we were leaving we had to run a half a block from the hall to the car.  I had water dripping down my neck, hair plastered to my head, and squishy runners. What fun, I felt like I was six years old as I ran through the puddles.

When I got home all I wanted to do was dry off, grab a mug of hot chocolate, and spend the rest of the afternoon in my stamp room by the fireplace. It actually worked out great because it put me in the mood to work on Gail's WWC86 Fall Simply Stamping Challenge.  

Here's My Card:

Gail's challenge photo inspired me to grab my Fall colours and one of my new stamp sets Jar of Haunts to create a colourful Pumpkin patch. 
Jar of Haunts Photopolymer Stamp set Coordinates with the Everyday Jars Framelit Set

Unfortunately my enthusiasm and creativity ground to a halt fairly quickly.  Why?  Well this is a "simply stamping" or "clean and simple" only challenge, and I had to really think about what I was making.
I don't know about you, but I find "simply stamping" a real challenge because it means there are no additional layers or card stock, other than the one you're stamping on.  And, it also means no die cuts, no bling, no ribbon and/or additional accessories allowed on the card.  Once again, "simply stamping".  

Supplies:
Stamp Sets:  Jar of Haunts, Thoughtful Branches, Thankful Forest Friends (R), Itty Bitty Stamp set
Ink:  Early Espresso, Old Olive, Pumpkin Pie, So Saffron, Tangerine Tango
Card Stock:  Always Artichoke, Ivory Flecked Specialty Card Stock (R)
Accessories:  Trimmer, Tom Bow Adhesive, Wink of Stella, Blender Pen, Aqua Painter.

Assembly:
1.  An Always Artichoke card base was cut to measure 8 1/2" x 5 1/2" and scored at 4 1/4" for a side fold card.

2.  A 5 1/4" x 4" piece of Ivory Flecked Specialty card stock was used for the watercolour layer. I love this card stock even though it's been retired for a while, and kept a huge stock on hand.  Its rough texture and porous nature make it work with water colouring techniques as long as you don't saturate the paper.  

3. The pumpkin images were created using a mask.  To make the mask  I simply stamped a pumpkin image onto a Post It Note then fussy cut around it, retaining some of the sticky part.  I stamped the first pumpkin in Early Espresso ink and then applied the mask then stamped the second pumpkin.  I repeated this for the third pumpkin.  Note:  Early Espresso is a classic ink and not really made for water colouring.  A better choice would have been brown Staz on Ink or Black Archival ink.   

4.  Place the mask over each pumpkin before stamping the pumpkin handle and tendril leaves. The leaves were stamped in Old Olive and a blender pen was used to move the colour around.  An aqua painter and sponge dauber were used to colour the pumpkins, again in Pumpkin Pie, Tangerine Tango and So Saffron.  Parts of the pumpkins were shaded with Old Olive ink. 

5.  I added a grass texture with a stamp from the Thoughtful Branches stamp set in Always Artichoke and Old Olive.  I sponged the bottom of the card with Old Olive to build up the grass.
This stamp set is still available in my On Line store.  It was the August special

6. Pumpkin Pie, Tangerine Tango, So Saffron, and Old olive inks were sponged around the top and sides of the card faceNote:  Always begin your  blending from off the card stock moving towards the center, so you don't get harsh ink marks.

Originally I planned to create a tree trunk and branch starting from the bottom left of the card face and overhanging the pumpkins.  I began by using a stencil with diamond shapes on the upper half of the card, in hopes of creating a leaf bower effect.  Well that didn't turn out as planned, so rather than scrap the card face I blended out the diamond shapes with a sponge dauber.I created a much denser sponging than I had anticipated but it worked to mask off the diamond leaf effect.

7. The sentiment "Give Thanks" from the Thankful Forest Friends retired stamp set was stamped in the upper left corner in Early Espresso Ink.

8.  I cut and adhered a 5 1/4" x 4" piece of Ivory Flecked DSP to the inside of the card and left it blank. 

9.  To finish the card I used a small dotted texturizing stamp from the retired Itty Bitty stamp set to add tiny dots in Old Olive and Early Espresso ink across the face of the card. The pumpkin tendrils and outlines of the Pumpkins were traced with Wink of Stella.


Despite my initial hesitation and grumbling, I finished this card in record time and really enjoyed how it turned out.  I hope you like it too!  Leave me a comment.  I hope you'll check out the rest of the Watercooler Wednesday design artists and that you'll try out our "WWC86 - Simply Stamping" Challenge.  We'd love to have you come and join us this week. 

Happy Stamping!
Penny Tokens Stampin Spot

September Hostess Code:   2KDCKBQE
Click here to go to my On-Line Store.  Don't forget to apply the Hostess Code if your order is under $200.00 and I'll send you a gift for shopping with me. 

Words of Comfort FMS Challenge 634

Sometimes you just need some comforting words and to know that someone's thinking of you.  I felt that this week's Freshly Made Sket...