Thursday, June 18, 2015

The Wacky Watercooler Blog Hop Welcomes the New Annual Catalog(ue)


Hi everyone and welcome to my contribution to the June Wacky Watercooler Blog Hop

This month we're celebrating the launch of the new 2015-2016 Share the Fun Annual Catalogue, and projects related to Father's Day, Graduation and "something new".  

There are lot's of participants in this blog hop so I hope you'll play along and visit everyone's site between now and Saturday night (June 20th).  There are some awesome projects that I know you're going to love!

If you've been following the blog hop from the beginning you will have arrived here from the wonderful and talented Jackie Susnick's blog.  

Father's Day Project:

For my first project, I've made a Father's Day Card using the Guy Greetings stamp set featured on page 98 of the catalogue. Before I share my card, I just want to express how grateful I am that this stamp set was carried forward from the Spring Occasions catalogue.  It is probably one of the best male themed stamp sets I've used in a long time. 

Guy Greetings Stamp Set #137178 is a 22 piece stamp set that comes in Clear or Wood Mount and Photopolymer, and is available in English and French versions.  
Here's My Card:
Love that Tip Top Taupe Striped paper from the Cherry on Top DSP Paper Pack. 
Supplies:
Cardstock:  Whisper White, Chocolate Chip, Watermelon Wonder and Tip Top Taupe
Ink:  Tip Top Taupe,  Watermelon Wonder
DSP: Cherry on Top  Designer Series Paper Stack #138443
Accessories:  Extra Large and Large Oval Punches, 1" and 1 1/4" square punches, scissors, trimmer, adhesive and dimensionals.  


Graduation Card 
Since my niece is graduating this month, I wanted to make her a special graduation card.  While scouting around on the internet for graduation card ideas I found one by Glenda Caulkins of The Stamp Camp blog, that really caught my interest.  As the school colours were exactly what I was looking for, I decided to CASE her original card, with is called a "Peek A Boo Front Flip card".  You can see Glenda's card here, and here's my original CASE with a couple of changes.
This is a flip top fancy fold card.  Just the center part opens up.  I'll be posting more details and a brief tutorial on how this card and the shaker card below are assembled in my Sunday post, so make sure you come back and check it out.
When you open the flip top you have room to right your message below the sentiment.
When I was asked to make something with a graduation theme for this blog hop, I wanted something a little more exciting so I used the same card colours and stamp set, but designed a "shaker" card.

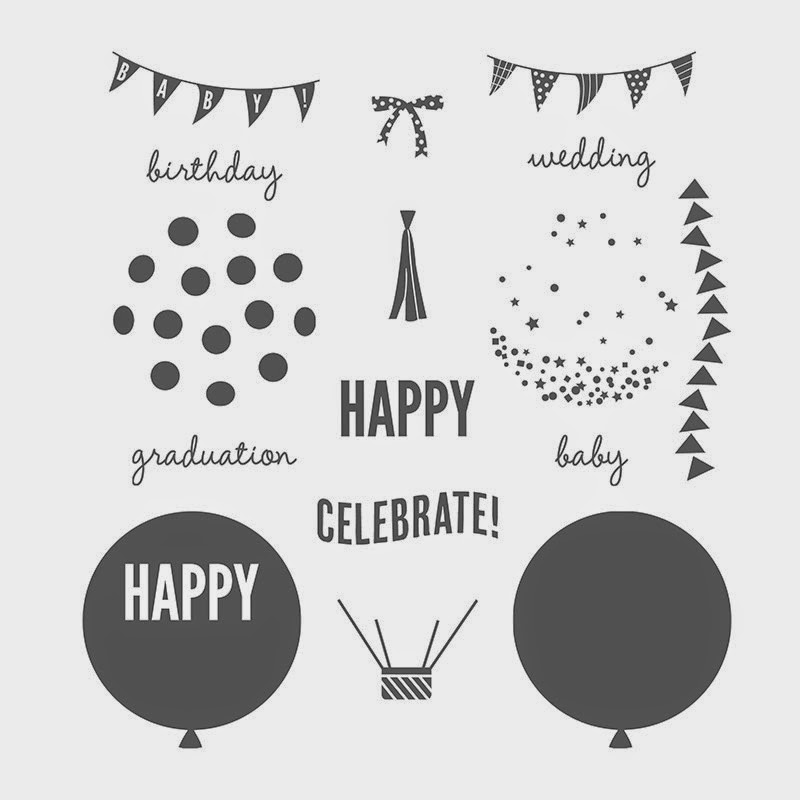
Both cards were made with the Celebrate Today stamp set, another carry over and favourite of mine. 


Here's my graduation shaker card:
 

I added some gold and royal blue seed beads along with the Metallic Sequins to the inside of the balloon shaker.  What fun!  The sentiment is embossed with Gold Embossing Powder.
Supplies:
Stamp set:  Celebrate Today

Cardstock:  Very Vanilla, Night of Navy and Gold Foil 
Ink:  Versa Mark 
Accessories:  Balloon Framelits, Metallics Sequin Assortment, Gold Seed Beads (non-SU), Fun Foam, Adhesive, Gold Stampin' Emboss Powder, trimmer, Big Shot
 
This is the bundle which includes 17 Photopolyer two-step stamp images and 4 framelit dies.  By purchasing these products as a bundle, you save 15% off the original price.


Something New 
For my "Something New" project, I wanted to share a combo gift card holder and birthday card made with this year's Ronald McDonald House (RMH) Charities stamp set "Sprinkles of Life".  Did you know that for every Sprinkles of Life stamp set sold, Stampin' Up! contributes $3.00 towards the RMH Charities?  I think that's so awesome!

Sprinkles of Life is a 22 piece Photopolymer stamp set that you're absolutely going to fall in love with.  It has a matching punch called the Tree Builder which helps you cut out all those ice cream or cup cake tops in the blink of an eye!
Here's My Card:


The gift card holder on the inside of the mini gift bag. 
Here you can see the gift card holder with an actual gift card inserted in it. 
Supplies:
Cardstock:  Daffodil Delight, Cucumber Crush, Watermelon Wonder, Mint Macaron, Tip Top Taupe and Whisper White 
Ink:  Watermelon Wonder, Cucumber Crush, Tip Top Taupe, 
DSP: Cherry on Top  Designer Series Paper Stack #138443
Accessories:  Tree Builder and Banner Triple Punches, Mini Treat Bag Thinlits, Dazzling Details, sequins, trimmer, adhesive and dimensionals.
The Banner Triple Punch gives you triple the banner options in one punch. You can make banners in three widths--1", 1-1/2", and 2"--in any length. Just slide the paper in, punch, and get perfectly notched banners (or gift tags, bookmarks, belly bands) every time. * Punch size: 3-3/8" x 5-3/4" x 1-1/4"
Well that's the end of my projects for this month. Enjoy the remainder of the blog hop... and thanks for stopping by!  

Since this is a circular blog hop you have some choices about how to proceed.  You can click on the "next" button below to move on to the awesome Kath Rick's blog or move back to Jackie Susnick's.  You can also click on the Home link and go back to the beginning of the hop where all the participant's blog links are listed.  Come back and visit again soon!

Click here to go to Kath Rick's incredible blog


Click here to go back to Jackie Susnik's blog
If you want to start at the beginning of the blog hop you can click on this link to go back to the Wacky Watercooler Blog Hop site for the list of participants.  

Tuesday, June 2, 2015

Share The Fun - Launch

 
Today is a very special day in the stamping world!  What's so special about June 2nd, you might ask?  It’s the day we’ve all been waiting for--the 2015-2016 annual catalogue is here!  You can begin ordering all the fun new products from the new catalogue. In addition, this is the last day to order from the 2014-2015 annual catalogue and the occasions catalogue.
How to take advantage of all that's going on:
  • Place an order of $200 or more today and receive hostess benefits of $35 or more. Select your free items from any of the three catalogues (note: some items may already be retired).
  • Doing what I love, and sharing what I love with others are just a few of the benefits that made me decide to become a Stampin' Up! demonstrator. I love sharing my passion for stamping with family and friends, meeting new people, and having the chance to build a great business doing so. I also get to set my own schedule and that is a definite plus!  Choose any two stamp sets from the new annual catalogue when you join Stampin’ Up! as a demonstrator June 2–June 30, 2015
 

  • Purchase a Stampin’ Up! Starter Kit for only $125 in June and receive:
    • $155 in your choice of products
    • Two free stamp sets of your choice from the new catalogue
    • Free Shipping on the kit and the GST is paid
    • A discount of 20% or more on all future orders as a demonstrator
     
    Click here and select  to get started
      
    June 3rd is the first day for the new 2015-16 Stampin’ Rewards program seen on page 178 of the new catalogue.
 
Happy Stamping!
Penny Tokens 


Catalogue Launch Party
10:00am to 2:00pm
Saturday June 6th, 2015 
RSVP 778-880-1296


Sunday, May 31, 2015

May Hostess Code.........Extension to June 2, 2015

While we're counting down the hours until the new annual catalogue is launched, some other  important deadlines are coming up fast:

May Hostess Code #BD37E4S4 expires on May 31st*, June 2nd, so if you've got an order under $200.00 and  want to take advantage of the Hostess Code Club Offer don't delay.  Check out this link for ordering details on how to get and use the code. 
*I'm holding the May Hostess Code over until June 2nd, to take advantage of the catalogue transition period.  From this point forward all monthly hostess codes will end on the last day of the month they are generated.


Retiring Stamp Products can only be ordered until June 2nd when the new catalogue goes live, so if there's something you want from the 2014-15 Annual Catalogue, Occasions Catalogue or Clearance Rack, don't delay.  Click here to check out the retiring stamp set and accessories lists.

Catalogue Transition
  • June 2nd is the last day to order from the current 2014-2015 annual and occasions Stampin' Up! Catalogues!

  • June 2nd is also the FIRST day to order from the NEW 2015-2016 Stampin' UP! Catalogue!
  • All carryover items from the 2014-2015 annual catalogue and 2015 occasions catalogue will keep their 2014-2015 prices on June 2, while brand-new items in the 2015-2016 annual catalogue will follow the 2015-2016 printed price. Beginning 3 June, all 2015-2016 pricing will take effect.
  • Current host program benefits will remain in effect on June 2. However, beginning June 3, all new host benefits (Stampin' Rewards) will take effect for orders over $200.
  • On June 2, hosts may choose hostess items from the 2014-2015 annual catalogue, the 2015 occasions catalogue, or the 2015-2016 annual catalogue for orders over $200.

  • Beginning June 3, hosts will no longer be able to choose host items from the 2014-2015 annual catalogue or the 2015 occasions catalogue, and the new Stampin' Rewards program will begin for orders over $200.
Feel free to contact me if you have any questions.


Happy Stamping!
Penny Tokens

Thursday, May 28, 2015

Celebrate Today Birthday Wishes!

May is a totally huge birthday month for me.  Probably my biggest month of the year!  I know so many people who are celebrating their special occasion, that it's kept me busy churning out cards and today I'd like to share three of them with you.

This is a Peek-A-Boo Flip Top card in Bermuda Bay, Calypso Coral and Whisper White card stocks.  The DSP that you can just barely see is from the new Annual Catalogue, and I know it's one that you're going to want to own. 

The balloon is cut out with the Balloon Framelits which gives a perfect finish every time.  I just love these framelits! 
The Happy Birthday sentiment that's stamped in Calypso Coral ink is from the Celebrate Today stamp set.  This perfect 17 piece photopolymer stamp set has lots of sentiments and balloon images as you'll see in my next cards.
My second birthday card uses a fun combination of Watermelon Wonder and Cucumber Crush two of the 2015-2016 In Colours paired with Bermuda Bay card stock.  Wow what a happy colour combo!  You'll be seeing them a lot as summer approaches and the new catalogue season gets under way!


This is a shaker card that I made using a new-to-me technique with fun foam.  I'm currently writing a tutorial on this technique and for the Peek A Boo Flip Card and plan to post these tutorials in early June.  I hope you'll come back to check them out.

Once again I used the Celebrate Today stamp set, the Balloon Frame Lit dies  and that oh so special DSP from the 2015-2016 Annual Catalogue.  You can save 15% on the dies and stamp set by purchasing them as a bundle. 


The sentiment on the inside of the card is from "Remembering Your Birthday" stamp set.
Remembering Your Birthday in Wood and Clear Mount styles.

My third and final card was once again made with the Celebrate Today stamp set and is a warm mix of Cantaloupe Crisp, Island Indigo and Hello Honey card stocks and inks.  I think you're going to like this one too!  This card design could easily sub for a Grad Congratulations card and the colours could be changed up to reflect the school of the recipient..... just a thought!


The Hello Honey card base was embossed with the Lucky Stars Embossing Folder.  The DSP is from the All Abloom DSP Paper Stack that will be retiring soon. 

The birthday sentiment is from the Petite Pairs stamp set. 
And that's my three birthday designs made with the Celebrate Today and Balloon Framelit Dies.  I hope you enjoyed this post and will return in June to see the tutorials.  

Happy Stamping!
Penny Tokens 


Sunday, May 24, 2015

Celebrate Today & Make a Wish


Hi everyone!  Hope your Sunday is a little brighter and sunnier than ours is.  

It's currently cloudy and on the verge of rain.  One good thing about the weather not being so enticing outside is that I get to play in my stamp room today...........yeah!

Last Tuesday when I was making cards with my bestie Sheri, we were working on a Colour Challenge put out by Just Add Ink.  The colour mix was Calypso Coral, Pear Pizzazz, Pool Party and Crumb Cake. Nice combination right? 


Well, as I sometimes do, I suckered myself into using Pear Pizzazz for the background on my card, even though my better judgement was screaming "go neutral" keep it "clean and simple".  

In the end because of my misguided decision followed by my indecision and dissatisfaction, I missed the post time for this challenge.  Urrrrrrrrgh!!! The final birthday card was finally finished a few days later after much creative angst and major revisions, but the good news is it did get finished and even though it was late for the challenge I decided to post it here.  


Here's the card I came up with: 


The card in MHO is overwhelmed by the Pear Pizzazz background which I tried to make more interesting by embossing with the Lovely Lace embossing folder.  I'm pretty sure that if I'd stuck to a Whisper White background for the card base and the stamped layer I think it would have worked better. Sometimes as the saying goes "less is more".


Along with the colour challenge we were eager to try out a new to us fancy fold technique called a "corner fold card".  This is a great card technique and takes very little time or effort to accomplish.

I'm not going to give you the dimensions and details for completing a corner fold card in this post as you can find several good examples on Youtube .  The one we chose to follow was done by Linda Bauwin.

Supplies:
Stamps:  Celebrate Today, Perfect Pennants
Ink:  Calypso Coral, Pool Party
Card Stock: Calypso Coral, Pear Pizzazz, Crumb Cake and Whisper White 
Accessories:  Balloon Framelit Dies, Lovely Lace Texturized Embossing Folder, Trimmer, Big Shot, Basic Rhinestones, Dazzling Details Glimmer Adhesive in Dazzling Diamonds, Note Tag and 1/2" Circle Punches, Snips, Crystal Effects, Adhesive, Dimensionals

Some Details:

Originally I stamped the birthday balloon from Celebrate Today in Pool Party ink on the whisper white layer, and coloured in the word happy with Calypso Coral blendabilities.  I also stamped the sprinkled stars image over top of the balloon and added some Dazzling Details glimmer adhesive to the stars.

One thing about the 17-piece Celebrate Today set is that you get so many creative options and can combine individual stamps to build the final image you want in the colors you want.  I decided to use some more of the images  to dress up this card.  I stamped 4 of the shaker images on Pool Party card stock with the matching ink.  I layered two of the shakers and then cut small strips below the tab part to make them look 3 dimensional.


The banner was stamped in Calypso Coral on Whisper White card stock and then cut out using the Balloon Framelits (love those).  To add a lacquered look to the banners I covered them with Crystal Effects and let them dry before adhering some small rhinestones. 


I fussy cut the balloon tail which was stamped in Calypso Coral on Crumb Cake cardstock and used dimensionals to adhere it to the card base.   I finished it off by adding basic rhinestones in every second tail.  

I stood back, looked at the card and I still wasn't satisfied.   By now I'm sweating because time is ticking on the challenge clock and I so wanted to enter my card.  "What's a girl supposed to do?"

Well, I'll tell you, in frustration I went back to the drawing board, removed all the added details from the card front, that's right stripped it right back down to just the balloon image, and then I stared at it.   I hummed, played on the computer, looked at other stamp sets, planned dinner, and still nothing.  

Then, failing inspiration and in desperation, I did what all good stampers do when they get stumped............. I went and ate a bunch of chocolate and pondered what to do.  And finally the "ah ha" light went off in my head as inspiration hit me!  

It was while I was "wishing" for an idea to hit me that I remembered the "Make a Wish" sentiment stamp in the Perfect Pennants stamp set.  


Bingo this would be the perfect sentiment to layer onto the balloon and I could use my Note Tag Punch to cut it out.  I stamped the image in all four of the colours from the challenge to see which one would work best on the card front and chose to use a Calypso Coral on Crumb Cake.  I punched out the "a" from one of the tags I'd stamped in Pool Party with a 1/2" circle punch and then  mounted it with a dimensional to the center of the tag.  

The rest was easy peasy.  I re-attached the shakers, banners and balloon tail, and stamped the inside of the card with another balloon image.  I missed the challenge but, I did finish the card and that was important to me, along with being satisfied with the second attempt. 


I hope you enjoyed this card and the journey I took to finish it.  How about you, have you experienced my "I'm not satisfied" feeling, and if so what did you do about it?  I'd love to hear your story.  Please share and links to your card if any.  

Happy Stamping!
Penny Tokens

May Hostess Code is in effect Until May 31st:   BD37E4S4

Saturday, May 23, 2015

Sizzling Hot Birthday Wishes! & Sneak Peek

Hi Stampers!  Today I finished up what I consider a totally hot, girly birthday card and it has a surprise sneak peek from the new catalogue that's "just for you".  

Have I captured your interest yet?  I hope so because the card I'm about to share with you was fairly sizzling while I photographed it.  The marriage of Calypso Coral, Lost Lagoon and Hello Honey make me think of sunshine, beaches, tropical nights, fiestas and sangria. 

Here's My Card:


 Supplies:
Stamp Sets:    
  • Sneak Peek Alert!!!!! The "Happy Birthday" sentiment stamp is a sneak peek from the new catalog, so I can’t provide you the link, a stamp name, or picture until June 2nd when the catalog goes live, but I can tell you when it’s available it will be on page 179 and it can be purchased with hostess dollars. 
  • I Love Lace Background Stamp
Item Number 134036 I Love Lace Background Stamp will retire on June 2nd, 2015
Card Stock:  Whisper White, Lost Lagoon, Hello Honey, and Calypso Coral
Ink:  Calypso Coral, Hello Honey, Lost Lagoon
Accessories:  Scalloped Punches 7/8", 1 1/4", 1 3/8" and 2 3/8", Lovely Lace Textured Embossing Folder ,Big Shot, Trimmer, Mini Gift Bag Framelit Dies, Lost Lagoon Taffetta Ribbon*, Flower Embellishment*, Small Leaf Sizzlet*, White Tulle*.
Lovely Lace EF Item Number 13337 retires June 2nd, 2015
 Note:  Items marked with (*) in supplies list have previously retired and are not available.

I stamped the Calypso Coral cardstock with the I Love Lace background stamp before punching out the flowers with the various sized scallop punches noted above.  
Assembly:
  • The card base was cut from an 81/2 x 11 piece of Whisper White Card stock and scored at 4 1/4".  
  • The next layer of Lost Lagoon card stock measures 5 3/8" x 4 1/8".  
  • The Hello Honey layer which measures 4" x 5 1/4" was embossed with the Lovely Lace Texturized Embossing Folder.
  • The next layer which measures 4 3/4" x 3 1/2" was one of the left over pieces of watercoloured backgrounds that I made for the Wacky Watercooler Challenge and I discussed here.  I embossed this piece with the Lovely Lace Texturized Embossing Folder too.  
  • A 5" strip of Lost Lagoon Taffeta Ribbon* was adhered to the center of the layer with sticky strip.  I love this ribbon it's simply gorgeous.  I grabbed a few of these before they retired, because I know I'm going to use this ribbon a lot.   
  • The flower is comprised of four layers of scallops.  After stamping and punching out the scallops I crumpled them up into little balls to break up the paper fiber and then I sponged the outer edges of each scallop layer with Lost Lagoon and Calypso Coral to give the layers some additional texture and interest.
  • The flower layers were assembled with large glue dots, and a flower embellishment was added to the center.   
  • Two scraps of white tulle were adhered below the flower to add some sparkle and also the small leaves in Lost Lagoon were sponged and then adhered to the sides of the flower. 
  • The sentiment "for you" was die cut in Lost Lagoon with one of the framelits in the Occasions Mini Treat Bag Framelit Die set. 
 
Mini Treat Bag Framelit Die ......... lots of extra great dies in this set.
 
I used scraps of the water coloured background design and lost lagoon to form a band on the left hand side of the card's interior. 


Thanks so much for stopping in to visit me today, I hope you've enjoyed my blog post and samples.  Feel free to C.A.S.E. this card.  If you need products to create it – I would love to be your demonstrator, simply use my “shop with me” button below, or contact me and I would be happy to place your order for you.


Happy Stamping!
Penny Tokens  

Friday, May 22, 2015

Birthday Cards from left overs

Do you hoard scraps, bits of paper, pieces of ribbon and embellishments?  I do.  Yes, I'm guilty as sin when it comes to paper and ribbon hoarding and I'm proud of it!  

I can't throw away mistakes or technique samples, extra punched or stamped images, one off buttons, embellishments and 2 inch scraps of ribbon, because I know in my heart of hearts there's the odd chance I'll use them.  So they're stashed away on a shelf at my creation station in little baskets just like the one above, just waiting for that "ah ha" moment!
 
I just can't throw these "extras" away!

During a recent Wacky Watercooler Challenge that called for silhouette stamping on a watercolour backgound, I wound up with several sample watercolour pieces that I didn't use.  You guessed it, I stashed these background pieces away waiting for just the right moment to haul them out and construct something else. The following are two birthday cards I made utilizing the two left over background images in the center of this photo.
While trying to create a suitable background for the challenge, I applied Calypso Coral, Lost Lagoon and Hello Honey inks with re-inkers to the raised part of a Mosaic Madness Embossing Folder and then covered them with Natural Ivory card stock.  I ran one piece through the Big Shot while it was still wet (not a good idea as I left a big mess behind), and the other two I simply applied pressure to the outside of the folder with my hands to transfer the images.  The results were fascinating, in that none of the pieces were alike.   

Here are the two cards I made:

For my first card, I layered the cardstock in the three ink colours noted above, starting with a Hello Honey base measuring 8 1/2" x 5 1/2" and scored at 4 1/4".  This was followed by a layer of Calypso Coral measuring 5 1/4" x 4" and a Lost Lagoon layer measuring 5" x 3 3/4"  I cut the embossed layer down to 4 3/4" x 3 1/2".  

I stamped the small floral motif in Lost Lagoon randomly on the embossed background layer.  Both of the butterfly images and the 3" piece of Lost Lagoon taffeta ribbon I added were in my stash, left over from a month or two ago when I was stamping with the Basic Butterfly stamp set.  I added a few basic rhinestones to the center of the butterfly.   


Since I can't throw anything away, I wound up with a small strip of the embossed background piece which was ideal for using as a layer on the inside of the card.  I carried the butterfly and floral theme to the inside of the card by stamping the lacy flower butterfly, small flower and happy birthday sentiment from the Butterfly basics stamp set in Lost Lagoon ink. 


In this closeup, you might see something unusual about the Modern Mosaic Embossing folder image. Trust me you're not seeing double and they haven't changed the folder.  I created this effect by running the embossing folder through the Big Shot twice.  The first time through was to create the normal image and the second time through I offset the cardstock about an eighth of an inch.  I really think this creates a neat effect, even if I do say so myself. 

For my second birthday card I used one of the more subdued water colour backgrounds and a wonderful stamp set called Celebrate Today that will be carrying over into the new catalogue.   When I added the inks for this one I really used the water spritzer to move them around on the card stock, so it blurs the image of the mosaic. 


Once I used Calypso Coral, Lost Lagoon and Hello Honey inks for this background. The base of this card is made from an 8 1/2 x 11 piece of Natural Ivory cardstock (retiring) scored at 4 1/4"  The Lost Lagoon layer was left over from a card class I did a few months ago and had been embossed with the Polka Dot Textured Embossing Folder.  You can just barely see the embossing behind the background layer.  The ties on the balloons are from leftover butcher cord in Calypso Coral.  Both balloons were die cut using the coordinating Balloon Framelit Dies.
This is the inside of the card.  I added a strip of the embossed folder at the top of the inside layer for some additional detail.  The inside Natural Ivory cardstock piece measured 5 x 3 3/4".   I love the tail on this balloon.  Makes me smile!


Well that's it for today folks.  I hope you're now inspired to use your scraps.  I'd love to hear how you make use of them and whether you're as big a hoarder as I am.   How do you save your scraps?

Happy Stampin!
Penny Tokens 

Leave me a comment I'd love to hear from you

Rock Star Masculine Birthday Card

We finally have some good weather and have spent the week tidying up in the garden and the garage.  Visits to the recycling plant to get rid...