 Hi everyone and welcome to my contribution to the June Wacky Watercooler Blog Hop.
 This month we're celebrating the launch of the new 2015-2016 Share the Fun Annual Catalogue, and projects related to Father's Day, Graduation and "something new".
There are lot's of participants in this blog hop so I hope you'll play along and visit everyone's site between now and Saturday night (June 20th). There are some awesome projects that I know you're going to love!
If you've been following the blog hop from the beginning you will have arrived here from the wonderful and talented Jackie Susnick's blog.
Father's Day Project:
For my first project, I've made a Father's Day Card using the Guy Greetings stamp set featured on page 98 of the catalogue. Before I share my card, I just want to express how grateful I am that this stamp set was carried forward from the Spring Occasions catalogue. It is probably one of the best male themed stamp sets I've used in a long time.
 |
| Guy Greetings Stamp Set #137178 is a 22 piece stamp set that comes in Clear or Wood Mount and Photopolymer, and is available in English and French versions. |
 |
| Love that Tip Top Taupe Striped paper from the Cherry on Top DSP Paper Pack. |
Cardstock: Whisper White, Chocolate Chip, Watermelon Wonder and Tip Top Taupe
Ink: Tip Top Taupe, Watermelon Wonder
DSP: Cherry on Top Designer Series Paper Stack #138443
Accessories: Extra Large and Large Oval Punches, 1" and 1 1/4" square punches, scissors, trimmer, adhesive and dimensionals.
Graduation Card
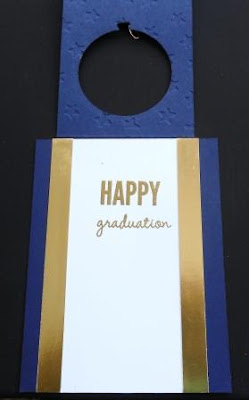
Since my niece is graduating this month, I wanted to make her a special graduation card. While scouting around on the internet for graduation card ideas I found one by Glenda Caulkins of The Stamp Camp blog, that really caught my interest. As the school colours were exactly what I was looking for, I decided to CASE her original card, with is called a "Peek A Boo Front Flip card". You can see Glenda's card here, and here's my original CASE with a couple of changes.
 |
| When you open the flip top you have room to right your message below the sentiment. |
Both cards were made with the Celebrate Today stamp set, another carry over and favourite of mine.
 |
| I added some gold and royal blue seed beads along with the Metallic Sequins to the inside of the balloon shaker. What fun! The sentiment is embossed with Gold Embossing Powder. |
Stamp set: Celebrate Today
Cardstock: Very Vanilla, Night of Navy and Gold Foil
Ink: Versa Mark
Accessories: Balloon Framelits, Metallics Sequin Assortment, Gold Seed Beads (non-SU), Fun Foam, Adhesive, Gold Stampin' Emboss Powder, trimmer, Big Shot
 |
| This is the bundle which includes 17 Photopolyer two-step stamp images and 4 framelit dies. By purchasing these products as a bundle, you save 15% off the original price. |
Something New
For my "Something New" project, I wanted to share a combo gift card holder and birthday card made with this year's Ronald McDonald House (RMH) Charities stamp set "Sprinkles of Life". Did you know that for every Sprinkles of Life stamp set sold, Stampin' Up! contributes $3.00 towards the RMH Charities? I think that's so awesome!
Sprinkles of Life is a 22 piece Photopolymer stamp set that you're absolutely going to fall in love with. It has a matching punch called the Tree Builder which helps you cut out all those ice cream or cup cake tops in the blink of an eye!
Here's My Card:
 |
| The gift card holder on the inside of the mini gift bag. |
 |
| Here you can see the gift card holder with an actual gift card inserted in it. |
 Supplies:
Cardstock: Daffodil Delight, Cucumber Crush, Watermelon Wonder, Mint Macaron, Tip Top Taupe and Whisper White
Ink: Watermelon Wonder, Cucumber Crush, Tip Top Taupe,
DSP: Cherry on Top Designer Series Paper Stack #138443
Accessories: Tree Builder and Banner Triple Punches, Mini Treat Bag Thinlits, Dazzling Details, sequins, trimmer, adhesive and dimensionals.
Since this is a circular blog hop you have some choices about how to proceed. You can click on the "next" button below to move on to the awesome Kath Rick's blog or move back to Jackie Susnick's. You can also click on the Home link and go back to the beginning of the hop where all the participant's blog links are listed. Come back and visit again soon!
 |
| Click here to go to Kath Rick's incredible blog |
 |
| Click here to go back to Jackie Susnik's blog |
 |
| If you want to start at the beginning of the blog hop you can click on this link to go back to the Wacky Watercooler Blog Hop site for the list of participants. |


