Tuesday, July 31, 2012

Wedding Card CASe

This weekend my husband and I attended Kim and Ross' wedding, and from the time I received their invitation, I knew I wanted to make a very special card for this couple. 
While at convention I saw several wedding card samples, but one in particular really stood out for me.  I decided I wanted to CASe or recreate this  beautiful card. 

Note:
Although I spoke briefly with the very gifted and talented stamper who made the original card, I didn't get her name in order to credit her.  So, if anyone recognizes this card and/or
attended Convention and knows who created it, please let me know so I can give credit where credit is due.

One of the reasons this wedding card stood out for me is the use of the Framed Tulips Embossing Folder to make a square card face.  What a great and unusual technique! 

Here's my version:


For the card base I cut a 6 x 12 inch piece of Textured White Card stock.  I added a layer of Basic Black cut to 5 3/4 by 5 3/4.  I then cut a 5 1/2 x 5 1/2 layer of Shimmer White card stock for the next layer which I embossed with the Tulip Frame Embossing Folder. 

To emboss the square on this piece I placed the 5 1/2 x 5 1/2" piece of card stock inside the embossing folder so the edges were straight and even on the top and two sides and then I ran it through the Big Shot Machine.  I was careful to only roll 2 3/4 inches into the card, then I rolled the plate backwards until I could remove it from the machine. I then carefully placed the Embossing Folder on the non-embossed side of the card and repeated this half-way roll process.  The result is a perfect square tulip frame on this square layer. 

Note: Because the Embossing Folder has to be rolled through the Big Shot sideways, this causes a lot of pressure and stress on the EF seam, so I would recommend not doing this process for swap or multiple cards.
Tulip Framed Embossing Folder
The rest of the card was pretty straight forward.  I cut the beautiful heart shapes with the new Heart Framelits die cuts.
Heart Framelit Die Cuts
I embossed the layers with the Vintage Wallpaper and the Fancy Fold Embossing Folders and then stacked the heart shapes in layers using dimensionals between each heart layer.  Before adhering the finished heart to the card front I added some Whisper White Taffeta Ribbon and tied a bow using a Clear Fire and Ice brad. 
Fancy Fan Fold Embossing Folder.  The original card used small individual flowers cut with BoHo Blossoms Punch.


Vintage Wallpaper Embossing Folder

The two small birds are cut out using the Bird Builder Punch.  The wing on each bird is mounted with dimensionals and a small basic rhinestone was added for the eyes. 
Here's a view of the finished inside of the card:


I repeated the layering on the inside of the card with the large and medium hearts and stamped the sentiment "happy I do day" from the Word Play stamp set in black stazon ink and then embossed it with clear embossing powder and heat set.  A medium sized basic rhinestone was added to the ring. 

I double layered the shimmer white and basic black card stock to give more balance to the page.  And, although you can't see it in this picture, I typed out a message to the bride and groom and printed it out on Whisper White cardstock, then cut it out in a heart shape and adhered it to the center of the left side of the card. 

Hope you enjoyed and here are some shots from Kim and Ross's Wedding which I think you'll enjoy. Kim is very creative and did most of the displays herself.   


Snail Adhesive Changes

Do you buy Stampin' Up!s SNAIL Adhesive? If so, this note is to let you know about a change that's coming.

Stampin' Up! will be switching the type of liner used in their SNAIL Adhesive. The new liner will be tinted blue and it'll be thinner than the previous liner, making the roll appear to have less adhesive.

Rest assured that you're still getting the same amount of adhesive; the only change is the liner itself due to the supplier no longer carrying the current one.

If you haven't tried SNAIL Adhesive before you should.  Why?  Because you get 472" of this permanent double-sided strong bond adhesive in every SNAIL Adhesive cartridge.  It's great for cards, scrapbooks and other art projectsSNAIL applies a controlled amount of adhesive directly to your project, so both your hands and work area never get sticky. You only need a small amount to create a strong bond, so your cartridge lasts a long time. You can also order refills that slip right into the cartridge case, so you’ll never find yourself without your SNAIL. I know you’ll love this adhesive, and it’s a great price, too! Click here for more information.

Friday, July 27, 2012

Convention Swaps and Pictures

Here's a peak at some of the awesome swaps I received at the two Late Night Stamper swaps I attended.  I haven't finished going through them yet, but will be taking pictures of individual cards and posting them with credits to the creators.  Stay tuned!

This is one of the Christmas display boards that were on view.  Imagine my surprise and delight to see one of my cards smack dab in the middle of the board............ It's the one done with Christmas Collage in Island Indigo.  Hey Stampin' Up!  thanks for posting it.  What a thrill!

The next cards were posted on the display boards at Convention and really caught my eye.  Although I don't have the names of the gals who created them, I thought they were so share worthy!  Enjoy


This card using the pinwheel technique was posted on the Hispanic boards.  Did they ever have some beautiful cards and three dimensionals on display. 

The next few shots are again from the Hispanic boards and were just delightful.


This last one was from the Valentine Display and I loved the texture and how they used rolls of DSP and buttons. 
If any of these cards or projects are yours, please send me your contact information.  I'd love to give you credit for your awesome creation.  Enjoy.

Two of My Convention Swap Cards

Here's a view of the cards I made for the Late Night Stampers Friday Night 80+1 Swap held at the Radisson Hotel during Convention.

I was inspired to make a pin wheel card after visiting Sheri Wintersteins great blog. Sheri's been hooked on making pinwheels and once I made one I could see why.  They are addictive.  Sheri was originally inspired by Annette Stewart's blog, Ink, Paper, Scissors Rock! where she demonstrates the Pinwheel technique in a video she created. 

I actually made 40 of these using Midnight Muse/Pool Party and Comfort Cafe Designer Series Paper.  The other 40+1 cards were made with Cajun Craze and Starfruit and Comfort Cafe Designer Series Paper.   Sorry for the blurry pictures. 


More Convention Friends

I just want to share some more pictures of the great friends I made at convention.  Some I knew already like Cheryl and Jenn, while others like Joni, Nikki, Olivia and Sherrill were new to me. 
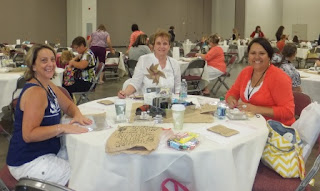
This was taken during one of our Make N' Take sessions.  What fun we had.  Sorry I don't have a picture of DaVita our Make N' Take Helper, extraordinare.  She made it so much fun.  Cheryl LeFore and Jennifer from LaQuinta California and Joni Metras from Charlton Massachusetts.
Cheryl Lefore (in white) was the top Artisan Winner at the 2011 SU Convention.  She's an amazing artist and I'm blessed to be able to attend her workshops and Stamp Clubs when I'm in California.  Jenn (in the orange) is part of her downline.  It was really great getting to meet Jenn again.  She's always so gracious and sweet.  And of course there's Joni and me hamming it up in the Center! What fun!

Here are Nikki Smith and Olivia from Washington State.  Nikki just won a fantastic prize box filled with Stampin' Up Goodies.  Way to go Nikki.  I'm hoping to meet up with both of these gals at the September Regionals in Tacoma Washington!  See you there girls!!!
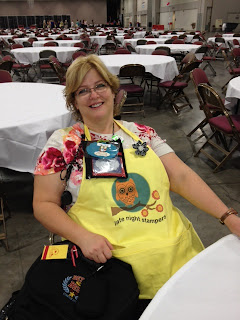
Here I am with Joni Metras.  Joni made my Convention adventures so much fun I just know we'll be life-long friends.  What a treat it was being able to share the fun of our Make N' Take and Late Night Stamper sessions with her.  Hey Joni you're the best!

These were the awesome "Purple Margaritas Joni, Diane and I had in the bar at the Radisson.  I had to share this photo with you.  These drinks made with Chambord, Tequilla and Lemon were so tasty and refreshing.  
This was the night I met Joni at the Late Night Stampers Welcome Soup and Salad Dinner.  Sherrill Graff is the gal in the Pink and is the pivotal driving force behind Late Night Stampers! 

Here's Sherrill Graff of LNS taking a well deserved break.  This session of LNS as well as the Friday night 80+ swap and Soup and Salad dinner were one of the major highlights of my convention attendance.  What a great group of women and the talent was amazing!  Thanks Sherrill for making LNS pre-convention events possible.  The Radisson Hotel where all the LNS events took place is awesome too.  Can't say enough about the Soup N' Salad buffets..............the soup was to die for. 

Tuesday, July 24, 2012

Stampin Up Convention Highlights Video

Here's a copy of the Highlights Video that Stampin' Up posted on YouTube today.  Enjoy!

"I Am...........Convention Friends"


Going to Convention for the first time was a really scary thing for me.  Sure I was super excited about all the things I would see and do, such as visiting the Riverton Stampin' Up! campus, but I was still worried that I wasn't going with our big "Colourful Impressions" group. 

And I wondered if I'd wind up alone and missing out on the fun and companionship of a larger group.  Boy was I wrong!  Just look at this crowd of stampers on opening day...........no matter what I'd never be alone!

From the moment we headed out on our trip, there was no need to worry about being alone.  I was so fortunate to meet up with the nicest group of women I've been with in a long time and I'm sure these gals will be my pals for many years to come.

Adel on Opening Day
I'd previously met Adel Klassen and stamped with her, so it was a given that I'd enjoy her company, but I didn't know just how much I'd learn from her.  Adel taught me a lot.  She's patient, kind and funny.  And big drum roll she taught me how to "text".  I also really enjoyed her companions Ann and Connie who accompanied us to Salt Lake City and did touristy things while we were in convention.  We shared a nice dinner at the Blue Iguana on Thursday night. 

Sue Farrant, Liz Holloway, Linda Yamamoto, Nancy Kier and Diane Dyson in the Green top
The other stampers I met while in the departure lounge in Vancouver airport were Allison, Sue Farrant, Liz Holloway, Linda Yamamoto, Nancy Kier and Diane Dyson.  These were all super nice gals and a pleasure to be with. 

I had the pleasure of Liz's company on the flight to Salt Lake City, although didn't see her much at convention.  This is one savvy lady and stamper, and I'm hoping to keep in touch with her.  Make sure you check out Liz's blog Stamper's Plus, she's taking registrations for a "Creative Escape" event in October that's sure to be a blast!

 After settling into our respective hotels Adel, Diane and I ate a wonderful meal at the Olive Garden and then did a walkabout at the Convention Center and City Creek Shopping Mall before calling it a day.

Myself, Diane and Adel at the Olive Garden SLC
Adel and Diane at the SLC Salt Palace where the SU Convention is being held.
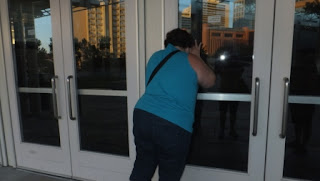
Adel trying to get a sneak peak but everything's locked up for the night.

The Shilo Hotel was a perfect location situated across the street from the SLC Salt Palace Convention Center where all the events were held.

View from my 8th story room.
Salt Place Convention Center


Paper Pumpkin Alternative April 2024 Delicate Wings and TSOT Challenge:

I'm quite liking this sketch challenge by the gals at T ry Stamping on Tuesday (TSOT) , so have decided to give it a go.  This is a thre...