Showing posts with label Cheryl Lefore. Show all posts

Thursday, November 13, 2014

Festival of Trees

Today I want to share a card I made at Cheryl LeFore's Stamp Camp last week that uses the Festival of Trees Punch and coordinating Stamp Set.

This is one of my favourite bundles this season, and judging by the fact that it's been on back order a few times, it's the favourite of many other stampers too. 


Save 15% off the regular price by ordering the bundle #137640.  This stamp set is available in English, French and Spanish.
Here's My Card:
Card design from Cheryl LeFore's Stamp Club

Supplies:

Stamp Set:  Festival of Trees
Card Stock:  Lost Lagoon, Soft Sky, Pear Pizzazz, Whisper White,
DSP:  All is Calm Specialty DSP, Dazzling Diamonds Glimmer Paper (for stars)
Punch:  Tree Punch, Star Punch from Itty Bitty Accents Punch Pack
Accessories:  Dimensionals, Trimmer

How Did I Make It:
1.  Cut a 4 1/4 x 11" piece of Lost Lagoon card stock and score at 5 1/2".
2.  For the 1st layer cut and adhere a 5 1/4" piece of Pear Pizzazz card stock.
3.  For the last layer cut and adhere a 3 3/4" x 5" piece of Pool Party card stock.
4.  Cut 2 1/2 x 4" strips of various designs from the All is Calm Designer Series Paper and punch out 10 trees.  No two patterns will match.
5.  Stamp the sentiment "A little merry wish..." in Lost Lagoon in the upper right hand corner of the Pool Party layer.
6.  Adhere three of the trees across the card face with the tip of the last one just below the sentiment line.
7.  Adhere a second layer of trees with dimensionals  overlapping the first layer.
Line up with the bottom of the card stock layer.
8.The last four punched tree designs need to be reduced in size before adhering them over the second row of trees.  To do this you need to cut a strip of scrap paper measuring 2 1/2 x 8 1/2" and adhere the first tree with repositioning tape to the end of the strip.  Fit the tree into the punch moving it so the stump of the tree is just above the stump area on the punch.  When the tree is positioning the way you want then depress the punch.  Voila a perfectly shaped smaller tree image.  Repeat this process for all four trees and then adhere them with two dimensionals (top and bottom) on each tree.  I positioned the center trees first placing them in between the three trees on the second row and then adding the other two trees one on each side.  I matched up the bottoms of the trees so they just barely touched. 

Here you  can see how the tree trunks are lined up with the bottom of the Pool Party layer and the bases of each tree just touch ever so slightly.
9.  Punch out 3 stars from Dazzling Diamonds Glimmer Paper using the star from the Itty Bitty Accents Punch set.  Mount these stars randomly on the tree tops with pieces of dimensionals. 
10.  For the inside of the card, cut a piece of Whisper White card stock to measure 3 3/4 x 5".  Stamp the blank tree image on the left hand side in Pool Party ink.  Using Lost Lagoon ink stamp the image with the balls on it over top of the tree image.  Stamp the sentiment "For Lots of Joy at Christmas" in Lost Lagoon ink.

Card and Matching Envelope
Well that's it for today.  I hope to do some more cards and tags featuring this stamp set bundle in the coming days, so I hope you'll return to check them out.

Happy Stampin!
Penny Tokens

Friday, July 27, 2012

More Convention Friends

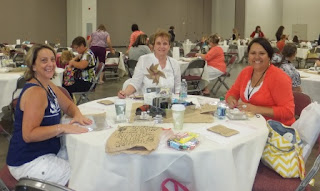
I just want to share some more pictures of the great friends I made at convention.  Some I knew already like Cheryl and Jenn, while others like Joni, Nikki, Olivia and Sherrill were new to me. 
This was taken during one of our Make N' Take sessions.  What fun we had.  Sorry I don't have a picture of DaVita our Make N' Take Helper, extraordinare.  She made it so much fun.  Cheryl LeFore and Jennifer from LaQuinta California and Joni Metras from Charlton Massachusetts.
Cheryl Lefore (in white) was the top Artisan Winner at the 2011 SU Convention.  She's an amazing artist and I'm blessed to be able to attend her workshops and Stamp Clubs when I'm in California.  Jenn (in the orange) is part of her downline.  It was really great getting to meet Jenn again.  She's always so gracious and sweet.  And of course there's Joni and me hamming it up in the Center! What fun!

Here are Nikki Smith and Olivia from Washington State.  Nikki just won a fantastic prize box filled with Stampin' Up Goodies.  Way to go Nikki.  I'm hoping to meet up with both of these gals at the September Regionals in Tacoma Washington!  See you there girls!!!
Here I am with Joni Metras.  Joni made my Convention adventures so much fun I just know we'll be life-long friends.  What a treat it was being able to share the fun of our Make N' Take and Late Night Stamper sessions with her.  Hey Joni you're the best!

These were the awesome "Purple Margaritas Joni, Diane and I had in the bar at the Radisson.  I had to share this photo with you.  These drinks made with Chambord, Tequilla and Lemon were so tasty and refreshing.  
This was the night I met Joni at the Late Night Stampers Welcome Soup and Salad Dinner.  Sherrill Graff is the gal in the Pink and is the pivotal driving force behind Late Night Stampers! 

Here's Sherrill Graff of LNS taking a well deserved break.  This session of LNS as well as the Friday night 80+ swap and Soup and Salad dinner were one of the major highlights of my convention attendance.  What a great group of women and the talent was amazing!  Thanks Sherrill for making LNS pre-convention events possible.  The Radisson Hotel where all the LNS events took place is awesome too.  Can't say enough about the Soup N' Salad buffets..............the soup was to die for. 

Wednesday, February 16, 2011

Projects from February Stamp Club - La Quinta


Feb Stamp Club Projects and Gifts
 Last week, I was lucky enough to be invited to join Cheryl Lefore for her monthly Stamp Club in LaQuinta.  Cheryl is a great demo, talented designer and wonderful cook and I simply love visiting her home and joining her groups whenever  I can.

Although I didn't catch the hostess' name for the evening, I must say she was also one talented cook!  This gal brought home made chicken enchiladas served with red and green chile sauces, beans and other fresh toppings.  They were just excellent.  And, as always, Cheryl served up some scrumptuous cupcakes for dessert.  This was so fitting for the evening as you will see from the "cupcake" card we made below.  Here are some closeup pictures of the evening's projects and gifts.Enjoy!
This was a gift from Cheryl for Valentines Day!  Love it!
Another Gift - These were candy tubes and the heart is made from Glimmer Paper
Isn't this gift card cute!  The shape of course is "lips".  I remade this card and gave to my honey for Valentines Day!  He loved it. 

Project # 1 - Cup Cake Birthday Card  complete with Cherry on top!
Project #2 - Beautiful Faux texture card highlighting DSP from the Sale-a-bration cattie.

Hope you enjoyed this peak at some of the great projects I made.  Cheryl is always so generous and I love the projects she designs for us to make.  Hope you've enjoyed this post!

Sunday, January 31, 2010

Valentines Workshop


Yesterday I had a wonderful day attending Cheryl Lefore's Valentines Day Workshop. I always enjoy Cheryl's events.  Not only is she such a great Stampin' Up Demonstrator but she's a superb hostess.   She made the most awesome Red Velvet Cupcakes for the occasion and they were simply awesome!  A good time was had by all.   

As you can see from this picture we made four awesome projects, based on Cheryl's recent involvement in Regionals and Leadership in Phoenix.  Here are some pictures of the projects we made.

Don't you love receiving those little heart boxes at Valentine's with the chocolates in them?  I always have, and now thanks to Cheryl I can make my own!  Isn't this just adorable.  It was a little time consuming to make, but really rewarding when completed.  How do you like the shabby chic flowers made using the new Extra Large Fancy Flower punch (118073), corderoy buttons and felt flowers?  Here's a look at the interior of the box.


The next project, a Heart Card, was really a card within a card.  Very fun and easy to make and the kind of card that really delivers the WOW factor.  This card utilized one 12 x 12 sheet of regal rose cardstock for the exterior card.  The inner card was made using
Old Olive textured cardstock for the base, pretty in pink for the layer and awesome Old Olive Striped 1/2 in Grosgrain Ribbon.  I {Heart} Hearts Stamp set was featured on the inside.  The A to Z Stamp (115711) pg. 41 Mini Occasions Catalogue, was used with Chocolate Chip Ink on  the Heart cutout on the front of the card as well as on the bottom of the Old Olive interior card.  I really liked this stamp as it added just a bit different look for a background.  I also had a chance to work with the Stampin' Up Embosslits Die - Scalloped Heart of Hearts (117332) pg. 15 of Mini Occasions Catalogue, and I've immediately added it to my "Wish List".  Wow is it nice to work with.   Here's an interior view of the Heart Card so you can see the full effect.

The green heart is embellished with Certainly Celery Chunky Sprinkles Stampin Glitter  (11343) and a small Chocolate Chip button from the Button Latte (114333) Designer Buttons featured on pg 180 and 181 of the IB&C.  A small piece of velcro was used on the back of the cover heart to hold the card envelope closed.  So there you have it, a card in a card.  I think this was an awesome project!


The 3rd project was a scrapbooking page that was very quick to make but had several elements that were new to me.  A 12 x 12 sheet of Real Red Cardstock was used as the base and a piece of the Sending Love Specialty DSP (117153) was torn and mounted on the base.  Prior to mounting the DSP we used the jumbo roller I {Love} Love (117084) pg. 15 Mini Occasions cattie, with Real Red ink cartridge on the Real Red base.   The LOVE letters were cut on the big shot using the Serif Essentials die cut (113464) pg. 199 IB&C.  Another Big Shot first for me was cutting out the felt flowers using the Stampin Up Flower Folds die cut (115970) pg. 201 of the IB&C.  I couldn't believe how simple it and fast it was to make these flowers...........another "must have" on my wish list!!!  The rest of the embellisments on this card were layers of Chocolate Chip, Real Red and Very Vanilla Cardstock and some hearts made again from the I {Heart} Hearts stamp set and the Scalloped Heart of Hearts Sizzlit.  Another new item to me was the Glassine Small Square Envelope (117226) pg. 19 of the Mini Occasions.  This housed a number of little hearts punched out with the Heart to Heart punch.  The final touch is a picture of Murphy my little bichon cross dog and me at Christmas enjoying a moment of pure "Love"! 

The final card was made with the Sweet Treats Heart Cups filled with deliscious pink, brown and red M&M's............ one of my favourite snacks.  A layer of Pretty in Pink was added to the Real Read cardstock base and the stamped image was on Very Vanilla.  Once again strips of the Specialty Designer Series paper were used and strips of Chocolate Chip cards stock were punched with the new Pinking Hearts Border punch (117649) pg. 11 of the Mini.  A beautiful 5/8" Chocolate Chip Satin Ribbon was added as a finishing touch.  This is just a beautiful card and very fast and easy to make.

So thanks Cheryl for a great day and for all the inspiration you give me.  You are a fabulous demonstrator and I will be sad when I go home to miss any of your coming events.............. oh well next year! 

Paper Pumpkin Alternatives April 2024 and Sketch Challenges

The past week was so busy that time literally flew by.  I have a number of projects on the go, including working on my April 2024 Paper Pump...