Saturday, September 28, 2024

Atlantic Hearts Sketch Challenge # 596

Hi everyone.  Another week has flown by with so much on the go.  I'm delighted to say I managed to squeak in some cardmaking time, and have a couple of cards to share with you.  The first card is for the Atlantic Heart Sketch Challenge #596 which closed on Sunday September 29th.  Here is their sketch: 


HERE'S MY CARD: 


This sketch gave me an opportunity to show off the Nests of Winter designer paper I recently purchased from Stampin' Up!  This  beautiful sketch allowed me  to mix and match the papers and create a small scene with virtually no stamping  except for the sentiments. This 12 x 12 paper is part of the Nests of Winter Suite Collection on pages 30 and 31 in the 2024 Holiday Mini Catalogue.  


I love the detailed images of the birds and the subtle natural tones, which make it ideal not only for Christmas cards but those other winter time celebrations.  


Stampin' Up! Supplies Used: 

Stamp Sets and Dies: 

  • Something Fancy #160416 for "Happy Birthday" sentiment for card front.  Die cut for sentiment.
  • Frosted Forest #164344 for sentiment inside the card.  Tree Die cut in black and pecan pie for card front. 
Cardstock and Designer Paper: 
  • 8 1/2" x 5 1/2" Whisper White for card base and scrap for sentiment.  3 7/8" x 5 1/8" piece for inside mat
  • 5 3/8" x 4 1/8" Pecan Pie for card front base mat; 2 1/8" x 4 1/8" Pecan Pie mat for Pool Party DSP strip; 1 5/8" x 4 1/8" Pecan Pie Piece for Birch Tree DSP strip. A scrap for the Tree Die Cut in Pecan Pie.
  • A scrap of Basic Black for Tree die cut 
  • 5 1/4" x 4" Pool Party for base mat inside card.
  • 4" x 5 1/4" Birch Design DSP from Nests of Winter
  • 2" x 4" Pool Party Diamond design paper from Nests of Winter 
  • 1 1/2" x 3 7/8" strip of Birch Design with Small Birds from Nests of Winter
Accessories:
  • Opaque Faceted Gems in Pool Party # 162979 
Here are a couple of birthday cards I made using the same papers.  The images were so easy to fussy cut that I didn't purchase the stamp set or dies that coordinate with it.  


HAPPY STAMPING!
PENNY TOKENS STAMPIN' SPOT 

Penny Hanuszak, CDN Stampin' Up! Demo since 2006

Click here to visit my 24/7 Online Web Store 


Tuesday, September 24, 2024

Clearance Refresh......Stampin' Up!


I just had to share the good news!   The Clearance Rack has finally been updated in the we hours with lots of new items! There are definitely bargains to be had, with some products discounted by up to 60%. 

Clearance items are only available while supplies last and can sell out quickly, so don't delay placing your order if something catches your eye.

If you're looking for designer series paper, embellishments, cardstock or blends there is currently lots to choose from.  

Check out the Very Vanilla products that are reduced.  You might want to stock up if that's one of your favourite neutrals .......just in case it's being phased out.  Just sayin! 

HAPPY STAMPING!
PENNY TOKENS STAMPIN' SPOT 

Penny Hanuszak, CDN Stampin' Up! Demo since 2006 

Click here to visit my 24/7 Online Store 

Don't forget to add my September Hostess Code
if your  order is under $200.00
Click here for instructions.  You'll receive a free gift from me!


Monday, September 23, 2024

Sending Happy Thoughts FMS#654

It's Sunday and the weather has turned cold and cloudy.  Perfect weather for going to my card room and working on some projects.  I'm using this weeks sketch challenge at Freshly Made Sketches for my card inspiration:  

Here's My Card:

Truthfully although this looks like  a very easy sketch challenge, I wasn't sure how to approach it.  After looking through my stamps for trees or tall features that I could use and not finding anything that really worked, I had a lightbulb moment.  

I decided to rummage through my past Paper Pumpkin kit bags to see if there was anything that would work.  I was so excited when I found the Adventure Begins kit from 2021 which featured nature and camping scenes.  There were still some card bases left in the bag that worked perfectly for creating this card.

The leftover background scenes in the kit were simply amazing, but the one I chose seemed to be the best for this sketch.  Using this scene eliminated the need to do anything else apart from attach the trees and a card strip to the card front. 

I cut the picture mat to 3 3/4" x 5" and mounted it on a 4" x 5 1/4" Whisper White mat.  After adhering these two mats I attached them to an 81/2" x 5 1/2" Basic Black card base.  

Deciding on what to do with the strip was difficult.  I had lots of ideas but no time to start searching for dies that would cut the strip into rolling hills or a picket or log fence.  So I decided to keep it simple and used a 1" by 3 3/4" piece of Basic Black cardstock. When I was positioning the strip, I realized it didn't add any dimension or life to the card so I embossed it with the Fern embossing folder. This simple step added the depth I was looking for. I adhered one of the trees with adhesive and the second one with dimensionals. I grabbed a pre-stamped sentiment from my stash and I was finished.  This is literally a 5 minute card. 

The sentiment is from a long retired Stampin' Up! set where all the sentiments were on one piece of red rubber and you used a coordinating solid die to cut them out.  The stamp and die are long gone, that's why I don't remember the name, however before I sold it, I stamped and cut out  a gazillion of the sentiments and I'm still using them.  Having pre-stamped sentiments on hand is a life saver when you're in a hurry.

Supplies:

The Adventure Begins - June 2021 Paper Pumpkin kit by Stampin' Up! for background paper, tree shapes (ephemera) and coordinating envelope. 

Cardstock:

  • Basic Black 8 1/2" x 5 1/2" for the card base. 
  • A 1"x 4" strip for the front card layer and 
  • a 4" x 5 1/4" Whisper White layer for inside mat.  

Ink:

Momento Tuxedo Black ink

Accessories: 

  • Fern Embossing folder for black strip
  • Basic Rhinestones 
  • Dimensionals 

Thanks for dropping by and checking out my card for this week's Freshly Made Sketches challenge.  Appreciate it.  Let me know if you've ever used kits to complete a sketch, I'd love to hear your story.  

HAPPY STAMPING!

PENNY TOKENS STAMPIN' SPOT 

Penny Hanuszak, CDN Stampin' Up! Demo since 2006 

Click here to visit my 24/7 Online Store 


Sunday, September 22, 2024

Christmas Scotties - AHSC #595

 Here I am once again with my version of the Atlantic Hearts Sketch Challenge #595.  This sketch was created by Michelle and digitized by Brandi.  


HERE'S MY CARD: 
Since I'm trying to get my stash of Christmas cards built up I'm doing a Christmas theme for my focal point.


T
his was such a fun card to make. Nothing in this card is current. The stamp set and designer papers are all part of my stash that I'm trying to use. I love the Christmas Scottie stamp set and coordinating punch, and probably will never part with them, as this is one of my most loved Christmas bundles.


As a Stampin' Up! demonstrator I'm obligated in my agreement to use what's called the "Angel Policy" when creating cards. It's really easy to add the Stampin' Up! logo and my brand when using light coloured cardstock, however when using black as a cardbase, or some other dark neutral, it's almost impossible to see this information.

To resolve this problem I came up with a simple solution, that not only looks good, but is easy to do.


Voila, problem solved by simply stamping on a neutral cardstock and cutting out a tag or die that holds the information.  I usually add my small  Stampin' Up! logo stamp as well, so that it conforms with the Angel Policy.  

Supplies:

Stamp Sets:
  • Christmas Scottie #159740 (R) 
  • Christmas Gleaming #150464 (R) for sentiment

Ink:
  • Momento Tuxedo Black ink
  • Real Red
  • Old Olive 
Card Stock and DSP:
  • Basic Black 81/2" x 5 1/4" scored at 4 1/4" for the card base. A 1" x 5" strip for the bottom of the card front.
  • Garden Green mat for card front 5 1/4" x 4", a 3" x 3" piece for stitched circle piece for focal.
  • Plaid DSP 2 3/4" x 5" for front mat
  • Whisper White 4" x 5 1/4" mat for inside card
  • Scrap of Daffodil Delight for Street Light
Accessories:
  • Red Rhinestone Basic Jewels #146924
  • 3" Stitched Circle Die 
  • Basic 3-D Embossing Folder Cross Hatch pattern (R) 
  • Dimensionals 

Well that's it for this sketch challenge.  I hope you enjoyed this card and that it inspired you to try a sketch challenge or create some Christmas cards using this stamp set.  Please leave me a comment, I love to hear from you. 

Happy Stamping!
Penny Tokens Stampin' Spot 

Penny Hanuszak, CDN Stampin' Up! Demo since 2006


Wednesday, September 18, 2024

Organizing Embossing Folders

Today's post is all about organization.  Some time ago I repurposed an old three drawer sewing cabinet into a cutting and embossing station.  I kept my collection of Embossing Folders (EF) in the top drawer so they  would be close to my Cut N' Emboss machine.  I used a set of file card alphabet dividers to keep them separate, and while that was okay, it was easy to miss the one you were looking for, or put it back in the wrong place when you were finished using it.

I found this really frustrating and was thinking of moving my EF to a bin however I found a simple, cost effective and doable solution to organize these folders, which simply makes me smile.  

Robin Feicht posted a Youtube video six years ago called Craft Room Organization Embossing Folders.  In the video she demonstrates her system for creating file folders for storing her EF in an organized, pretty and functional way.  After watching her video I was instantly motivated to organize my folders using her fantastic system.  


This storage system virtually was free because I used what I had on hand. I used smokey slate cardstock for the file folders. My Stampin' Up! Envelope maker came in handy for making the tabs, and luckily I had a new cartridge for my P-touch Label maker.  

I printed three labels each time - one for the file folder, one for the EF and one for a swatch book.  I embossed two swatches of each EF - one for the cover of the folder and the second for my swatch book.  I used retired cardstock and the file folder ones were all in blue while the swatch ones were smaller and whatever scrap cardstock I had on hand. I kept the original product jacket with the embossing folder in case I need it later on.  

I already had a swatch ring with smaller sized samples of the embossing folders so I just made sure it was up to date. 


I absolutely loved how well this came together, and have used this system successfully over the past few weeks.  I keep extra folders on hand so that if I buy new Embossing Folders, I can have the storage folder already assembled and labelled when my order arrives.  All I have to do is the swatches.  This is a win, win.  

After being so successful setting up the regular sized Embossing Folders, I have decided to use the same system to organize the larger square embossing folders that I have stored in a basket.   
These are some of my dies and big embossing folders sitting in baskets on my craft display cabinet.  They aren't in any kind of order and I'm constantly rummaging through them, wasting time, looking for the one I want. 

Because Stampin' Up! and some of the other manufacturers like Sizzix keep making larger EF I had to create a template that would work with these.  I used old white cardstock 65lb that I had purchased from Michaels for the folder and adjusted the measurements so the folder would hold the larger EF.  I cut the cardstock to 6 1/4" x 11" and scored it at 4 1/4 & 4 3/4" in the center.  The back of the folder is a little shorter, but that's okay it still contains the EF when it's inside.  The large swatch piece for the folder is 5 1/5" x 5 3/4" and these will all be the same color, again using retired cardstock that I had a lot of.  I am making a separate swatch sample book for these larger folder sizes.  

Here's what a finished folder should look like.  The embossed panels will all be in this Cantaloupe Crisp cardstock which I had a lot of. Because this is a work in progress, I won't cut the tab until I have all the folders in alphabetical order and the labels to attach.  That way I can have the tabs placed either on the right or the left to make it easier to see the folder.  


Here's what the folders will look like in the bin . 

I'm also working on separation cards for my die cut baskets to make it easier to locate what I'm looking for.  Again they'll be filed alphabetically and I am putting the product information sheet on the divider for reference.  If I ever sell the dies I can cut the divider and repackage them before they go to their new home. Here's what they are going to look like:

I indicate on the label how many dies are in the set, and I've been putting the long magnetic sheets into a cello envelope to make sure all the dies stay in tact.  I love this and it's going to work.  

Well that's it for today.  Let me know if you like this system or if you have any questions as to how I made the folders.  Honestly adding the labels and gluing the swatches to the front of the EF holders was a piece of cake and something I could do while I was watching tv.    Thanks for dropping by.

HAPPY STAMPING!
PENNY TOKENS STAMPIN' SPOT!
Penny Hanuszak, CDN Stampin' Up! Demo since 2006 


Tuesday, September 17, 2024

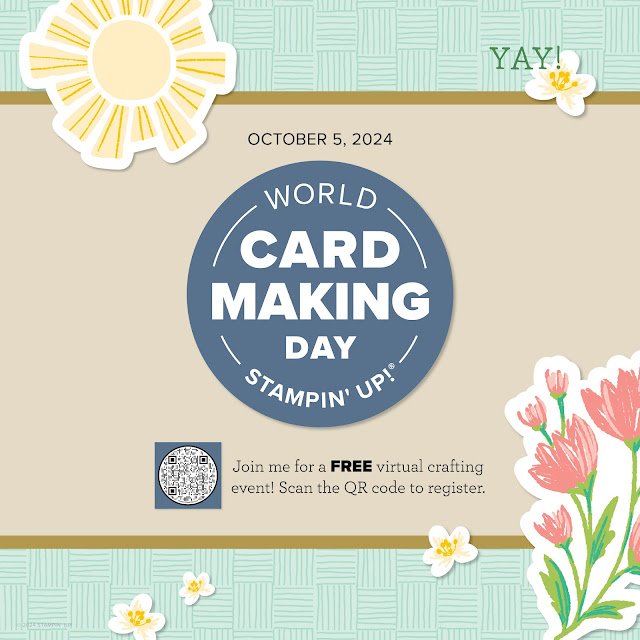
WORLD CARD MAKING DAY OCTOBER 5 2024


Who:         Everyone is invited!

When:       October 5, 2024, from 2:00 to 3:00 p.m. (MT)

Where:      Online

Cost:          Free

Register:    September 3–October 4, 2024, at 2:00 p.m. (MT)

Click here to Register or scan the 

You must register for this event in order to receive a link to view it. Also, those who register will receive a gift after the event ends. So even if you’re gathering a group of people to craft together during the event, invite them to register so they don’t miss out on the event link and a special registration gift.

Language of Event: Most of the event will be presented in English with language interpretation voiceover and subtitles available in English, French, German, and Dutch on the video link.

Video on Demand: We will record this event. Anyone who has the event link will be able to watch the recorded event starting October 8.

Hashtag: We encourage all who view the event to post about it on social media using #SUWorldCardMakingDay2024. If you post with the hashtag, you’ll see your post appear on the event webpage as you watch the event!

Supplies: During this event, you’re invited to craft along.  Participants can make 5 simple cards or watch the live video and then make your cards following the presentation.  Supplies to be used for the five cards include:* 

    • Calming Creek Cards & Envelopes (item 163753)
    • Fully Flowering Mix & Match Ephemera Pack (item 163762)
    • Saying Something Mix & Match Ephemera Pack (item 163761)
    • Something for Everything Mix & Match Ephemera Pack (item 163763)

Stampin' Up! will also use these supplies to show you how to make a few additional projects. You can create them later and keep the fun going after World Card Making Day ends. If you want to make these cards after the event, order/gather these items in addition to the items listed previously:

  • Basic White Note Cards & Envelopes (item 159232)
  • Simply Said Stamp Set (item 163756)
  • Clear Block D (item 118485)
  • Stampin’ Dimensionals™ (item 104430) 
  • Tuxedo Black Memento™ Ink Pad (item 132708) 
  • Multipurpose Liquid Glue (item 110755), or any other adhesive 
  • Paper Snips 

* Note:  It's not necessary to use the Ephemera or Stamp set suggested by Stampin' Up!  You can use what you have on hand.  Just have fun, get together with your best stampin' buddy, or group.  The video link will be available until October 8th, 2024.  

Happy Stamping!

Penny Tokens Stampin' Spot


Monday, September 16, 2024

Free Shipping - September 18th Only


Surprise! It’s time for FREE SHIPPING! On September 18, you can shop and save on all qualifying orders of $100 or more (before tax).

Here's a great way to stock up on all your favorite products from the catalog, Online Exclusives, kits, and more! FREE SHIPPING is a limited-time offer (one day only).

Here's what you need to know:
  • All order types qualify for this promotion.
  • FREE SHIPPING is for 24 hours only. Orders must be opened and closed on September 18, 2024 no later than 11:59 Mountain Time.
  • FREE SHIPPING automatically applies to your cart after the qualifying amount has been met, which is $100 CAD (before tax).
  • Coupon codes and product credits are non-commissionable and will lower your order’s retail amount. Orders must meet the qualifying amount to be eligible for FREE SHIPPING.
  • The additional cost for expedited shipping is not covered by this promotion.
  • Prepaid 3-, 6-, or 12-month Paper Pumpkin subscriptions can contribute to the qualifying amount for free shipping. Month-to-month subscriptions do not qualify.
  • Subscriptions billed and shipped this month will be charged for the normal amount $34.75 CAD shipping included) + tax.

HAPPY STAMPING AND SAVING!
PENNY TOKENS STAMPIN' SPOT
Penny Hanuszak, CDN Stampin' Up! Demo since 2006

Click here to visit my 24/7 Online Store 

Add my Hostess Code to your order and you'll receive a free gift from me.  See this note for instructions on how to apply the code: 


Last Free Shipping of the Year - December 9, 10 11, 2024

Heads up, it's time for the last FREE SHIPPING promo of the year! From December 9–11, you can shop and save on all qualifying orders of...