Showing posts with label "Christmas cards". Show all posts

Monday, November 23, 2020

WARM & TOASTY WISHES FOR YOU

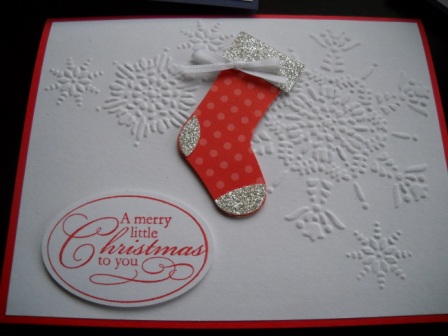
Freshly Made Sketch challenge this week is by Narelle, who did a pretty good job of "throwing" this sketch together based on her computer icon.  Love the inspiration!  

Here's My Card:


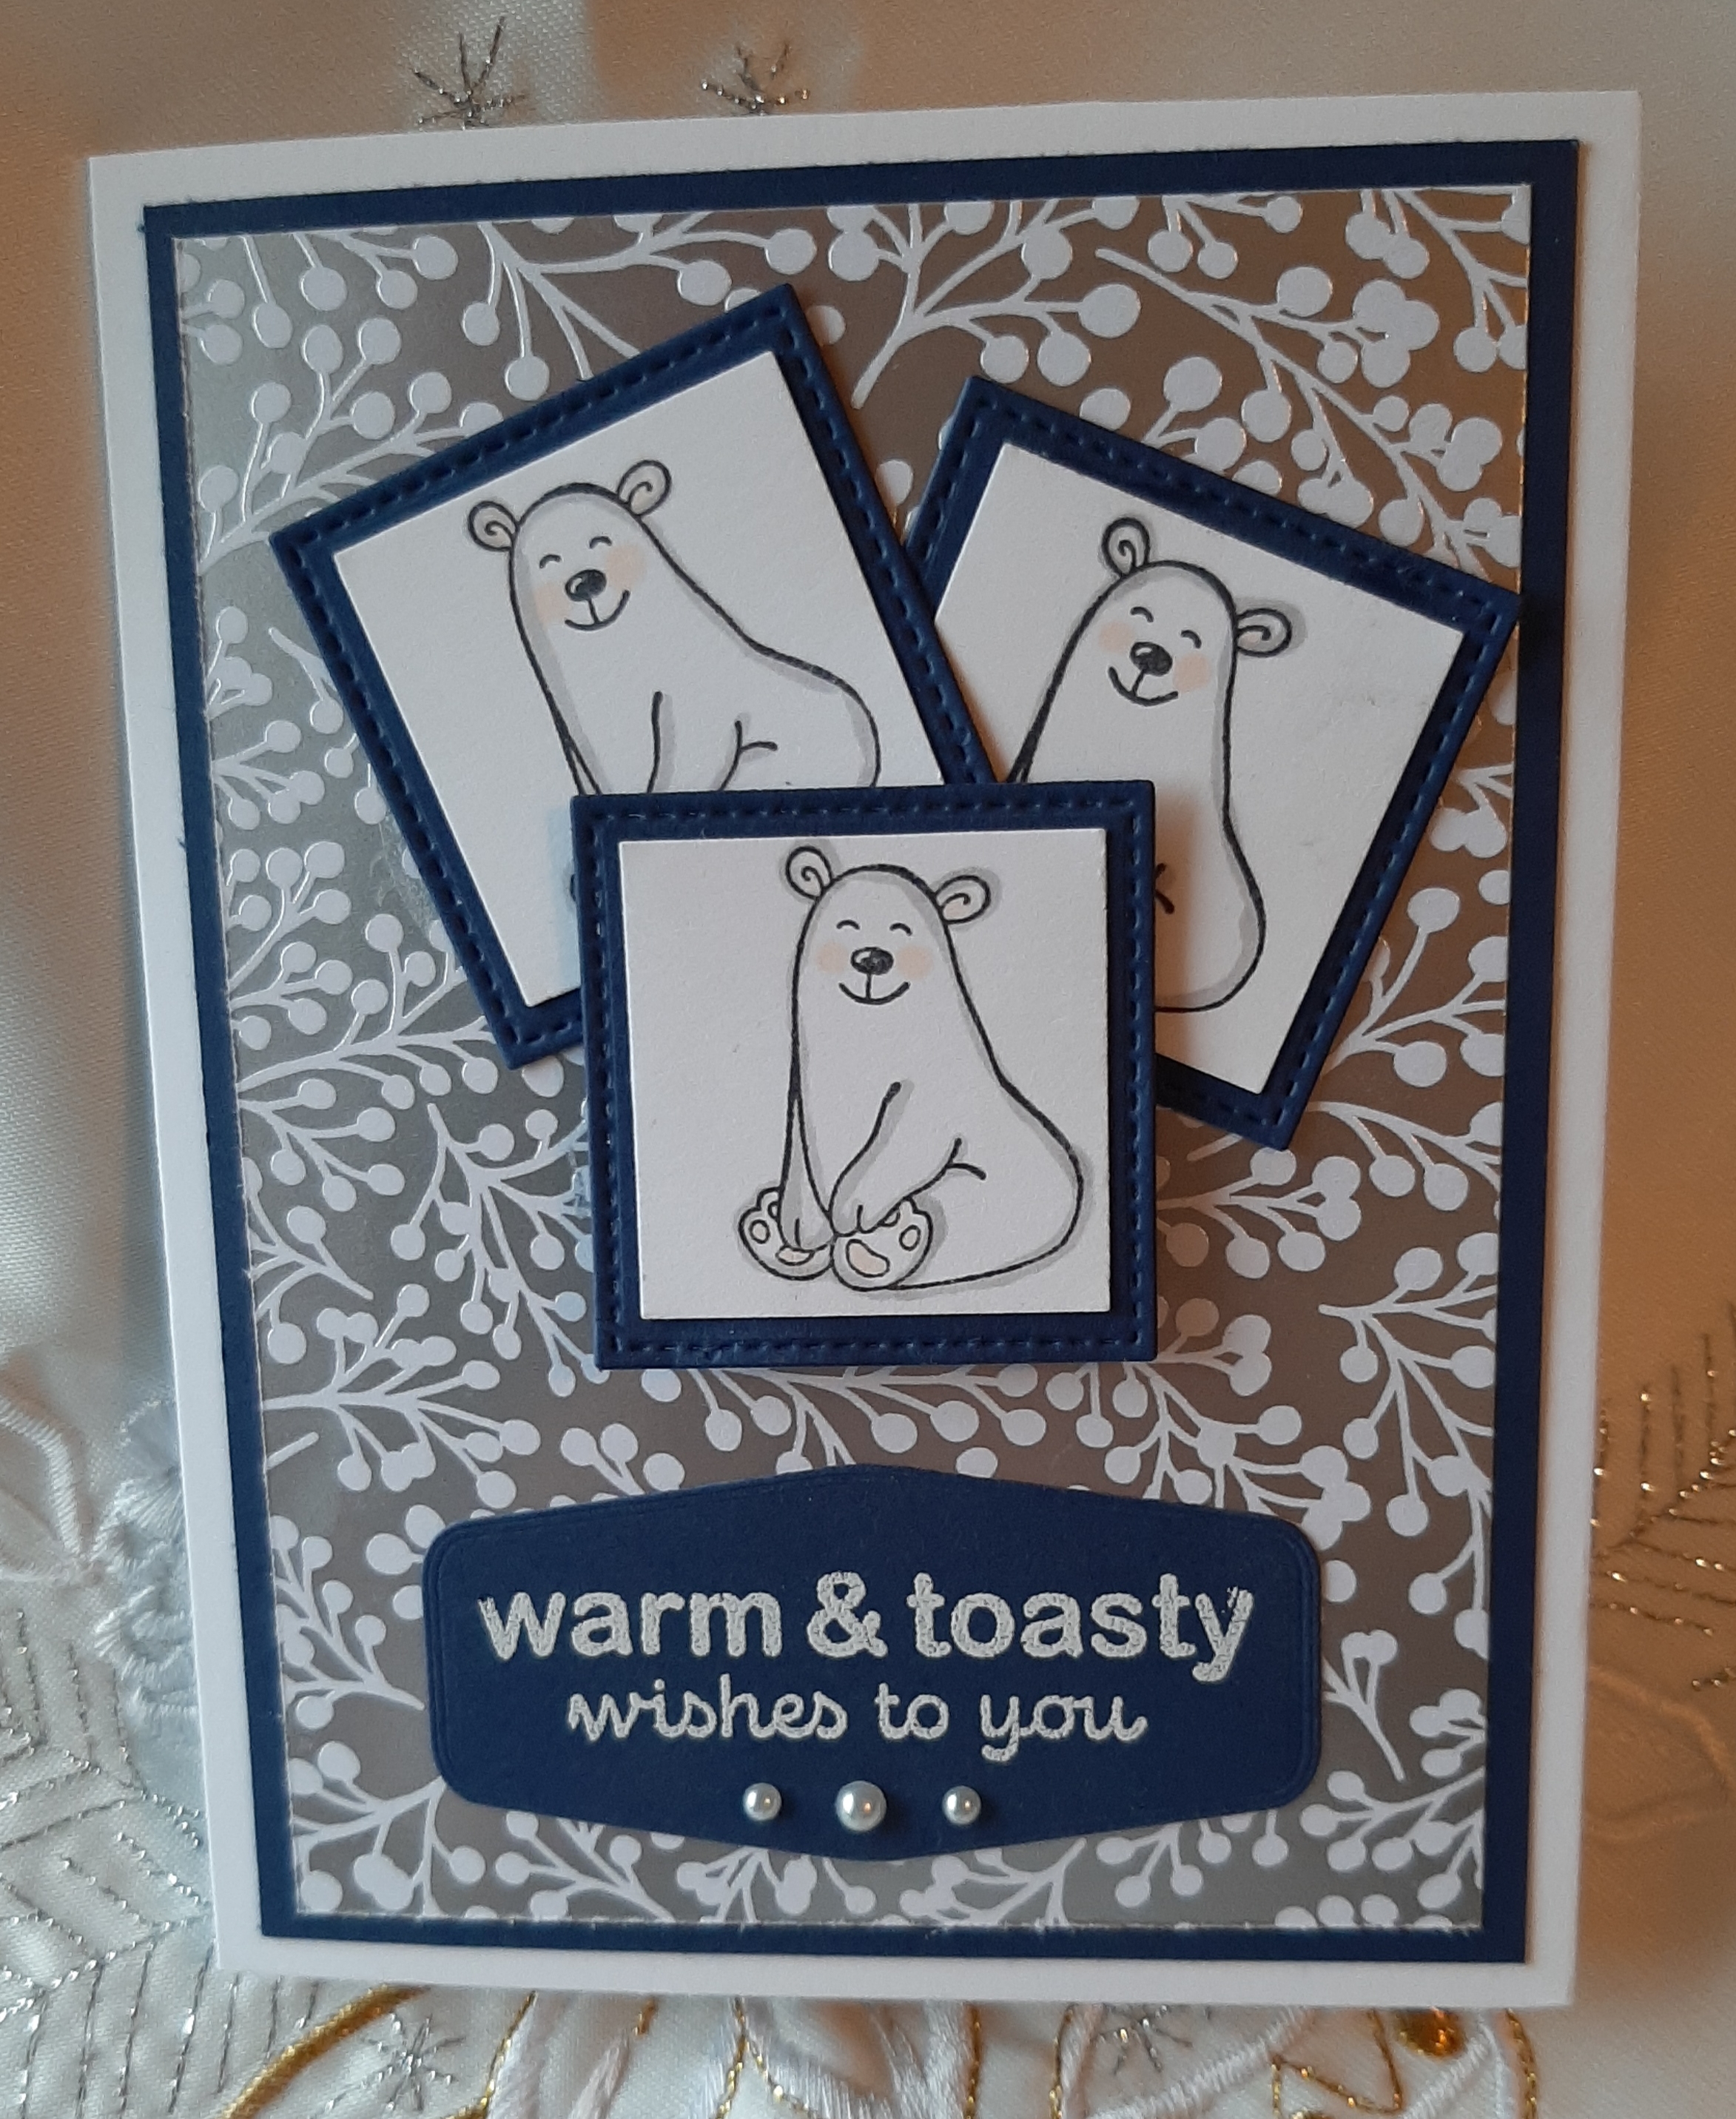
My card features the tiny polar bear from the Warm & Toasty Stamp Set.  He is such an adorable little character I just couldn't resist.  But don't just think of this image as being a Christmas/winter image it can be usable all year round.  At the end of the post I'll show you a cute card I made to welcome baby using this sweet and versatile image.  

My card started with an 8 1/2" x 5 1/2" piece of Whisper White card stock that was scored at 4 1/4".  The first layer is a 5 1/4" x 4" piece of Night of Navy followed by a 5" x 3 3/4" piece of designer paper from the Feels Like Frost designer series pack. Stampin' Up! thankfully brought this beautiful winter themed 6 x 6 paper pack forward from last year's Holiday Catalogue.  The designs are so much fun to work with and I absolutely love the metallic designs on the reverse side.    


This is the exact paper I chose for my card background today.  I started off matching my Night of Navy card stock to the beautiful image but when I turned it over to add my glue, I stopped, stared and in that aha moment chose to showcase the metallic side of the paper.  So beautiful!

The bears were stamped in Momento Black ink on Whisper White card stock and then punched out with my 1 1/4" square punch. I coloured the bears with Stampin' Blends. Don't you think the little blush cheeks and toe pads are cute? I used the light powdered pink blend for those. The bear is outlined with the light smokey slate blend and it adds just enough of a shadowy light colour to bring him to life.

The Night of Navy squares that the bears are mounted on were cut with the 2nd smallest die cut in the Stitched Shapes squares.   The two background squares were just adhered with Tom Bow adhesive, but I added a double layer of Dimensionals to the lower part of the front square so it would pop it up enough to provide some dimension.  That seemed to work.  

And that's it for this fun FMS today.  Once I decided on my theme this card literally came together in minutes, which is what I want.  Another pro is that the card is flat and mail able, which is great at this time of year if mailing a lot of cards.  I also think this sketch would be usable for any theme and or season.  I like that so I'll be keeping this sketch in my "Using Up Scraps" idea bin.    

Before I go here is my Welcome Baby card using the Warm & Toasty stamp set.  What do you think?  Isn't she adorable?   I added a little bow at her neck with a baby pearl... so feminine.


For this baby card I began with an 8 1/2 x 5 1/2" base of Sahara Sand, scored at 4 1/4".  The first layer is a piece of designer paper from the Peony  Garden Designer Paper Series.  It features a nubby Petal Pink texture.  The second piece of designer series paper is from the In Good Taste packet and has a soft wool like appearance, so made me think of a super soft baby blanket. 


The sweet little sentiment "Hello Baby" is from the So Sentimental Stamp set.  I used the Tasteful Labels Dies to cut out the labels that I mounted the bears and sentiment on.  These small labels are perfect for grounding small images so they don't get lost in the background of a card.  

Thanks for dropping by today.  Hope you liked my cards.  Leave a comment and tell me which one is your favourite.  Appreciated.  

Happy Stamping!
Penny Tokens Stampin' Spot 
Penny Hanuszak, Independent Stampin' Up! Demonstrator 

NOVEMBER HOSTESS CODE:  ZZ49FQKS
If you're thinking of putting in an order this month, and it is under $200.00 before shipping and handling, add my November Hostess code at the end of your order, and you'll receive a free gift from me.  If you're planning in putting in a larger order, no worries if you spend over $200.00 you'll be earning your very own Stampin' Rewards to choose products you want.  

  
Click here to shop in my 24/7 Online Store


Sunday, August 2, 2015

Christmas in July Card Classes

July went by in a whirl with two Christmas in July card classes, my bestie returning for Stampin' on Tuesdays and some beginner's Stampin' 101 classes under my belt.  And now, it's on to August. But, before I switch gears, I thought I would share my Christmas in July card class for some inspiration.


What fun we had making these four Christmas cards.  Almost all of the supplies are from the 2015-2016 annual catalogue.  Participants made two of each card and matching envelopes.  All supplies were included.  Details are on my event calendar. 

This beautiful card features the Wonderous Wreath Bundle stamp set and framelits.  The card face is dry embossed with the new Elegant Dots Embossing folder.  The wreath is stamped in Smokey Slate and Versa Mark ink and embossed with Silver Embossing Powder. 

This card also features the Wonderous Wreath stamp set, this time stamped in Pear Pizzazz, Mossy Meadow and Real Red inks.  This is a fancy fold card with a delightful peek-a-boo window behind the wreath. 
This card which can double as a gift card holder was a blast to make.  It's made with the Mini Treat Bag Thinlet Dies, the Tree Builder punch and Boho Chic Embossing Folder. 
 

I've had such a fun time with the mini treat bag that I made some additional samples to show the girls.


This fourth card features a peek-a-boo window made with a retired BigZ Die of the same name.  This is a fun card with its hidden Christmas messages.  


I've decided to hold this class again by request, so if you're in the area and  interested in gathering some friends (six maximum) and hosting a workshop in my house or yours, contact me to arrange a date between August 18th and September 30th, 2015.  

Happy Stamping!
Penny Tokens

Monday, December 26, 2011

Cards From Friends and Family...........

I want to share some of the fabulous cards I received from friends, family, customers and my newest recruit. I think you'll love them too!

Love this stunning card from Shirley Sumption.  Shirley ran wonderful weekly Halloween and Christmas Blog Hops this year and I've so enjoyed her creative talents and becoming a great cyber friend!  Thanks Shirley!

This beautiful handmade card is from my wonderful SIL Elise!  Elise is very creative and always makes such fabulous cards.

Thought I'd add this wonderful Thank You card I received from Betty Lee.  Isn't it gorgeous.  The texture in the DSP is so nice and the colours blow me away!

A beautiful Cardinal Christmas card from my wonderful sister Heather.  I love the scallop circle card and the sentiment!

This gorgeous Delightful Decorations card was created by a friend and customer, Betty Lee.  Isn't it gorgeous!

Eileen, created this stunning Lovely as a Tree card.  I love the tone on tone and the beautiful embossed snowflakes.

Ethel my newest downline member, created this stunning Poinsettia card using a die cut.

Wednesday, December 21, 2011

Stocking Builder Punch - Holiday Mini


If you loved these cards and you want to duplicate them time is running out!  Sometimes Stampin' Up!  carries over seasonal specific items from their mini catalogues to the Idea Book and Catalogue, but I'm sorry to say the Stocking Builder punch will not be carried over after January 4th, 2012. 


Stampin' Up announced yesterday they've decided not to carry over the Stocking Builder Punch (item 124095) from the 2011 Holiday Mini Catalogue into the next Idea Book & Catalogue. Instead they  will offer other great designs in its place--not to mention a trendy, new design planned for next holiday season.  

Once the current inventory of this punch has been depleted, it will no longer be available for purchase.
Tue, 20 Dec 2011 08:25:14

Monday, December 19, 2011

"The Stockings Were Hung"

I worked like the dickens and managed to be on time this year, finishing my cards, getting them addressed and in the mail!  Whew what a relief!  I love making them and I love sending them, but it's always such a panic to finish all the little notes, add pictures and make sure everything's properly in the envelopes.  And next year I swear I'm making some of those box envelopes so that all my embellishments lie flat, or maybe I'll make single layer cards.  I had to pay double postage on about 20 of my envelopes this year, just because the little rhinestone on the stockings stopped the envies from going through the postal slot.  Oh well at least they got mailed, and here's a closer look at what I sent.  I think all my friends will like them.  How about you? 


Thursday, December 15, 2011

I'm Back With Monkey86: Holidays & Sketch Challenge

I've been away for awhile and really missing all of you. Hope you've missed me too. While trying to get back in the swing of things I wandered over to the Ala Card Monkey Blog and checked out this week's sketch.

What a great sketch.  I drew inspiration from it right away as well as a good chuckle looking at the little boy searching for santa.  Here is my rendition of this sketch.
I've been in a purple mood for the past month or so, and although it's a non traditional colour for Christmas for me it evokes serenity and a regal charm.  So with that in mind I chose Wisteria Wonder for my card base and layered it up with Whisper White, Prints Pattern DSP in Concord Crush and a strip of Concord Crush that's been embossed with the stripes embossing folder.

This close up will show a little more of the detail on this card.  As soon as I saw the sketch I knew I wanted to add an image from the Christmas Lodge Stamp Set.  I stamped the image of the lodge in Concord Crush on Whisper White card stock, sprinkled it with Clear Embossing powder and then heat set it. Then I punched a 1/2 inch circle from a post it note to make a mask for the moon, and sponged the sky with Concord Crush.  The circle layers are Whisper White for the scalloped layer, Concord Crush, Silber Glimmer Paper, and the image.  The sentiment is stamped, embossed and layered in the same sequence.
Here's a view of the inside of the card.  I again layered with the DSP, Concord Crush and Whisper White Card stock.  The birds on a branch image is from the Christmas Lodge Set.

I think I'll be storing this sketch in my favourites file.  It was fast and easy to do and looks oh so good in real life!  Don't forget to check out all the great submissions on A La Card Monkey.  There's still time to enter for this week's challenge which includes blog candy!  They're giving away Warmest Wishes stamp set.

Sunday, November 13, 2011

Stampin Queen's Sketch Challenge #12

It's Sunday night once again and time for me to share my rendition of this week's Stampin' Queens Sketch Challenge card.  I really like the layout of this sketch.  It's got lots going on it but it's not overpowering. 

I'm still into making Christmas cards and wanted to hightlight some of the "other" Stampin' Up Christmas stamps that are available in the 2011-2012 Idea Book and Catalogue, namely Decorative Decorations and Christmas Collage.  I love both of these sets and would hate to see them overlooked for newer ones.

So with these sets in mind I began by stamped the Christmas Collage in Whisper White onto a  5 1/4 x 4" piece of Night of Navy cardstock, and then emboss it with White Embossing Powder.  This piece was cut into three 1 1/4" strips and  glued from left to right onto the Whisper White card base.


I used a scallop die to cut the small oval scallop from the Silver Glimmer Paper and then mounted one of the ornaments from the Decorative Decorations set with dimensionals on top of it.  The ornament was stamped in Whisper White ink and embossed with White Embossing Powder on Night of Navy cardstock.  The center of the ornament is my sentiment and again it is from the Decorative Decorations set.  A basic rhinestone was added to the center of the sentiment star.  For the bow I used Whisper White Taffeta ribbon.  The image for the three circles pieces was stamped in Night of Navy on Whisper White cardstock and then cut out with the 3/4" punch.  This piece was mounted on dimensionals onto a 1" circle cut from the Silver Glimmer paper.  A basic rhinestone was added to the center of each image.

This is a view of the inside of the card.  The sentiment is from the Christmas Lodge set.  A 1/2" x 5 1/2" strip of Night of Navy Cardstock was adhered to the right side of the card and a 1/4" strip of the Silver Glimmer paper was added.

Sunday, November 6, 2011

Stampin Queen's Sketch Challenge #11

Have you checked out this week's Stampin Queen's Sketch Challenge SQSC11 yet?  If not click here to check out what the guest designer's have come up with and all their fabulous cards. 

This sketch has tons going on  in it, but you can make it as simple or as complicated as you want.  Don't let it scare you off as there are prizes this week and you won't want to miss out on!

As in past week's I'm sticking to my "Holiday" theme with a vintage flair.  I chose the family silhouette from the Welcome Christmas stamp set (pg 36 IB&C) for my stamped image.  The image was stamped in Early Espresso ink on Whisper White cardstock.  This piece of cardstock was mounted on a 1 3/4 x 2 1/2" piece of Garden Green.  


The card base is Whisper White cardstock layered with a 5 1/4 x 4 piece of Cherry Cobbler that was texturized with the Snow Burst  Textured Impressions Embossing Folder (12406 pg 33 Holiday Mini).  I loved the plaid papers in the Frost Wood Lodge Designer Series paper (124002) pg 28 Holiday Mini) so decided to layer pieces of this DSP onto Garden Green cardstock to make the two of the required panels in the sketch.  The third panel is a 1 1/2" x 3" piece of Crumb Cake that was texturized with the Stripes Embossing Folder (123128 pg 218 IB&C).  The edges were distressed with Crumb Cake ink for a vintage look.   

I chose the 3/8" Quilted Ribbon Satin Ribbon on page 20 of the holiday mini for my ribbon and bow.  I think it goes perfectly and adds a bit of country charm to my card.  The buttons are tied with thin strips of Garden Green cardstock. 

The sentiment is from the Merry Crittermas stamp set which retired last year. 

Zany Birthday FMS#628

Well another week has flown by and there's a promise of Spring between the rain drops.  I'm thrilled to see all the cherry trees sta...