
I love giving treats for hostess gifts and having these cute little boxes to package them in works really well during the Holiday season. They are absolutely the perfect size for holding little bags of goodies.
I use 4.75 x 6.5 clear envelopes and just trim off the sticky end and then fill them with all kinds of things. Make sure you don't overfill these treat bags and it's nice to tie them up with a little ribbon and tag before sealing them in the box. Here ae some gift ideas you may not have thought of: Some fancy tea bags, chocolate covered pretzels or homemade Rolo pretzels, chocolate covered espresso coffee beans, Keurig K cups for fancy brews, hot chocolate packages, small round bars of specialty soap, to name a few. I hope you'll drop me a comment at the end of this post and let me know what you'd like to pack in one of these boxes. I'm sure you can think up some of your own!
Supplies:
Stamp Sets From the Holiday Catalogue:
Santa's List #131181
Very Merry Tags #130401
Cardstock:
Cherry Cobbler 1 sheet#119685
Season of Style Designer Series Paper Stack - 1 sheet #132181
Ink:
Cherry Cobbler #126966
Whisper White Craft Ink #101731
Accessories:
Pop N' Cuts Card Base Die #130099
Big Shot Machine #113439
Extended Cutting Pads #113478
Chevron Striped Ribbon Cherry Cobbler #130012
Circle Collection Framelits #130911
Large Oval Punch #119855
Decorative Label Punch #120907
Dazzling Diamonds #102023
Clear Embossing Powder #109130
Basic Rhinestones #119246
Assembly:
1. Cut a piece of Cherry Cobbler Cardstock at 5 1/2" x 11 and two small pieces at 2 1/2" x 3".
2. Place the long piece of cardstock on the Pop' N Cuts Card Base and run through the Big Shot Machine. This piece is your box base.
 |
| Card Base Pop' N Cuts #130099 cuts a card base. It's magnetic, so you can insert the magnetic Pop ‘n Cuts Dress Form Die or Label Pop' N Cuts die cuts inside this base to cut a fun pop-up card. Card base: 4-1/4" x 11". Use with Extended Cutting Pads. |
 |
| Too bad I had this sitting on a red table cloth.............. looks kind of confusing. Tip: Try to focus on the black Pop' N Cuts frame. I added some markers with white sticky strip to the card base. You could actuall add Washi Tape around the outter rim. Anyway, these markers help me line up card stock so I get a precise cut without wasting paper. |

4. Slip the tabs into the top of the box base being careful not to fold cardstock and then use the Large Oval Punch to punch out a handle for the box.

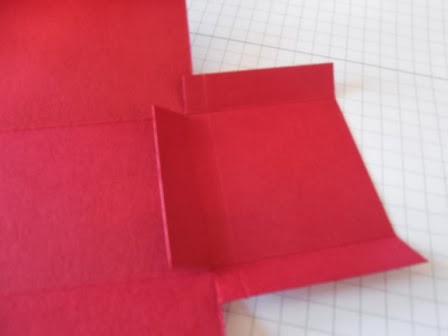
5. For the sides of the box score the two 2 1/2 x 3" pieces of Cherry Cobbler card stock at 1/2" on the 2 1/2" side, then rotate and score at 1/2" on the 3" side, rotate and score again on the last 3" side.


 |
| The three pieces you need to make this cute little box. |

- Cut 2 pieces 1 3/4 x 1 3/4" for side panels
- Cut 2 pieces 4 x 3/4 for lid panels
- Cut 2 pieces 4 x 1 3/4" for front and back panels

8. Crease all fold lines on box base and fit tabs into slots, this will assist with assembly.

9. Starting on one side of the box line up the short-sided tab from side panel with the inside bottom edge of box and adhere. Bring in both side tabs one at a time and line up with sides of box and adhere. Make sure edges all line up otherwise your box will be tippy. Repeat for second side.


10. Decorate the box as per your wishes.
 |
| I added a Santa image from Santa's List and a sentiment from Very Merry Tags. The ribbon is the Cherry Cobbler Chevron Ribbon. |
 |
| This box is decorated with the Winter Frost Designer Series Paper Stack paper. The snowflake embellishment is made with the Festive Flurry Stamp set and matching framelits and a Frosted Finishes embellisment. I've tied the box with a strip of Smokey Slate Chevron Ribbon. |
 |
| I put life savers in this treat box. The others have chocolate covered pretzels and truffles. |
 |
| This treat box is tied with the gorgeous Cherry Cobbler Tulle ribbon which is still available at last check in the Clearance Rack Blitz. It is so awesome to use. The sentiment is from the Warmth and Wonder Hostess Stamp set. |

I hope you enjoyed this tutorial and would love to hear your comments.


3 comments:
I love all your projects, Penny! Great ideas :) I don't have the Pop'n'Cuts die, but I'm going to try this cute little box without it. Thanks for sharing - wishing you a Very Merry Christmas!
Thank you so much for such a GREAT tutorial on these..Just made a dozen and need to finish them off with ribbon and an embellie! Once again, thanks for such a detailed set of instructions. :)
Thanks Sheri. So happy these boxes worked out for you. Hope you post some pictures on your blog, I know I'll totally love them. Too bad this bigz die is no longer active with Stampin' Up! I'll never retire mine though!
Post a Comment