I had extra tea light candles left over from my first project so I decided to make a tea light candle card. This project could easily be adapted for any occasion not just Christmas, to hold small cards or other trinkets or candy in the box. So even if you're not a fan of tea lights there is still a reason to make this box.
My Version:

Supplies:
Stamp Sets:
Santa's List #131811
Very Merry Tags #130402
Ink:
Early Espresso #126974
Cherry Cobbler #13002
Whisper White Craft Ink #101731 or Staz on White Ink
Card Stock:
Early Espresso #119686
Cherry Cobbler #119685
Whisper White #100730
Season of Style Designer Series Paper Pack
Window Sheets #114323
Accessories:
Chevron Ribbon Cherry cobbler #130012
Basic Rhinestones #119246
Labels Collection Framelits #125598
Clear Embossing Powder #109130
Assemble The Card Shell:
STEP 1: Cut a 9 x 4" piece of Cherry Cobbler card stock to measure and score at 4" and 5". Crease and fold on the score lines. This will form the spine of the gift card.


Step Two: The inside and the outside of the box are layered with card stock and designer series paper. Do step 2 before assembling the tea light candle box.
Front, Inside and Back Panels:
1st layer: Cut 4 pieces of 3 7/8 x 3 7/8" Early Espresso card stock.
2nd layer: Cut 4 pieces of 3 1/2 x 3 1/2" Season of Style Designer Series Pack paper. Apply adhesive to the back sides of the card stock and DSP and adhere to the card base front, inside and back panels.
Spine Outside and Inside Card Base:
1st layer: Cut two pieces of 7/8 x 3 7/8" Early Espresso card stock. Adhere to the spines on the front and inside of the card base.
2nd Layer: Cut two 2 pieces of 3/4" x 3 3/4" DSP and adhere to Early Espresso pieces on inside and outside of the card base.
Assembling the Tea Light Box:
STEP 1: Cut a piece of Early Espresso 5 1/2" x 5 1/2 card stock. Score this piece at 1/2" and 1 1/4" on all four sides.

Step 2: When you've score this piece you'll see squares in each corner. Trim away the corners on these score lines as indicated in the diagram below. need to be trimmed as per diagram.

Step 4: Fold in the sides to form a box and secure the flaps with a glue dot or sticky strip. Trim the opening of the box flap by snipping the corners.

Step 5: Cut a 3 x 3 piece of designer series paper and adhere it to the top of the box.
Step 6: Using the smallest size of Label Collection Framelit dies to make a cut out in the center of the box top. Flip over and cover with a square of acetate or window sheet to ensure the contents of the box don't fall out. Use glue dots in the four corners of the accetate to secure.
STEP 7: Attach the box to the card base with sticky strip.

Finishing Touches:
Step 1: I decorated the front of the box with a stamped image from the Santa's List stamp set. It's one of my favourite sets this year. I stamped the Santa image in Early Espresso on Whisper White card stock and then cut it out with an Oval die from the Oval Framelits set. I distressed around the oval's edges with Early Espresso ink and a sponge dauber.
Step 2: I added a layer beneath the Santa in Early Espresso Card stock cut out with a Labels Collection Framelit die. This additional layer really makes the stamped image pop.
Step 3: The "Naughty or Nice" sentiment from the Very Merry Tags stamp set was stamped in Whisper White craft ink on Cherry Cobbler card stock and then heat embossed with Clear Embossing powder. I added two medium sized Basic Rhinestones to the checklist on the sentiment for a bit of sparkle.
Step 4: To keep the box closed when it's completed, I added a piece of the beautiful Chevron Striped Ribbon in Cherry Cobbler that I adhered to the top, spine, and back of the card base with Glue Dots.
Step 5: Add your candles to the box. The box will hold 4 was tea light candles, but you could easily substitute other little trinkets or goodies to this box such as "chocolate".

Well that's it for today's tutorial. I hope you enjoyed it and will leave me a comment. Thanks for stopping by.
My Version:

Supplies:
Stamp Sets:
Santa's List #131811
Very Merry Tags #130402
Ink:
Early Espresso #126974
Cherry Cobbler #13002
Whisper White Craft Ink #101731 or Staz on White Ink
Card Stock:
Early Espresso #119686
Cherry Cobbler #119685
Whisper White #100730
Season of Style Designer Series Paper Pack
Window Sheets #114323
Accessories:
Chevron Ribbon Cherry cobbler #130012
Basic Rhinestones #119246
Labels Collection Framelits #125598
Clear Embossing Powder #109130
Assemble The Card Shell:
STEP 1: Cut a 9 x 4" piece of Cherry Cobbler card stock to measure and score at 4" and 5". Crease and fold on the score lines. This will form the spine of the gift card.


Step Two: The inside and the outside of the box are layered with card stock and designer series paper. Do step 2 before assembling the tea light candle box.
Front, Inside and Back Panels:
1st layer: Cut 4 pieces of 3 7/8 x 3 7/8" Early Espresso card stock.
2nd layer: Cut 4 pieces of 3 1/2 x 3 1/2" Season of Style Designer Series Pack paper. Apply adhesive to the back sides of the card stock and DSP and adhere to the card base front, inside and back panels.
1st layer: Cut two pieces of 7/8 x 3 7/8" Early Espresso card stock. Adhere to the spines on the front and inside of the card base.
2nd Layer: Cut two 2 pieces of 3/4" x 3 3/4" DSP and adhere to Early Espresso pieces on inside and outside of the card base.
 |
| Outside view of the card base. The inside should look the same. When using striped DSP make sure the stripes are all running in the same direction before assembling. |
Assembling the Tea Light Box:
STEP 1: Cut a piece of Early Espresso 5 1/2" x 5 1/2 card stock. Score this piece at 1/2" and 1 1/4" on all four sides.

Step 2: When you've score this piece you'll see squares in each corner. Trim away the corners on these score lines as indicated in the diagram below. need to be trimmed as per diagram.

 |
| Step 3: Cut the flaps to the 1 1/4" score line on all four sides before forming your box. See arrows on box diagram. |

Step 5: Cut a 3 x 3 piece of designer series paper and adhere it to the top of the box.
Step 6: Using the smallest size of Label Collection Framelit dies to make a cut out in the center of the box top. Flip over and cover with a square of acetate or window sheet to ensure the contents of the box don't fall out. Use glue dots in the four corners of the accetate to secure.
 |
| Apply sticky strip to the two sides and the bottom of the box. |
 |
| Note: If you want to keep the contents of the box a surprise then omit step 6 and just decorate the top of the box. |

Finishing Touches:
Step 1: I decorated the front of the box with a stamped image from the Santa's List stamp set. It's one of my favourite sets this year. I stamped the Santa image in Early Espresso on Whisper White card stock and then cut it out with an Oval die from the Oval Framelits set. I distressed around the oval's edges with Early Espresso ink and a sponge dauber.
 |
| Santa's List # 131811 - One of those great classic stamp sets. Only available in the Holiday Mini until January 3rd, 2014. |
 |
| You can easily cut stamped images from the Oh, Hello Stamp Set with these framelit dies. Largest scallop oval measures 4-1/4" x 5-1/8". There are 6 dies in the set and they cut single sheets of paper with your Big Shot, Standard Cutting Pads, and Multipurpose Platform. |
Step 2: I added a layer beneath the Santa in Early Espresso Card stock cut out with a Labels Collection Framelit die. This additional layer really makes the stamped image pop.
 |
| Labels Collection framelits coordinate with the Apothecary Art Stamp Set. The largest label is approximately 5-7/16" wide. The set includes 6 dies in a sturdy envelope for easy storage in SU's Big Shot Die Storage. |
Step 3: The "Naughty or Nice" sentiment from the Very Merry Tags stamp set was stamped in Whisper White craft ink on Cherry Cobbler card stock and then heat embossed with Clear Embossing powder. I added two medium sized Basic Rhinestones to the checklist on the sentiment for a bit of sparkle.
 |
| Very Merry Tags Stamp Set #130402 |
Step 4: To keep the box closed when it's completed, I added a piece of the beautiful Chevron Striped Ribbon in Cherry Cobbler that I adhered to the top, spine, and back of the card base with Glue Dots.
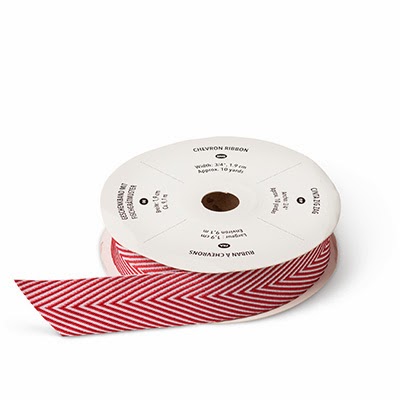 |
| Chevron Striped Ribbon is elegant and smooth and ties so easily. You'll love it! |
 |
| I used over 20 inches of ribbon so I could tie it on the side. Tip: Before cutting ribbon strip measure from the spool how much you'll need to tie either a box or just a double bow knot like I did. |
 |
| Once the ribbon was attached I mounted my two images by adhering Stampin' Dimensionals to the back sides and then adhering them over top of the ribbon strip. |
Step 5: Add your candles to the box. The box will hold 4 was tea light candles, but you could easily substitute other little trinkets or goodies to this box such as "chocolate".
 |
| This view of the box shows the candles inside. They fit perfectly! |
 |
| Side view of the box opening. You could also turn the box so this faces the top but I chose to put it on the side for easy access and also in case the box opened the tied ribbon will hold in the contents. |

Well that's it for today's tutorial. I hope you enjoyed it and will leave me a comment. Thanks for stopping by.


1 comment:
Super gift idea. Thanks for the tutorial.
Post a Comment