Friday, November 18, 2011

Shirley's Winter Wednesday Christmas Blog Hop - Week 2

Welcome to week two of Shirley's Winter Wednesday Christmas Blog Hop.  You might notice from last week that she changed the name of the hop.  That's not to confuse you, it's just to clarify that her hop will be updated every "wednesday" not Monday (like the Halloween Hop) from now until Christmas.  Okay now that you're in the know about scheduling, here's a few rules you need to know about before I get to my post.

Shirley has a few rules which I'll share with you now. Shirley’s Winter Wednesday Christmas Blog Hop, want to join the fun, here is all you have to do:

1. Add the Christmas Blog Hop badge to your post and link back to Shirley’s blog (http://lookatmycutestuff.blogspot.com/)
2. Anything goes it just has to be Christmas.
3. It has to be a new post.
4. Add the Hop to your Post.
5. Have fun!

I quite enjoy making spotlight cards and teaching this technique to new stampers.  It opens up a whole new dimension for them and the "wows" are fun to listen to when they complete their cards. 

So with that in mind, here is one of the four cards that I'll be teaching in my Christmas card class this coming Sunday. 

This card is a mashup of Serene Snowflakes, Holiday Lineup and Tags Til Christmas stamp sets.  These are three of this year's popular Christmas stamp sets featured in the 2011-2012 Idea Book and Catalogue (IB&C).  The card base is Marina Mist cardstock and the second layer is Old Olive and Real Red cardstocks that were embossed with the Finial Embossing Folder. 

To begin with I stamped 2 of the elf images onto a piece of 2" by 4" Whisper White cardstock.  I used the Stampa-m-jig to make sure they were lined up perfectly.  You gotta love that tool!  I then restamped the elves on some scrap WW cardstock and then punched out a 1" and 1 1/4" circle punche and a small oval from those images I wanted to highlight.  The final step was colouring the punched out images with markers and then adhering them with dimensionals over their matching image.


When adhering the punched images to the original stamped image make sure everything lines up perfectly and check your colouring to make sure you didn't miss any detailson the punched portion.


The inside of the card was stamped with images from Serene Snowflakes  (pg 36 IB&C #115438)and a sentiment from the Punch Pals stamp set in Whisper White Ink.  I applied White Embossing Powder over the damp images and heat set them. 
Serene Snowflakes a wood mount stamp set on page 36 of the IB&C, #115438
Holiday Lineup pg 38 of the IB&C


Here's a closeup of the cute sentiment which is from the Tags Til Christmas set (pg. 32 IB&C #120847w or 121169c).  I've cut ot the sentiment using the 1 1/4" square punch and mounted it on Real Read cardstock that was punched out with the scalloped square punch. The no-name pompoms are glued on with Crystal Effects to add a little more dimension to the card.


I'm also going to be making a bonus project at my card class.   I saw these cute little post it note holders on someone else's blog (sorry I don't have your name right now but will add it and your link).  I thought they would make a perfect add-on to the class.  Simple to make and a great gift idea.  Okay that's it for my Wednesday Winter Christmas Blog Hop post for Week Two.  Hope you enjoyed it!


Thursday, November 17, 2011

Annual On Line Shopping Extravaganza!!! It's Coming...................

Stampin' Ups! fabulous Online Christmas Shopping Extravaganza is just a few days away!!!  I'm so excited I can't wait to share it with you! What a wonderful way to kick off the holiday shopping season!

Starting on Monday November 21st and running through November 30th, log into my on-line store to see what's so special about the
On-Line Extravaganza.

Here's some hints about what's coming:
  • How about getting FREE digital downloads when you buy My Digital Studio Express?
  • How about getting 60% off on select Designer Fabrics
  • How about getting 30% off on an exclusive ribbon bundle?
  • In addition, there will be two items on sale for just 24-Hours.  That's right!  From 12:01am November 21st to 11:59pm two special discounted items will be offered!!!!  WOW!!!  So make sure you don't miss the first 24 hours of Online Extravaganza!  I know I won't.
If you're on my mailing list watch for your copy of the Extravaganza E-Card coming on November 21st, or the Ad on my Website on November 21st so you don't miss the 24-hour-only deals!

Monday, November 14, 2011

Shirley's Christmas Blog Hop - Week One

I'm so happy that Shirley from Look At My Cute Stuff decided to do a Christmas Blog Hop and I'm getting all revved up to play along.  Isn't her little Blog Hop badge just the cutest!  Makes me want to start my Christmas baking. 
Anyone can join in this fun weekly event which will last up until Christmas time.  Hope you can play along too, cause I'd love to see your creations. Shirley has a few rules which I'll share with you now. Shirley’s Christmas Blog Hop, want to join the fun, here is all you have to do:

1.        Add the Christmas Blog Hop badge to your post and link back to Shirley’s blog (http://lookatmycutestuff.blogspot.com/)
2.       Anything goes, it just has to be Christmas.
3.       It has to be a new post.
4.       Add the Hop to your Post.
5.       Have fun!

For my first creation I drew inspiration from the DSP and colours in Shirley's Blog Hop Badge and from the Holiday Mini Catalogue. 
I've been seeing these floral designs on various blogs and on page 28 of the Holiday Mini so I thought I would try my hand at using one for the focal point on my Christmas Blog Hop Card #1. 

The DSP is from last year's Holiday Mini and is called Candy Cane Christmas.  I have a ton of it left over as I was partial to this paper and the Merry Chrittermas stamp set last year.  When I saw Shirley's Hop badge I knew what I would be doing, so started digging through my stash.  I used Pink Pirouette and Baja Breeze cardstocks.

I layered the flower onto a piece of Red Glimmer Paper (121790 pg 181 of the IB&C).  The glitter in this paper perfectly matches the little glimmer dots on the Candy Cane Christmas DSP.  Talk about luck!  I love this Glimmer paper and think I'll be buying some extra sheets for my stash before the year is out.  It'll be perfect for Valentine's Day projects.

This floral image is made by cutting twelve 1 1/4" squares of DSP and rolling them into little cones.  Do your rolling first and then secure with Tom Bow or Crystal Effects glue.  This is tricky as they want to pop open, so you'll have to hold each one a few minutes to make sure they are secure.  Once you have all the little flutes made then adhere them to a circle punched out with 1 3/8" circle punch.

Make sure the points all work to the center.  I did mine like a clock (12, 3,6,and 9) and then filled in the gaps.  Once this piece has dried add a flower center or focal point that will hide all the little points from the flutes.  I used a 3/4 inch circle cut from the Red Glimmer paper and a small flower and Rhineston Brad (Circle Fire 109110 pg 198 IB&C), for mine.


 This sentiment is from the 2010 retired Merry Chrittermas set.  It's layered on Pink Pirouette and Baja Breeze cardstocks. 
Inside View:  Sentiment is from a retired set called Merry Chrittermas.I used the Candy Cane Christmas  DSP  layered on Baja Breeze cardstock for some interior design. 

Okay I probably have missed the deadline this week, but I'm posting anyway.  Hope you enjoy this entry.  Thanks for dropping by.

A La Card Monkey 82: Anything Goes + Sketch


My wonderful SIL's 50th birthday is coming up on the 25th of November and I thought since this week's A La Card Monkey sketch was "Anything Goes" that I would use it for her card.  Hope she's not watching!

"E" is a very sweet gal who loves making cards too, so I'm hoping this will be one she loves.   When I think of sweet I think of soft sugary things (yummy cupcakes, frothy icing, more cupcakes) and soft warm pastels.  With all that in mind here is my card:
The card base is Chocolate chip cardstock layered with a 5 1/4" x 4 piece of Blushing Bride (119796 pg 176 IB&C).  I texturized this piece with the Finial Press Embossing Folder ( 115963 pg. 219 IB&C).  The designer series paper has since retired but I loved the very feminine shiny swirls of embossed design and it matches perfectly with the embossed folder piece.  The 3/8" Quilted Satin ribbon is in Early Espresso (124104 and can be found on page 30 of the Holiday Mini catalogue. I love this ribbon so much, I'm going to order a couple of extra spools before this catalogue expires on January 3, 2012. 

How do you like this sentiment?  This is such a great stamp to work with and layer out.  Book a workshop with me and you can purchase this stamp set with your Hostess Dollars.  It's part of the Hostess set called Happiest Birthday Wishes on page 10 of the Idea Book and Catalogue.  I think this is one of the best Birthday sentiment stamp sets I own and I know it's going to see a lot of ink this year.  

I stamped my image in Chocolate chip on Blushing Bride and Very Vanilla cardstocks and punched out the Blushing Bride layer with the Scallop Punch and 1" circle punches and the Vanilla Layer with the 1 38" circle punch.

Inside View.  The verse and cupcake are from the Create a Cupcake stamp set (pg 68 IB&C).  The cupcake base is stamped in Chocolate Chip ink and the top is cut from the DSP.  I should have done some sponging on this card before putting it together but didn't have the time.  The next time I make it I'll make sure I do as I believe it really adds to the life of the card in terms of additional texture and eye appeal. 


Okay that's it for this week.  Hope you enjoyed this card and thanks for stopping by! 

Sunday, November 13, 2011

Stampin Queen's Sketch Challenge #12

It's Sunday night once again and time for me to share my rendition of this week's Stampin' Queens Sketch Challenge card.  I really like the layout of this sketch.  It's got lots going on it but it's not overpowering. 

I'm still into making Christmas cards and wanted to hightlight some of the "other" Stampin' Up Christmas stamps that are available in the 2011-2012 Idea Book and Catalogue, namely Decorative Decorations and Christmas Collage.  I love both of these sets and would hate to see them overlooked for newer ones.

So with these sets in mind I began by stamped the Christmas Collage in Whisper White onto a  5 1/4 x 4" piece of Night of Navy cardstock, and then emboss it with White Embossing Powder.  This piece was cut into three 1 1/4" strips and  glued from left to right onto the Whisper White card base.


I used a scallop die to cut the small oval scallop from the Silver Glimmer Paper and then mounted one of the ornaments from the Decorative Decorations set with dimensionals on top of it.  The ornament was stamped in Whisper White ink and embossed with White Embossing Powder on Night of Navy cardstock.  The center of the ornament is my sentiment and again it is from the Decorative Decorations set.  A basic rhinestone was added to the center of the sentiment star.  For the bow I used Whisper White Taffeta ribbon.  The image for the three circles pieces was stamped in Night of Navy on Whisper White cardstock and then cut out with the 3/4" punch.  This piece was mounted on dimensionals onto a 1" circle cut from the Silver Glimmer paper.  A basic rhinestone was added to the center of each image.

This is a view of the inside of the card.  The sentiment is from the Christmas Lodge set.  A 1/2" x 5 1/2" strip of Night of Navy Cardstock was adhered to the right side of the card and a 1/4" strip of the Silver Glimmer paper was added.

Friday, November 11, 2011

Remembrance Day 2011


For all the Canadian War Veterans, men and women,
who have served our Country in all times my thanks. 
I will not foget the sacrifices made on my behalf.

Monkey 81 - Thanks/Friend + Sketch


Here's a pretty cute sketch that was featured on A La Card Monkey this week. Don't you just love the picture of the kitten and ducks?   I wasn't able to participate in time for my rendition to be posted. You know how it is, life gets in the way.  However I did make an entry and even though the challenge is closed I thought I'd share my take on the sketch with you. 

Before I do that,  I just want to take a moment and congratulate the winner and spotlighted Monkey Princesses who will all be guest designers for A La Card Monkey in weeks to come.  Marie received the prestigious "Monkey Princess" for her adorable little deer friendship card.  I think you'll agree it's just so stinking cute!  Congrats Marie! 

And way to go,  to all the other gals who participated; especially Luciana and Jennifer who were chosen as upcoming guest designers.  Jennifer actually made two cards which is awesome!  Make sure you stop by their blogs to congratulate them and check out their wonderful creations. 

And here is my "non-entry".  That'll teach me to procrastinate and do some unimportant stuff like housework and dishes.  Lol!


Because this sketch is about friendship and thanks, I thought what better stamp set to express this than Stampin' Up!s  "Friends Never Fade" (pg.107 Idea Book & Cataogue [IB&C]).  I love the floral shapes and sentiment in that set. 
This set of 4 stamps is so reasonable priced.  It comes in wood mount (118750 for $21.95) or clear mount (120618 for $16.95).  At $4.25 per stamp for clear mount, that's an awesome deal.   Although the Greenhouse Gala DSP I used is now retired this set also works well with the "Beyond the Garden" papers offered on page 185 of the IB&C.

I wanted a floral paper for my background layer and remembered I still had some Greenhouse Gala Designer Paper in my stash which matches this stamp set perfectly.  I loved the richness and colours in this DSP and it's really worked for me in past projects, so I thought why not.  Once I chose the DSP the ink colours and cardstock were a no-brainer.  That's one of the things I totally love about Stampin' Up! products, they all coordinate so beautifully! 

This picture shows a bit of the upper detail in the card where I've tied a bow with Whisper White Tafetta Ribbon and added three little sentiments stamped in Pear Pizzazz ink on Jewelry Punch tickets. The three cardstock colours I chose for this card are Whisper White, Peach Parfait and Pear Pizzazz.  

I'm not a big fan of large scallops so decided to use the Lacey Ribbon Border punch (pg. 211 IB&C) rather than a scallop on the card front.  I cut a 5 1/4 x 1 1/2" piece of Pear Pizazz cardstock to layer under the Lacey Ribbon border strip.  This adds a bit more definition .  Instead of using brads or flowers I picked three of the beautiful large size basic pearls and added them to the bottom of the Lacey strip. 

Finally, I layered up the sentiment "Friends Are Flowers that Never Fade" with Peach Parfait, Pear Pizazz and Whisper White cardstocks.  The sentiment which is stamped in Pear Pizazz is adhered with dimensionals to the Whisper White layer.  Building the layers up from the main cardstock colour to the sentiment seems to really make the words pop off the card.

As I mentioned earlier I love the floral stamps in the "Friends Never Fade" stampset and rather than add designer paper or cardstock detail to the inside of the card I chose to showcase the floral stamps and the sentiment on their own. 

To accomplish this I began by stamping the sentiment which is from a retired set called "Best Blossoms", in Whisper White ink, and then embossed and heat set it with Whisper White Embossing powder.  I did the same for the floral images.  By using white ink to reflect the negative image on the front of the card, I believe this makes the lines of the card flow better.  

Okay so even though I wasn't able to make the deadline for entering my Monkey 81 card into the  A La Card Monkey weekly challenge,  I still had fun showing it to you and hope you like it.  See you next time and hope you draw some inspiration from my card. .

Sunday, November 6, 2011

Stampin Queen's Sketch Challenge #11

Have you checked out this week's Stampin Queen's Sketch Challenge SQSC11 yet?  If not click here to check out what the guest designer's have come up with and all their fabulous cards. 

This sketch has tons going on  in it, but you can make it as simple or as complicated as you want.  Don't let it scare you off as there are prizes this week and you won't want to miss out on!

As in past week's I'm sticking to my "Holiday" theme with a vintage flair.  I chose the family silhouette from the Welcome Christmas stamp set (pg 36 IB&C) for my stamped image.  The image was stamped in Early Espresso ink on Whisper White cardstock.  This piece of cardstock was mounted on a 1 3/4 x 2 1/2" piece of Garden Green.  


The card base is Whisper White cardstock layered with a 5 1/4 x 4 piece of Cherry Cobbler that was texturized with the Snow Burst  Textured Impressions Embossing Folder (12406 pg 33 Holiday Mini).  I loved the plaid papers in the Frost Wood Lodge Designer Series paper (124002) pg 28 Holiday Mini) so decided to layer pieces of this DSP onto Garden Green cardstock to make the two of the required panels in the sketch.  The third panel is a 1 1/2" x 3" piece of Crumb Cake that was texturized with the Stripes Embossing Folder (123128 pg 218 IB&C).  The edges were distressed with Crumb Cake ink for a vintage look.   

I chose the 3/8" Quilted Ribbon Satin Ribbon on page 20 of the holiday mini for my ribbon and bow.  I think it goes perfectly and adds a bit of country charm to my card.  The buttons are tied with thin strips of Garden Green cardstock. 

The sentiment is from the Merry Crittermas stamp set which retired last year. 

DAY THREE MY DIGITAL STUDIO EVENT & FREE DOWNLOADS

MY DIGITAL STUDIO EVENT & FREE DOWNLOADS
ONLY TWO MORE DAYS TO GO!


Learn more about digital scrapbooking and card making and get your free download.  Simply complete a quick survey at http://www.mydigitalstudio.net/
and your ready to access these amazing free products. 
If you miss out on this offer/opportunity you will still be able to get these digital products after November 7th, however they will have to be purchased.  So why not take advantage and get them FREE today and tomorrow!
I love the fact the My Digital Studio is so easy to use.  I whipped up this Christmas tag in a matter of minutes.  Once printed out I can make a hybrid tag by simply adding some embellishments and bling.  The really neat thing about this is that I can also make a whole sheet of tags in a matter of seconds.  Something that would have taken considerably longer in my craft room. 
To learn more about My Digital Studio - click hereThere are great tutorials and samples and discussion threads you can follow. 

To shop online 24/7 - click here

Have a great creative weekend!

Saturday, November 5, 2011

Day Two Free Digital Downloads


Hi Everyone.  It's day two of Stampin' Ups! four days of Free Digital Downloads and I want to share a card I made with this fabulous program. 

This is the first card I've made using MDS.  While it may be a bit busy looking, the elements seemed to all work together, so I went with it. Let me know what you think.
 
The outside of this card uses elements from Home for the Holidays.

I kept the inside of the card fairly plain but if I was doing a bunch of these to send out in the mail I'd incorporate one of our pictures from our holidays this year.  Since there's no extra charge for this when they're printed that would be a great idea.   Come back tomorrow when I'll have a tag and another scrapbook page for you.  Happy Stamping and Scrapbooking!

Friday, November 4, 2011

Digital Scrapbooking Days Are Here - Get Your Free Download Today

Hi Everyone.  Today is a very special day because it's the start of Digital Scrapbooking Days.  That's right.  Today through November 7th celebrate with Stampin' Up by joining in their Digital Scrapbooking on-line event. 

All the downloads are compatible with most design software.  To access the downloads, you will need to fill out a short survey to help Stampin' Up! track the success of the FREE DOWNLOAD CAMPAIGN.  And that's all there is to it.  Go check it out for yourself on MyDigital Studio.net.
Over the next few days I'm going to be adding projects made with these free downloads and to start things off here are some pictures of my mom taken before Halloween.  All I did was drop in my photos and add some text and voila it was done.  That's just how easy this program is.  Let me know what you think.
Here's my mom working on her Halloween Cards.  She's adding stickers to the cards and envelopes before sending them out to her eleven grand/great grandchildren. 


Thursday, November 3, 2011

Monday Monster Mash Halloween Count Down Blog Hop - Week Twelve

Monday Monster Mash Halloween Count Down Blog Hop has finally come to an end after 12 fun filled weeks. Shirley sure puts on a good party and I'm glad I played along. Here's my last card and
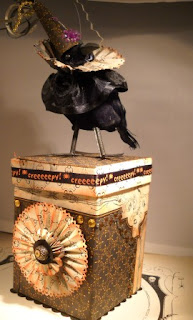
a little crow that I whipped up just for fun.  Hope you enjoy.  I'll be back to fill in the details later on. .


He's got some attitude. 

Black and White Anniversary - FMS #669

I'm up for another sketch challenge card, how about you?  Narelle Farrugia is the sketch designer for  Freshly Made Sketches #669  this...