Saturday, September 21, 2013

Basics for Babies Charity Event

I received an invitation last week to participate in an all day scrap-a-thon fund raiser being held in Aldergrove BC for the Basics for Babies Food Bank charity.  What a great cause!

I was thrilled to be asked by this group, and thought it would be a terrific opportunity to meet some local gals who shared a love of paper crafting and to see what this charity was all about.  I only had one week to prepare and since I've never had a vendor table before I decided to invite my down line Ethel DeTemple and my convention buddy Debby Evoy to get involved too.  Both were available and super keen to try out this experience too.  The following are some of the pictures of the day.

I didn't have a Stampin' Up! Sign or Table Cloth with the Stampin' Up! logo on it, so I decided to make a banner using the Build A Banner Simply Create Kit and the Christmas Banner Simply Create Kit from the Holiday Catalogue. In a later post I'll show some closeups of each of the banners.  It was super fun to make and we had lots of comments on it.

Debby, Ethel and myself contributed over $100 in Stampin' Up! products for a prize draw. At the end of the evening we drew the winning ticket which was held by S. Smith. 

Here's a picture of Debby working at our vendor table.  We had two round tables pulled together to hold all our promotional materials and things we were selling.  Since we'd never done this before we probably brought too much stuff, but who knew!

We had a card display board and some 3-d items behind Debby.  She and Ethel shared the first table and had their Stamp Camp Sign Up Sheets and gift items displayed. 

Ethel was in her element as she making kits from her Owl Builder Punch and Designer Series Paper.  A very productive day!

Ethel designed some fabulous picture frames that show case the Dress Up Frame Lit Dies.

To find out more about Debby Evoy's Stampin Clubs and Card Classes check out her event calendar and blog Debby Duz Stampin.  She's got some great classes coming up. 


Here's a room view of the Basics for Babies Scrap-a-thon participants.  What a worthwhile cause and well run event hosted by Alana and Sandi  C. This fund raiser is held annually the second week in September at the St. Dunstan's Church in Aldergrove BC.  We'll probably participate again next year as we had so much fun!  They had lots of great door prizes and raffles so it was a great value at $40.00 per participant. 
Debby and Ethel participated in a Halloween Card Make N' Take session hosted by Sharka Leigh an Artist from North Vancouver and avid scrapbooker. The card they are holding up used the now retired but ever popular Wicked Cool Stamp Set by Stampin' Up!.  Great demo by Sharka and great card! 


Make N' Take Cards by Alana Fidler and Sharka Leigh.

Make N' Take hosted by Ethel, Debby and myself.  What a team! Unfortunately we were so busy demonstrating our Make N' Takes, that non of us took any pictures...........duh!
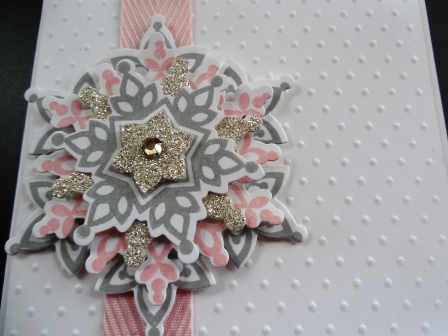
Here are some of my Post It Note holders that I worked on during the event.  These are so much fun to make and give.  The Santa Clause one is made with the new Ronald McDonald Stamp Set called Tag It which coordinates with the Chalk Talk Framelit Dies.  The snowflake post it note holder was made with the Festive Flurry stamp set and coordinating Festive Flurry Die Cuts.  The Festive Flurry stamp set and framelit dies can be purchased at a 15% savings when bought as a bundle.  The DSP I used for these holders is from the Winter Frost and the Season of Style paper packs sold in the Holiday Catalogue.  These paper packs which contain 48 sheets (24 each of 2 designs) are terrific for projects like these where you need multiple paper design repeats. 


Festive Flurry Framelit Dies #132193.  Largest Image is 4 3/16" diameter.  Use with Big Shot and Standard Cutting Pads.
Festive Flurry Stamp Set # 131778 Wood Mount or Clear 131781
Tag It Stamp Set #130300 Wood or 130303 Clear is available in Spanish, French and English and is the 2013 Ronald McDonald House Charity "One Stamp Set Can Make a Difference" stamp set.  Stampin' Up! donates $3.00 to Ronald McDonald House Charities (RMHC) when you buy this set.  To date they have donated over $1,000,000.  

All three of us won some great prizes during the raffle and vendor draws.  I'd like to give a shout out for the two prizes I won.  I won a $45.00 gift certificate from Timeless Memories Photography (Cindy Clark) and a Magnetic Platform from Mary Scott of Luv 2 Scrap.  Thanks to both these businesses for their contributions to this worthwhile event and for the awesome prizes!  This made my day, along with all the great people I met and chatted with. 


Thursday, September 12, 2013

New Clearance Rack.............It's Been Updated!

If you're a bargain hunter you may want to check out the Clearance Rack as it's been updated and there are some hot deals up for grabs.  Save up to 80% on some items.  Now that's a savings!

You know how the Clearance Rack works, it's always "first come - first served".  Since stock is limited you'll have to act fast to check it out and get the products you may have missed earlier this year or just have to have.  Check it out today.  

Here are my top picks from the Clearance Rack:

 
Cloudy Day Textured Impressions Embossing Folder 127022     Sale Price: $3.99


Early Espresso 3-1/2" Scalloped Tulle Ribbon     127839  Sale Price: $3.39


Ciao, Baby! Clear-Mount Stamp Set     129648  Sale Price: $6.39

Now Available - The Big Shot Magnetic Platform

If you've been waiting like I have for the re-release of the Big Shot Magnetic Platform then your wait is over! 

Stampin' Up has received it's newest shipment of the Magnetic Platforms and they are selling like hot cakes.  Order #130658 Price: $49.95.

If you use Framelits, Edgelits or the new Thinlit Dies then this new magnetic platform is an absolute must for you.  No more post it notes or shifting dies.  Order now and don't risk missing out on it again..................it'll be selling fast.  Here's a great little video from Mary Fish who demonstrates a fun card using the new magnetic platform.  Enjoy!


Note of Caution:
The Magnetic Platform is very powerful so if you have a pace maker you may want to be very careful or not use this product for your cutting as it could affect the operation of the pace maker.  Also do not put your credit cards or anything else that could be de-magnatized on top of the platform or you may regret it.  Just sayin!

Monday, September 9, 2013

Make N' Takes for Fund Raiser

I've been invited to do a vendor table next weekend in Aldergrove, to support a local charity called Basics for Babies. 

It's very short notice so I've been busy trying to pull things together with my downline Ethel and friend Debby.  We'll be doing the table together since none of us have had this experience and it's fun to share.  

So today I'm busy working on Make N' Takes for this event and thought I'd show you the preliminary card that we're planning to do.  They may change a little bit between now and Saturday, but for now let me know what you think  and whether you'd like to do them as a Make N' Take project.  Would they inspire or excite you?


Note:

I made a few minor changes to these cards, but basically cased the design from Chan whose great blog is called Two Rosie Cheeks. Make sure you drop by her blog and leave a comment too.  She's an awesome stamper! 

Saturday, September 7, 2013

Festive Flurry in a Festival of Colours!

In my last post, I shared my "Festive Flurry Goes Pink" card and details.  This was such a fun and easy card to make and it delivered that WOW factor when I showed it to my friends.

I also posted it on my Pinterest site and Stampin Connection web site (a unique site just for Stampin' Up Demos to share their work and discussions), and I received a lot of wonderful comments about the Pink and Smokey Grey colour combination on a Christmas card.  

One of the things I really liked about this card was the addition of the Chevron Ribbon. This 3/4" twill ribbon is simply beautiful and comes in a host of colours.  So that set me to thinking and got the creative cogs in my brain turning and before you know it I decided to try the same card design but with a myriad of other colours.  
My colour choices for these next cards were based solely on the Chevron Ribbon shares I'd purchased in June.  And, while these colour choices may be a little unconventional for some of you, I found them exciting and fresh.  

If you're interested in CASing this card all the supplies and construction information can be found on my previous post.

Here's a group shot of all the cards I made.  They looked so awesome all together.

I made four cards with the fold at the top.  Right now I'm working on a box to hold them and will give these away as a set.  It will make an awesome pre-Christmas hostess gift, don't you think?
I made three side-fold cards and I'm currently working on a fourth to go with these so I'll have another set to give away.  What fun! 

Wisteria Wonder

Blushing Bride

Marina Mist 

Crushed Curry
Calypso Coral

Pear Pizzazz

This is the inside of the Pear Pizzazz card. I stamped the skate and sentiment images with the retired Winter Memories stamp set from last holiday season.  I added a small amount of Dazzling Details to the mistletoe above the skate to give a little glimmer to this part of the card. It should be noted that the inside of each card matches the colour of the Chevron ribbon and ink, except for the Blushing Bride card where the image is stamped in Smokey Slate.  
Well that's it for today.  Hope you enjoyed this post and will let me know what you think. For example, what colour do you like the best and do you prefer the top folding or side folding card style?  I love them all but I'm most partial to the Blushing Bride and the Pear Pizazz.  

Tuesday, September 3, 2013

Festive Flurry Goes Pink

I happen to like pink and gray together.  Mix in a little glimmer paper and a rhinestone and you've got the makings of a great card, even if I do say so myself.  You be the judge.

Supplies:

Stamp Sets:
Ink:
  • Smokey Slate
  • Blushing Bride
Card Stock:
  • 5 1/2 x 8 1/2 Whisper White card base - fold in half
  • 5 1/4 x 4 Whisper White for 1st layer - emboss with Polka Dots EF #117335 and mount with dimensionals to card base
  • 4 1/4 x 4" Whisper White for snowflake images
  • Scraps of Whisper White and Blushing Bride for sentiment and backer 
  • Scrap of Silver Glimmer paper for snowflake and star  
Accessories:
  • Big Shot, Large Oval and Extra Large Oval punches, Festive Flurry Framelits #132193, Basic Rhinestones, BoHo Blossoms Punch,Perfect Polka Dots Embossing Folder, Dimensionals, Snail, 6/12" piece of Blushing Bride Chevron Ribbon and Dazzling Details glitter adhesive.
 

This is a very basic card starting with a Whisper White card base that has a single layer of Whisper White that was embossed with the Perfect Polka Dots Embossing Folder.  The 6 1/2" piece of Chevron Ribbon was adhered to the polka dot layer before the layer was added with dimensionals to the card base. Isn't the snowflake beautiful?  To achieve this look,  I stamped the medium sized snowflake in both Smokey Slate and Blushing Bride and the smaller snowflake in Smokey Slate.  The snowflakes including the smaller one on Silver Glimmer Paper were cut out using the Festive Flurry Framelits that co-ordinate with the stamp set of the same name. You can purchase these as a bundle and save 15% off the original price.  The snowflakes were stacked together with dimensionals and then mounted over top of the ribbon.  The small silver star was punched out of Silver Glimmer Paper with the BoHo Blossoms Punch and a medium sized Basic Rhinestone Jewel was mounted in the center. 

I stamped the sentiment from Winter Memories on the inside of the card.  This stamp set was one of my all time favourites from last year's Holiday Catalogue and even though it's retired I still want to use it.  I simply stamped the image in Smokey Slate on the inside of the card base and as an after thought, I added Dazzling Details on the laces of the skates.  You can't see how pretty that looks because I did it after this picture was taken, but trust me it added a subtle sparkle that worked.  

The sentiment from Petite Pairs was stamped in Smokey Slate on a scrap of Whisper White card stock and then punched out with the large oval punch.  I mounted 4 small Basic Rhinestone Jewels below the sentiment for a little extra bling.  The sentiment piece was mounted on an oval of Blushing Bride card stock with dimensionals.  To get that perfect layered look I punched the Blushing Bride piece out using the Extra Large Oval Punch.  Ta Da  all done!

Monday, September 2, 2013

Envelope Punch Board

I don't have to say a lot about this hot new September 1st product.  It's the brand new Envelope Punch Board.  

The Envelope Punch Board creates totally customizable envelopes in up to 66 different sizes (not to mention a million different color and pattern options depending on the paper you want to use). Even tried and true envelope sizes will only take you moments to create!

Features:

  • Super easy to use - it looks intimidating at first glance, but all you have to do is measure for the first punch and from there you just turn 90% and and score.  It's that simple!
  • It's small and lightweight so it stores easily and you can take it and use it anywhere - you could use it while watching a soccer match at a park, or take it to a friend's for craft night.
  • It comes with a slick scoring tool as well as a punch that lets you create rounded corners on your envelopes. 
  • It's easy to keep it all together; the stylus storage compartment and two punches are designed into the tool so you don't have a bunch of little pieces to keep track of (even the instructions are printed right on the tool so you won't lose them!).
  • The price is terrific-especially for a tool that does so much! 
  • It will be in next year's annual catalog, so it's here to stay.

Watch as Brian Pilling from Stampin' Up gives you the low down on this great little machine.


Rock Star Masculine Birthday Card

We finally have some good weather and have spent the week tidying up in the garden and the garage.  Visits to the recycling plant to get rid...