Thursday, August 4, 2011

Five Years and Counting - Milestones I've reached!

Milestones...................
One of the things that I have always liked about being a demonstrator with Stampin' Up! is the recognition you receive for doing something you love.  I reached two significant milestones with Stampin' Up!  - one in May and another in June of which I am very proud and thought I'd share these successes with you and some of the recognition I received, as you're so much a part of it.

Okay the first milestone was in attaining a promotion to Consultant from Senior Associate status for meeting my consistency in rolling sales this past year. To all my customers and my two new recruits, I wish to thank you so much as I couldn't have achieved this promotion without you. Take a bow!

Last week in the business portion of our Colourful Impressions Meeting Kristina Koch announced my promotion along with all the other gals promos and sales milestones, and I was so thrilled!  I thought how wonderful to get recognition from your peers, but yesterday when I got picked up my mail there was also this gorgeous card from Kristina on behalf of our group.  WOW!!! Thanks Kristina and Colourful Impressions for recognizing my achievement. 


As if that wasn't enough this week, I also received this beautiful diploma from Stampin' Ups! head office and my name was noted in the May Promotions for Canada in the August copy of Stampin' Success Demonstrator's monthly magazine.  What wonderful recognition!  Stampin' Up! really knows how to treat it's demonstrators well, and they walk the talk with their motto about "Inspire, Create, and Share". 

My diploma is now proudly displayed in my studio for all to see!   All this recognition has now given me lots of incentive to go to that next level in my business and I'll be working hard this year to build my business and achieve the next level.   If you are interested in learning how you can be a Stampin' Up! Demo give me a call or email me and I'd be happy to go over our start up package with you and have you join my team!

 
My second milestone was attaining my Fifth Year as a Stampin Up! Demonstrator in June of this year.    Even though I've mostly been a hobby demo, this was a great personal achievement for me.  I wished I could have attended convention this year and walked across the stage to get my pin but you know what, the thrill was still there when I opened this letter!  Again thank you dear customers for your ongoing support as I might not have made it without your continuing purchases and encouragement to do classes and workshops.  You are the best! 

Wednesday, August 3, 2011

A Girly Girl Birthday Card and Matching Gift Bag

My friend Linda's birthday was coming up the beginning of August and I knew I had to get busy and make her a card and gift bag suited to her personality. Because she's a real "girly-girl" I wanted to design a card that was femine and sweet, had a touch of bling and something to do with clothes or shoes.  I remembered seeing a ballerina card on Tammy Q. Howell's blog Tarheel Stamper so I went through my "samples I love file" and had a look at her design.  She used a clever combination of the Round Tab (119864 pg. 209)) and Blossom Petals Builder (121808 pg. 213) punches to make a ballerina dress.  You can check out her post here to see what she came up with.  I really liked the Round Tab for the top of the dress but decided to change mine up a bit with a smaller skirt cut from the Two Tags (115954 pg. 222) Bigz Die.  Here's what U came up with:

I'm in love with the new Wisteria Wonder (122926) cardstock and decided to use that along with some Concord Crush DSP from the 2010-2012 Paterrns Designer Series Paper Stack (117158) and one of  the small floral designer papers from the Cheerful Treat Designer Series [(DSP) #122381 - Hostess Idea Book and Catalogue (IB&C) pg. 11] and layer it on Whisper White cardstock that had been texturized with the Elegant Lines (119277) Embossing folder.  I used the Eyelet Border punch to create a ruffled edge along the Wisteria Wonder layer. 

For the inside of the card I decided to stamp the little girl silhouette from the Easter Blossoms stamp set  and the Happy Birthday sentiment from the Perfect Punches set, in Wisteria Wonder Classic ink.

I needed a little gift bag to go along with the card so decided to use the same designer papers and cardstocks and the part of the Two tags that was left over from the dress.  Here's a close up:

I repeated the sentiment on the tag to compliment the inside of the card and tied some melon mambo, green and purple (non SU) ribbons on the handle. 


Linda loved her birthday gift - some beautiful white chandelier earings that suit her oh so much!  She also loved the birthday card and matching gift bag.   I'd love to hear your comments too!

Wednesday, July 27, 2011

Colourful Impressions Meeting and Swaps

My 16 Christmas Collage Swaps show casing the Island Indigo In Colour.
I'm very lucky to belong to a great group of scrapping and stamping demos in the Lower Mainland called Colourful Impressions.  One of the great things about being part of this group is attending the bi-monthly meetings where information, card samples and techniques are shared and demonstrated along with a good dose of laughter and fun.  It's always nice to get together and find out what's new, and meet up with old friends.  Yesterday's meeting was no exception. 

It was really exciting to hear first hand updates from those lucky gals who attended the recent Stampin' Up! convention.  Maureen Pollack started out this fun evening with a memory game.  Kristina Koch our leader, drew several door prizes from Memento Mall goodies she'd brought back.  Some of the other gals shared their awesome swap samples and provided great demonstrations from some of the classes they attended.   Jenn Picard and Sandra Farrell two of our "super talented members" gave an overview of how they were chosen as part of this year's Top Ten Artisan Award WinnersCarrie Gaskin did a great computer presentation on colouring images in My Digital Studio as well as showing some of the fantastic "fascinator" hats she wore during convention and her reasons for doing so.

Another part of the evening that is always fun is sharing swaps with other demos.  We bring 16 swaps - one to be judged and 15 to be swapped.  Here are some samples of the swaps that I was so lucky to receive and a more detailed picture of my swaps.  Hope you enjoy.

My Christmas Collage Card features the background stamp Christmas Collage (#121279 pg. 150 Idea Book and Catalogue [IB&C] stamped in Island Indigo ink on Whisper White and layered on Island Indigo Cardstock. The florish from Baroque Motifs (#113490 pg. 146) stamp set was randomly stamped on the top and sides with versamark ink and embossed with sterling silver embossing powder.  Using a sponge dauber I distressed around the entire edge of the Whisper White layer with Island Indigo ink.  An embossed ornament from the Delightful Decorations (#116517 pg. 40 IB&C) stamp set and a band cut from Island Indigo using the new Lace Ribbon Border Punch (#122362 pg. 211) were added layers of detail.  To add a little bling I've mounted Basic Rhinestones on the ribbon border and ornament.    I so loved making this card that I'm planning on recreating it in Concorde Crush, Tempting Turquoise and other strong non-traditional colors for Christmas.  Stay tuned for other samples in upcoming posts. 

And here are the other swaps.  Hope you enjoy them.  Where possible I've provided links. 


Isn't this just the cutest?  This little piggy is really flying on his scalloped wings, and his snout is extra shiny with the Crystal Effects layer that was added.  The sentiment from the Word Play stamp set (#120308 w or #120651 c) " IMAGINE the Possibilities" is so perfect for this card, that was created by Carol Arbour of Surrey.  Here's a view of the whole card which features the Button Buddies stamp set (#122735w or #122737 c) from page 71 of the IB&C.


This swap submitted by Allison features the Flower Fest stamp set (#122278w or #122280 c) featured on page 124 of the IB&C.  The butterflies and lattice textured band are in the new Wisteria Wonder (#122922) In Color Cardstock and the wings have some dazzling diamond highlights. 

Adel Klassen's Peace on Earth card features Serene Snowflakes(#115438 pg 36 IB&C) stamped in Whisper White on Night of Navy cardstock.  The Peace on Earth sentiment is from the new "Four the Holidays" set (#116921 on page 168 of the IB&C).  The card front base is Soft Suede.  Basic Rhinestones glitter from the snowflakes.  


Maureen Pollock did an awesome job on this card which features the Zebra from the new "Zoo Review" stamp set on page 105 of the IB&C.  To highlight the Zebra's stripes she has created a unique background with the "Stripes" Textured Embossing  folder (#123128 pg 218 IB&C), by actually embossing the raised areas of the cardstock with versamark ink and black embossing powder.   
The zebra is also embossed in Black on Whisper White cardstock and mounted on a Cherry Cobbler Scalloped Circle.


Kellie Ohlmann's Lovely as A Tree Card features multiple layers of Old Olive and Not Quite Navy cardstock, and the image is stamped on Crumb Cake in Not Quite Navy Classic Ink. A great feature of this card is the strip of Not Quite Navy cardstock that was embossed with the new Houndstooth Textured Impressions Embossing Folder (123134 pg 218 IB&C)


This darling watercoloured swap created by Kim Knight features the Nursery Nest DSP (#122347 pg. 185 of the IB&C) and Marina Mist, Blushing Bride and Pear Pizazz Cardstocks.  The gorgeous Stitched Poly Ribbon is in Pear Pizazz (#119265 pg. 194 IB&C)

Kristina Koch's "Snow Much Fun" card (#122560w or #122562c pg 35 IB&C) is a fun homespun design featuring the large snowman from this great new set.  I love the use of the new Lace Ribbon Punch (#122362 pg. 211 IB&C) in Cherry Cobbler on Crumb Cake layer which has been distressed around the edges.  Kristina also layered the Snowman oval on First Edition Specialty DSP (#121878 pg 183 IB&C) which has been distressed around the edges and sponged with Crumb Cake ink.  The "merry" sentiment is punched out with the Jewelry Tag punch (#117190 pg. 210) and a bow from a scrap of Deck the Halls Designer Fabric (#121716 pg. 196) is tied to the edge of the oval.  A tiny vintage trinket button (#118764 pg197) finishes it off.  Wow Kristina this is an awesome card!


 This beautiful "Just Believe" card (#116948w or #120453c pg. 109) by Sheryl Tyson features the Framed Tulips Textured Embossing Folder (#121809 pg. 218 IB&C) on Soft Suede cardstock.  The image has been stamped in Soft Suede on  Naturals Ivory (#101849 pg. 181 IB&C) cardstock  and blue glitter has been added to the flowers to give it
some extra bling. 

 Sandy Stoyanowski created a beautiful card featuring Pretty in Pink blossoms and leaves from the  Build a Blossom set (#121923w or #121994c pg. 112 of the IB&C).  The Framed Tulips Textured Embossing Folder was used for the border and it's been coloured with markers.  The petals are stacked in double layers to add dimension.  The Birthday Wishes salutation is from the Sincere Salutations stamp set (#115068 pg 160).


The Fabulous Florets (#123025w or #123027c pg. 107) stamp set was used to create this beautiful card by Tara Ryland.  Versamark Ink and Whisper White Embossing powder (#109132 pg. 201) create a fabulous background and the single flower that is mounted on dimensionals is stamped in Wisteria Wonder and accented with a basic pearl.  The Wisteria Wonder cardstock base and layer provide a beautiful contrast to the Whisper White cardstock

.  
Spooky Bingo Bits (#123944w or #123946c pg. 25 IB&C) are stamped and layered on this totally fun card by Shannon Harding.  Rich Razzleberry and Basic Black and Basic Gray cardstocks are used for the base and layers of the card. The fabulous Spider Web (#120889 pg 218 IB&C) Textured Embossing folder creates some added spookiness to this card. The all new Petite Pennants Builder Punch (#122361 pg. 213 IB&C) was used to showcase the Delightful Daffodil images.  Shannon's card was voted #1 out of all the swaps tonight and you can really see why with all this added detail. 

The final swap card was created by one of our Artisan winners, Sandra Farrell.  It features a new stamp given out at the Stampin' Up Convention.  The image is stamped in Concorde Crush on Whisper White cardstock and layered on Pink Pirouette, Regal Rose and Concorde Crush cardstocks.  The face of the card features Pear Pizazz cardstock embossed with the
Vintage Wallpaper (#120175 pg. 219 IB&C) Textured Embossing Folder.  The twist with this is that Sharon chose to have the negative image showing on her card front.   Pear Pizzazz Seam Bindig has been  scrunched and layered onto Just Add Cake DSP (#124339 pg. 185). 

Thursday, July 21, 2011

Christmas In July Workshops

Everyone loves to get a jump on making their Christmas Cards and because of this I decided to hold a "Christmas in July" stamp-a-stack workshop to help get things rolling. I actually offered this class on July 10th at my home and again on July 13th in Vernon, BC. What fun we had. Each participant made 4 of 4 different card designs in a 31/2 hour class. Whew!!! That was a lot to accomplish. Want to see what we made: 

Here are the 4 Christmas Card Designs.
Each of the cards has it's own unique feel and utilizes a number of punches and stamp sets from the new 2011-2012 Idea Book and Catalogue.  Here are the individual cards and a brief description.
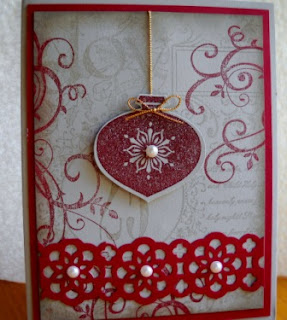
Christmas Ornament Card:  Sahara Sand cardstock stamped with Christmas Collage, Baroque Motifs and mounted on Cherry Cobbler.  The new Lace Ribbon Border Punch adds a decorative design.  The ornament is from the Delightful Decorations Stamp set and punched out with the Ornament Punch. 

The Vernon class used River Rock cardstock in place of the Sahara Sand and the edges were sponged in Cherry Cobbler.  The combo really worked.

The second card design was inspired by a design on page 21 of the IB&C which features the Snow Much Fun Stamp Set from page 35 of the catalogue.  I love this new set and so did everyone in the class.   I've also provided the details for this card in my earlier post entitled Inspiration in Action Case Contest.

Here's a closeup view of the Snowmall layering and the inside of the card.  The layering makes the snowman look so fat and jolly and brings some life to the card too!


The third card featuring two adorable penquins in the snow is based on punch art using the Owl Builder Punch (118074) page 213 IB&C.   What fun this was.   To position all the little parts of this punch art like the eye balls and nose, we used a tip I found on one of the blogs (sorry if it's your blog please let me know so I can give you credit here) whereby you use a toothpick dipped in melted bees wax to pick up all the little pieces.  This worked like a charm and made it both easy to glue and position these small little pieces.   The card is layered on Whisper White cardstock.  A piece of Baja Breeze is embossed with the Northern Flurries Embossing Folder and the sentiment is from the "Sincere Salutations" stamp set. 

And finally, the fourth card which also uses one of my all time favourite seasonal stamps "Holiday Lineup" is designed to look like these happy little snowmen are all huddled outside a window on a cold frosty day.  Lots of colouring with markers here but the design is super simple to recreate and is all about stamp placement.


I still have some class sets left so if you are interested in making the stamp a stack or a class just featuring one of each of the 4 designs then give me a call, I'd be happy to arrange a date and time.

Only 10 More Days to Sign Up Today and Get this Exclusive Bonus Christmas Kit

$119 Starter Kit and Free Project Kit Promotion

Promotion Dates:          July 1-31, 2011

July 31st is rolling around quickly and I wouldn't want you to miss out on this perfect opportunity to sign up with one of the greatest paper crafting companies and do what you love to do!  Come on, it's always more fun to stamp with friends, and this limited-time $119 Starter Kit is the perfect choice for the lover of Stampin' Up! products. Use this exclusive Starter Kit to share the opportunity with your friends and future hostesses who want to get the products they love at a 20 percent discount.
There are so many benefits to becoming a demonstrator like:
  • A 20 percent product discount!
  • A free monthly issue of Stampin' Success, Stampin' Up!'s demonstrator-only magazine!
  • Sneak peeks at brand-new products!
  • Invitations to exclusive Stampin' Up! events!
  • Regular get-togethers to stamp!
  • Free access to an online communtiy of 30,000+ stampers and creative artists, as well as 160,000+ project samples!
As an added bonus, first-time demonstrators can get two free months of Demonstrator Business Web Services (DBWS) when they sign up during their first 21 days as a demonstrator.  Subscribing to DBWS means having your own online store, blog, hostess portal, and much more! 


Sign up today and you will also receive this beautiful and unique Christmas Keepsake Box Project Kit.  This kit is valued at $50.00 and only available to new demonstrators signing up for this promotion.


The Christmas Keepsake Box Project Kit contains the following products (quantities are 1 unless otherwise noted):
  • Pines & Poinsettias Set (wood-mount)
  • Keepsake box
  • Scallop borders (cut from Tasteful Trim Bigz XL Die)
    • First Edition Designer Series Paper (3)
    • Holly Berry Designer Series Paper (6)
  • First Edition Specialty Designer Series Paper strip (2)
  • Holly Berry Designer Series Paper piece*
  • Real Red Top Note (cut from Top Note Bigz Die)
  • Real Red Decorative Label (cut from Matchbook Bigz XL Die)
  • Wild Wasabi Card Stock strips (3)
  • Naturals Ivory Card Stock piece
  • Holly Berry Bouquet Designer Fabric*
  • Real Red 1-1/4" Striped Grosgrain Ribbon
  • Real Red 5/8" Grosgrain Ribbon
  • Victoria 5/8" Crochet Trim
  • Linen Thread
  • Champagne Fine Galaxy Stampin' Glitter
  • Vanilla Pearl 1/2" Simply Adorned Bauble
  • Pearl Basic Jewels (1 pkg.)
  • Holly Berry Bouquet Designer Buttons*
    • Large Wild Wasabi
    • Small Real Red
  • Mini Vintage Tags
If you'd like to learn more about this exciting promotion and join my team, just give me a call and I'd be happy to answer your questions and provide you with any additional information you may need. 

Wednesday, July 20, 2011

INSPIRATION IN ACTION CASE CONTEST - SNOW FUN

Gretchen Barron recently held a unique and fun contest on her site, challenging stampers to sellect a project from the new Idea Book and Catalogue and to make it their own.  I was very excited about this challenge, and thought wow, I can do that!  And I have, only I was too late to enter into Gretchen's contest because I was out of town duringher time frame. 

The project that inspired me is on page 21 of the catalogue and is made with the Snow Much Fun Set. I loved this set from the moment I laid eyes on it and when I saw the sample in the new Idea Book and Catalogue, I just knew I had to recreate it and make it mine!


Okay so here's my version and the changes that I made to this card's design and set up.
I liked the warm homespun color combo in the sample card and decided to go for the same look.  My card started with a base of Confetti Cream (102835) cardstock and the image and sentiment were stamped on this too.  I chose Soft Suede (115318) for the first layer of the card and embossed it with the Framed Tulips Embossing folder......... I know it's a stretch but on this card the tulips look like little Christmas lights.  Okay so I have a big imagination......try squinting.  I'm sure you'll see what I mean. 

For my next layer and the one behind the sentiment I used Real Red (102482) cardstock.  I liked the look of the ribbon on the original card so decided to do the same and used 5/8" Real Red Grosgrain.  I also liked the way the Bigz Die Square scallop from the Scallop Squares Duo (120903) looked so retained that element but I wanted to change up the image by adding the cute little snowball and bird. All images were stamped in Chocolate Chip and colored with markers.  I used a Crumb Cake marker to create a shadow effect around the image.  Once I finished colouring this image I stamped a second one, repeated the coloring then cut it out and mounted it on dimensionals over the original snowman.  When I was cutting around the second image, I omitted the boots, arms, ends of the scarf and tassel on the hat, they show through from the original image and by piecing in this way you get a lot of dimension.  I used one of the sentiment stamps from the Snow Fun set and punched it out with the Modern Label (119849) punch and then mounted it on a strip of Real Red cardstock which was about an 1/8" wider.  I hand cut the points on each side of the sentiment and then mounted the label with dimensionals onto the ribbon.  Finally, I adhered Dazzling Diamonds with 2-way glue pen to the hat brim, snowballs and ground to give a shimmery effect. 

I was so pleased with this little guy and wanted to share how easy this card was to make, that I added him as one of the cards in my Christmas in July SAS workshops on July 10th and 13th.  Lot of ooooohs and awhs here....he was a big hit!  Hope you enjoyed this card as much as I do. I'd love to hear your comments. 

Friday, July 1, 2011

New InColors 2011-2013

INTRODUCING...
your (5) new 2012 In-Colors

Pool Party
Calypso Coral
Lucky Limeade
Wisteria Wonder
Island Indigo

And don't forget last year's InColors are being held over for another year.  And look how beautifully they match in with this years............got to love that shading!
Peach Parfait
Poppy Parade
Pear Pizzazz
Concord Crush
Blushing Bride

Last Free Shipping of the Year - December 9, 10 11, 2024

Heads up, it's time for the last FREE SHIPPING promo of the year! From December 9–11, you can shop and save on all qualifying orders of...