Showing posts with label "Halloween Cards". Show all posts

Sunday, October 23, 2011

Monday Monster Mash Halloween Count Down Blog Hop - Week Eleven

                                      Only two more posts to go until the big day!  Wow I've actually made it through this far in Shirley Pumpkin's awesome Monday Monster Mash Halloween Count Down Blog Hop

Today I'm posting a few things since I thought I better step up the process a bit here and make up for the two weeks I wasn't able to post.
To begin with I'm sharing a card I actually made for Mojo Monday 211, however when making it I had this blog hop in mind.  You can see my previous post for all the details and more pictures.  For now though here are a few views of my card.
I just love these ghoulish sneaks as they make their way through the graveyard on the way to collect their Halloween Treats!  This image is from the Haunting Wheel that is for sale on Stampin' Up's Clearance Rack.  What a bargain and what a hoot for Halloween!

Here's my full card using the sketch challenge from Mojo 211.  I really like the bow and the layers on this card.
I couldn't resist showing this spooky scene one more time.  I've used one of the gorgeous papers from the Pick Your Poison Designer Papers series for the background.  It's a perfect scrapbook page for those scary shots and also for highlighting this spooky card! 

I've been busy making treats for company and friends for the upcoming festivities.  Can you guess what this is? 

Right now I'm in love with making these Lollies and have been putting them on everything, including my treats! 
These two beautiful little gifts are quite simply dressed up Cadbury Chocolate bars.  No kidding! They're fun to make and certainly don't look like plain old chocolate bars when they're dressed up in this finery.  For something that takes very little time and supplies treats like these make a big impact.


I thought I'd show you just how simple they are to make.  To begin with just remove the outside wrapper from your chocolate bar and measure it to get the width of paper you will need.  Once you've got your measurement just cut out pieces of DSP to use for the wrappers.

 Before wrapping the bars, score lines to make it easier to wrap the designer paper around the bar and then secure by overlapping ends with sticky strip.


 Here's what they should look like before you add your embellisments. They look really pretty just as they are!
And voila the finished product on display.  I love the way these turned out and my plan is to make a  whole bunch of them for the grownups............... providing my husband and I don't eat the chocolate bars first! 

So that's it for this week of Monday Monster Mash Halloween Count Down.  Have you decided to play along yet?  There's still time to get your name in Shirley's draw for $25.00 in free product from the Holiday Mini catalogue.  Here's some rules for you to make your playing along easier........... hope to see you in this week's postings.

Here are the rules:
1. Whatever your entry is it has to be Halloween - either a card or 3D item.
2. It does not have to be 100% SU 80% is ok.
3. Yes using Retired is OK...
4. Use Shirley’s Monster Mash Badge/Graphic in your post and a link back to her blog.
5. Add your card to the blog hop then put the code on your post.
6. You can enter as many times as you like, it just has to be a new card and post.
The Blog Hop started a few months ago and is now in week eleven.  Shirley picks a favourite every week during the 12 weeks and then out of the 12 weekly winners will pick a Grand Prize winner. The Prize is $25.00 in new cool stuff from the new Holiday Mini, and the lucky winner will be announced on Halloween.  How cool is that!

When you post Shirley’s badge please add a few words about the blog hop on your blog. Shirley had to delete a few entries a while back because they didn’t follow any of rules.  Might be wise to mention there are rules or copy them to your post like I did.  Okay so now I’m excited to see your entry.

Mojo Monday 211

I really liked the sketch put out on October 17th  by the Design Team for Mojo Monday  this week and I decided to play along.  This would be a great sketch for just about any occasion including  birthday, wedding or sympathy. 

There wasn't a  theme for this sketch designed by Julee Tilman so you could pretty much do anything you wanted.   I decided to continue with my Halloween cards so I would have one ready for Shirley Sumption's Monday Monster Mash Haloween Count Down blog hop on Monday. 

Here's the card I made.  Once again I was able to use the Haunting Jumbo Wheel which I pick up for a super price on the Stampin' Up! Clearance Rack .  Let me know if you like it. 


Saturday, October 22, 2011

I'm A Monkey Princess...........Whoo Hoo!!!

I had some exciting news today when I was checking out the A La Card Monkey blog site for this weeks sketch challenge.  I received a "Princess" recognition for my My Spooky Cute Sketch 78 entry.  Not only that, but I'll be invited to be a guest designer for an upcoming challenge!  WHOO HOO!   What excitement........see me dancing like this little princess.  A La Card Monkey DT has made my day!  I'm sending a great big thank you to the Design Team at A La Card Monkey for choosing my entry and for encouraging me every week to participate in their awesome challenges.  Such Fun! 

Okay so enough braggin rights I'm heading off to work on this week's challenge.  It's another awesome sketch.  Make sure you drop by the A La Card Monkey site and check out the other entries in week 78.  They were all really great.

And, if you haven't already played along with one of these sketch challenges join in, they're fast and fun, and don't usually require a ton of layers and other embellisments.  Oh and the design team is
awesome too!  Hope to see you there.

Monday, October 17, 2011

Monday Monster Mash Blog Hop Week Ten With Haunting and Ala Card Monday Sketch 78

Can you believe how fast October is zooming by?  Counting today there are only 3 more Mondays until the big event............. Halloween!  Almost every blog you visit these days has some kind of Halloween post, whether it's a blog hop or a project someone's made for the occasion. 

For this week's entry in Shirley Pumpkin's  Monday Monster Mash Blog Hop Week Ten I decided to use the wonderful sketch from A La  Card Monkey 78.  What a Spooky Sketch.  Here's my take on it.   
I used Peach Parfait In Colour Card Stock for my base and layered it with DSP from the "Pick Your Poison" Designer Series paper (124001 Holiday Mini), mounted on Basic Black Cardstock.
Here's a closeup of the Halloween image I used from the retired Jumbo Wheel "Haunting" (which I recently purchased from the Clearance Rack #112480 $4.19CDN).  This jumbo wheel has witches, bats and monsters and I thought this little Grim Reaper image was really "Spooky". 

 On a background of Peach Parfait cardstock I stamped the Grim Reaper in Versa Mark and Basic Black inks and then over-embossed him with Black Embossing powder.  By holding the heat gun a little closer and for a tad longer time the image "bubbles" over giving it a really rough and scary looking finish, which I call "over-embossing". This layer was punched out with the 1 3/4" circle punch and distressed with black ink around the edges.  To complete the motif  I layered the Peach Parfait piece on a 1 3/8" circle punched from Rich Razzleberry, and finally mounted it on a 2 3/8" scalloped circle in basic black.  A trim of basic rhinestones coloured with purple ink from an alcohol based marker pen.  This was mounted onto the fence using dimensionals.  

For the Graveyard Fence I punched out images from the Jewelry Tag Punch (117190) and evenly spaced them across a strip of Basic Black Cardstock. I wove a thin strip of Basic Black cardstock through the "fence posts" for some added dimension. The tab above the fence is made by layering a piece of Peach Parfait and Rich Razzleberry from the end of the Decorative Label Punch and mounting these pieces onto a piece of Basic Black cardstock that has been punched out using the retired Designer LabelPunch. The image "Wicked" from the Wicked Cool set was inked up with BB Marker and stamped onto the Peach Parfait piece. I embossed it for some extra colour and texture.

The sparkly strip along the bottom of the graveyard fence is done by applying a thin strip of sticky strip in a straight line and then sprinkling it with black glitter. If you don't have any black glitter you can make your own by adding a tiny drop of black reinker to dazzling diamonds and mix it up.   
The inside of my card is very basic.  I used the Two Tags punch on Basic Black Cardstock and mounted the tag sideways on the inside of the card.  I then added a 1/38" Peach Parfait Circle punched from the images on the Haunting Wheel.  I added a "Wicked" tab on the side. 
Here's a last look at my card.  Hope you enjoyed it.  It really looks better in real life but then don't we all!  LOL!  Happy Stamping and I hope you join in this blog hop today. 


"Haunting" Jumbo Wheel # 112480.  This retired wheel is currently featured on the CLEARANCE RACK for $4.19 CDN.  This is a fun wheel and great for gift bags, cards and other projects where you want a host of scary characters.  Visit my on-line store to check it out.  Click here for Online Store.

Jewlery Tag Punch #117190, pg 210 Idea Book and Catalogue.


Here are the rules:

1
. It has to be Halloween, card or 3D item.
2. It does not have to be 100% SU 80% is ok.
3. Yes using Retired is OK...
4. Use Shirley’s Monster Mash Badge/Graphic (posted below) in your post and a link back to her blog
copy this URL:  http://www.lookatmycutestuff.blogspot.com/
5. Add your card to the blog hop then see instructions for putting the code on your post.
6. You can enter as many times as you like, it just has to be a new card and post.
The Blog Hop is every Monday for 12 weeks. Shirley picks a favourite every week for 12 weeks and then out of the 12 picks a Grand Prize winner. The Prize is $25.00 in new cool stuff from the new Holiday Mini, and the lucky winner will be announced on Halloween.

When you post Shirley’s badge please add a few words about about the blog hop on your blog. Shirley had to Delete a few entries a while back because they didn’t follow any of rules.  Might we wise to mention there are rules or copy them to my post like I did.  Okay so now I’m excited to see your entry.

Monday, October 10, 2011

Monday Monster Mash Halloween Count Down Blog Hop - Week Nine

It's week number nine of Shirley Sumption's Monday Monster Mash Halloween Count Down.  I'm running about two weeks behind on this one and am trying to play catchup.  This past two weeks has been hectic with so many doctor appointments and family things happening.  Sometimes life gets in the way of fun!
Speaking of fun when you have time hop on over to Shirley's blog and check out Frankie White's fabulous entry for week eight.

Her card is just too funny!  Frankie designed this
card at the last minute, using the Howl-o-ween Creeps stampset (123827w/123829c) from the Holiday Mini. These little Halloween monsters are having such a great time doing the Monster Mash. Love the light bulbs!  Oh and listen carefully because  you can almost hear the music playing in the background!  No wonder Frankie was the winner!!!! What an awesome card.

While you're visiting the site make sure you check out the other entries because they're simply awesome too and leave some comments for these great projects, they're all very deserving!  

Okay so on to Monday Monster Mash Halloween Count Down Blog Hop Week Nine.  Shirley hasn't even posted yet so I'm sure to make the time line this week.....lol! 

For this week's challenge I chose the A La Card Monkey Challenge sketch #76 from September 30th.

This is a great sketch that lends itself to easy interpretation, and while my entry is a Halloween card, I can envision this sketch being used for just about any occasion.  Wow that sounded a bit heavy and dramatic!

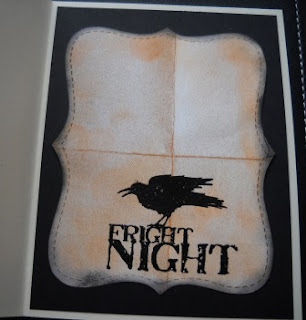
Speaking of dramatic how'd you like this Crow?  I think he's the epitomy of FRIGHT!!!  Although this stamp set featured in last year's catalogue has retired, I know he'll be in my Halloween stash for sometime.............. just can't part with him!
My card base is Very Vanilla layered with a 5 1/4" x 4" piece of Pumpkin Pie cardstock that was texturized using the new Houndstooth Embossing Folder.  I've added a Top Note Die Cut from the Pick Your Poison (124001 pg 10 Holiday Mini) that has been jazzed up by adding Basic Black Top Note die cuts on either side.  The edges of the Pick Your Poison paper have been distressed using both Basic Black and Pumpkin Pie inks. 

Bat images were stamped using Basic Black Ink, Versa Mark and Black Embossing Powder to the top section of the DSP.  A second piece of cardstock that was texturized using the Stripes Embossing folder, was run through the Big Shot on the short side of the Top Note Die cut.  See how it fits perfectly across the center of the card.  I've added 3 basic pearls coloured black with a Sharpie Marker. 

For this Lollie base I used a 1 1/2" x 12" strip of Pick Your Poison DSP that was scored every 1/4" on my brand new Simply Scored Scoring Tool (#122334 pg. 7 Holiday Mini).  What fun that was.  A scalloped oval layer was adhered to the top of the Lollie and then the SPOOKY image from the Wicked Cool stamp set (118738w/120600c pg 24 IB&C 2011/12) was stamped and embossed over top of an orange spider image from the reverse side of the Lollie DSP. 

And here's the inside of the card with it's beautiful spooky crow.
Well that's it for this week.  Remember there's still time to participate.  I hope to see your entry this week!  
Here are the rules:
1. It has to be Halloween, card or 3D item.
2. It does not have to be 100% SU 80% is ok.
3. Yes using Retired is OK...
4. Use this Monster Mash Badge/Graphic in your post and a link back to Shirley Pumpkin's blog: http://lookatmycutestuff.blogspot.com/
5. Add your card to the blog hop then put the code on your post.
6. You can enter as many times as you like, but each entry has to be a new card and a new post.

Wednesday, September 21, 2011

Monday Monster Mash Halloween Count Down Blog Hop - Week Six

It's my most favourite time of the week again, time for the Monday Monster Mash Halloween Countdown (MMMHC ) and it's week six.  That's right week six .........the halfway mark!  I'm ecstatic as I basically have only two Halloween sets to work with right now and I've actually made six cards.  Whoo Hoo! 

So, if you'd like to play along and have been too shy or haven't had time yet or whatever reason, don't worry there's still time to join in.  Hop on over to Shirley Pumpkin's awesome site and see all her wonderful Halloween creations and other projects. Leave her some love while you're there.  Her projects are awesome. 

This week she's combined her MMMHC with the Scaredy Cat Swap that she recently attended over at Terry Blais's place.  What fun!  She's got all the rules for her MMMHC on her fun blog hop, so check them out.  I can't wait to see what you'll make so get card making!

Okay so here's my entry for week six, hope you like it.  I decided since I really like making circle cards to use that format for my entry this week. Circle cards are so easy to make and they are such a fun wow in a class.  They're also awesome to receive.  I've made this one in traditional Halloween colours of Concord Crush, Pear Pizzazz, Basic Black and Pumpkin Pie cardstock.  No DSP is used.

I've used the cute little halloween girl from the "Greeting Card Kids" stamp set as my focal point.  I've coloured her with blender pens on watercolour paper.  She has a little bit of bling added to her great pumpkin with glitter glue and a shiney purple rhinestone on her witchy hat (see tip below). 

The Best Witches (don't say that fast...lol!) sentiment is from "Halloween Hoot" and I've stamped off some little bats from SU's "Wicked Cool" set.  The image is stamped on Pumpkin Pie, and the large oval punch was used to punch out the sentiment.  It's mounted on a scalloped oval punched out in basic black.  A few purple rhinestone complete the sentiment.  This sentiment is popped up on dimensionals so that when the card is opened it has a prop or anchor to hold it open.  The inside of the card is made with layered circles in corresponding card stock and lots of room to leave a message.  

View of the card opened up. I've used basic black ink to distress around the entire scalloped edge of the card to give it some extra detail.

I've used the bat image from "Wicked Cool" to stamp around the scalloped circle.  I stamped it in versa mark, basic black ink and then heat embossed it with clear EP.  I could have used Black embossing powder too.  It gives a kind of shiny look to the background of the card.

I added a bit of green glitter glue around the Pear Pizzazz layer to add some additional sparkle. 

Okay so here's my economizing tip of the week:
Did you know you can colour your own basic rhinestones inexpensively with any permanent alcohol based marker  (Sharpies work well because they let the colour sparkle through).
That's right your can now have red, green, blue rhinestones...........even black to match your favourite coloured cardstocks.  So no more searching for matching bling, just colour your Stampin' Up basic rhinestones yourself!

All you have to do is j=-0[st colour over the rhinestone with your marker pen and voila! instant colour. Go over it until you get the shade you want.  If it's too dark you can take a cute tip swab to lighten the colour by dabbing a bit of rubbing alcolhol (90% or more works well) on a Q-Tip swab and lightly dab it on the basic rhinestone.  You can also use an alcohol blending solution but be careful as both solutions will remove the colour. 
Okay bye everyone.  Happy card making.

Tuesday, September 13, 2011

Monday Monster Mash Halloween Count Down Week 5

Hi everyone.  Can you believe that it's Week Five already of Shirley Pumpkin's "Monday Monster Mash Halloween Countdown Week 5"?  Only 7 weeks to go to the big day!!!  Are you getting excited? 

Talk about excited, I sure was!  Shirley notified me at the end of week 4 to say she'd chosen my pumpkin card as her  favourite entry for the week.  I was bowled over let me tell you!  My grin was as wide as the one on these pumpkins funny little faces!  "Thanks Shirley for your vote of confidence, I really appreciated it". 
This was my entry for Week Four. 
I really had to put my thinking cap on for this week's entry.  I wanted to do something a bit different and with my limited Halloween stamp supply I was feeling a bit stumped.   While I was scratching my head and staring at the mess on my worktable I looked at the card I'd completed for Stamping 411's Saturday Sketch Challenge #220.  It was laying upside down and one of the images looked like something else to me.  The glimmer of an idea started to take hold and I grabbed a stamp pad and a stamp and this is what I came up with:

Here's a close up.  Aren't they just the cuteest bullfrogs?  
Okay and here's the stamp image that gave my idea for these little frogs:
It's the witch's cauldron from the retired Stampin' Up! set Halloween Hoot.  And here it is the way I saw it upside down.
The wheels on the cauldron looked like eyes to me and the rope or whatever it is around the middle of the pot looked like a big wide mouth, and the handled looked like a frog's tongue going for a fly or something!  Okay if you can't see it squint or something!  LOL
Details:
The card base is Very Vanilla.  I added a strip of Old Olive to the front of the card (for the slimy pool) and then ran it through the Big Shot using the Web Embossing Folder.  To add some shine to the web I drew on each of the web strands with a Versamark Ink Pen and then sprinkled on clear embossing powder and heat set.  The webs were then sponged in Old Olive ink with a dauber to give it a bit more colour and depth. 

The bullfrogs were stamped in Old Olive ink. I glued on some wiggley eyes for fun with Crystal Effects.  The Lily Pads were punched out of Old Olive cardstock with a 1 3/8" circle punch.  They were stamped with  the bubble stamp from the Halloween Hoot set and the edges were distressed with Old Olive ink.

I hope you enjoyed this card today and come back next week for Week Six.  If you're interested in playing along with the the blog hop, check out Shirley's website for the rules.  They are simple and fun and there's still time to get in on this great weekly event. 

Thursday, September 8, 2011

Monday Monster Mash Halloween Count Down Blog Hop - Week Four

Another week has whizzed by and now it's time once again for Shirley Pumpkin's Monday Monster Mash Blog Hop.  I thought I would share the rules with you today so you can play along.  So here's Shirley's rules:

 Do you want to Play along with the Monster Mash Blog Hop.?
Here are the rules:

1. It has to be Halloween, card or 3D item.
2. It does not have to be 100% SU 80% is ok.
3. Yes using Retired is OK...
4. Use Shirley's her Monster Mash Badge/Graphic in your post (see above)  and a link back to her blog (http://lookatmycutestuff.blogspot.com.)
5. Add your card to the blog hop then put the code on your post.
6. You can enter as many times as you like, just has to be a new card and post.
The Blog Hop is every Monday for 12 weeks. Shirley is picking a favorite every week for 12 weeks and then out of the 12 picking a Grand Prize winner. The Prize is $25.00 in new cool stuff from the new Holiday Mini. The winner will be announced on Halloween.

Okay so here's my entry for this week:
For this card I added some no-name DSP for the background and stamped the Scroll from the "Bliss" set in Versa Mark ink and them embossed it with Black Embossing Powder.  Love the feel of it on the card front.  Lots of texture.  The pumpkins are from a retired stamp set called "Autumn Harvest ".  I Stamped the small pumpkin on the bottom and then created a mask from a post it note, to protect the pumpkin before I stamped the other two pumpkins.  I loved being able to pile these guys together.  I used an aqua painter and Old Olive, Pumpkin Pie, and Parfait Peach inks to colour the  pumpkins. The pumpkins are mounted to the card with dimensionals.  The "Spooky" sentiment is from the "Wicked Cool" set.  It's stamped in basic black and distressed with Concord Crush ink and mounted on a Concord Crush decorative label punch out.  The teenie rhinestones I've used to add some bling are non-stamping up.  If you want to make coloured rhinestones to match your designs, simply use the blender pen to colour over your basic rhinestones.  I would have done this, but I use them so much I've run out!  LOL!

The crystal effects on the pumpkin's mouth adds a great effect, with little effort.  It pops the black ink up to a new level, just make sure you let it dry well.  The webs in the background were embossed with clear embossing powder and then I added one of Stampin' Ups! new bling products called "Dazzling Details" (#124117 pg 41 Holiday Mini $3.25).   This is an irridescent glitter glue that adds a dazzling effect to the webs.  Warning............ you only need a little to get that beautiful shimmer.  

Inside of card. 
It's not too late to join this week's blog hop.........but don't wait too long!  You could be next!

Last Free Shipping of the Year - December 9, 10 11, 2024

Heads up, it's time for the last FREE SHIPPING promo of the year! From December 9–11, you can shop and save on all qualifying orders of...