Monday, November 29, 2010

Sneak Peak - Christmas Stamp a Stack Class


Here`s a sneak peak at my Christmas Stamp a Stack cards...................they were so much fun to do.  Starting tomorrow, I`ll be posting pictures of each card along with the recipe for making them, so stay tuned and come back daily for a visit! 

Sunday, November 28, 2010

Wonderful Presents from Wonderful Friends

What a great week this has been for surprises!  On Friday when I picked up my mail I was so excited to see a parcel from my friend and fellow stamper, Kathryn Mangelsdorf who lives in Woodside, South Austrialia. She'd already given me a heads up that something was coming, but not what or why, so the excitement was building as I rushed home to open the package. Here's a peak:

Love that fold over withthe butterfly and button.............too cute!
Just to give a little background before I show you what I received, I met  Kathryn on UStamp With Dawn and Friends during the first session that I signed up for.  Kathryn's become one of the shining lights in terms of her fantastic tutorials and designs and I so look forward to chatting with her on the open chat line.  During our chat's we've gotten to know each other a little more personally and Kathryn shared that she had tragically lost members of her family to breast cancer.  Since Kathryn is not one to sit back and do nothing, she decided to sponsor a Breast Cancer fund raiser called "Kathryn's Girls Afternoon", and it's become a great annual event.

As you'll know from my earlier posts I am a big supporter of Breast Cancer and have been involved in the Walk for Life events here in Abbotsford, so when I heard she was doing it again this year I wanted to jump in and help out too.  I spent a few hours going through my stack of Stampin' Up! card swap fronts to find ones that would make "good sellers" and made them into full cards, packaging them in cello wrappers and sending them off with some breast cancer stickers and other goodies.  Kathryn was delighted to receive the package from me and sent me this wonderful appreciation gift, along with the fantastic news that the Kathryn's Girls Afternoon had raised $969.00+ for the Cancer Council as a result of their card sales and donations.  Isn't that fantastic???  

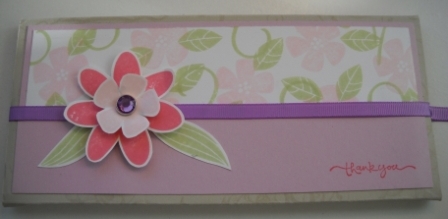
Congratulations Kathryn...........you go girl!  And thank's for the appreciation gift, which I'm now going to share.  Fabulous card, and love the chocolate bar wrapper so much!!!!
This is a Lindt Dark Chocolate Bar...........mmmmmmmmmmm yum!  hidden beneath this clever little cover.  I'm tempted to eat it cause I love dark chocolate, but I don't want to take it out of the wrapper!  Talk about diet control!

Isn't this card fabulous.  I think I'm going to case it for one of my Christmas designs. 

We ate the chocolate bar before I had time to take a photo
and it was delish.........................YUMMY!!!!
Okay my second surprise of the week came from our lovely neighbors Linda and Barry who arrived for my Wednesday night dinner party with a surprise hostess gift.  How thoughtful and how exciting!  They filled the bag with goodies that my mom, who was visiting, and I would enjoy during this snowy weather spell..........hot chocolate, winter tea, some great napkins and a to die for Milean's Demerara Butter Crunch White European Chocolate Bar (local choclatier). Yum, Yum!!!  What lovely gifts!


Now I have to tell you I would have been totally happy to have received just this gift bag........ and that's the truth.  I just found it totally awesome and couldn't take my eyes off it.  Isn't it amazing?


Here's a closeup of that deer.  He's so stunning..............covered in glitter (Dazzling Diamonds or Irridescent Ice Comes to mind) and I love the Baroque Motif styled swirls in the background in the gold and white.  Just beautiful.  Here's a closer view.


I also loved this little Tea Box with it's Jolly old snowman!  Isn't this a cute idea. 


Well now I have to go and spend some time in my studio seeing if I can use these ideas........................  see you!  Leave a comment and let me know what you think!


Saturday, November 27, 2010

Northern Flurry Spinner Card

Recently I've been looking at some cards that featured "spinner" designs and I thought it would be fun to try out this technique for a magical Christmas card.

Since I love snowflakes I decided to combine one of my favourite ones from a retired stamp set called Holiday Collection and the Northern Flurry Textured Impressions Embossing Folder.  Whisper White and Bashful Blue cardstocks provide the perfect winter backdrop for this design. 

Two snowflakes are stamped in Bashful Blue ink, punched out with the 1 3/4" circle punch, and glued together so the design is the same for both the inside and outside of the card.  Before I glued the circles together, I used a versamark pen to go over the design and dusted it with heat and stick powder, and then lightly heated the heat and stick powder with my heat gun and coated the snowflakes with dazzling diamonds.  I glued a piece of very fine fishing line, about six inches long, between the two snowflakes.  Some basic rhinestones completed the effect. 

Finished Card Front


Inside view of the card and sentiment

Northern Flurry Textured Impressions Embossing Folder


I really enjoy adding texture and embossing to cards and it's so easy to do using Stampin' Ups! fabulous Textured Impressions Embossing Folders.   I remember the days when I used to drag out my light box, brass stencils and embossing tools and work for what seemed like hours to create something unique and beautiful. Well let me tell you all that is a thing of the past.   Now, I simply slip a piece of cardstock or DSP into one of SU's textured impression folders and crank it through the Big Shot.  That's it.  Nothing could be easier and believe me it's pure magic when you see the results.  I love it!

When I was blog surfing earlier this week I came across a fabulous Christmas card designed by Glenda Calkins, using what she called "Faux Embossing Paste". This gal really does great video tutorials, so you'll want to take a peak at this one and check out her technque. Glenda used the Northern Flurry Textured Impressions Embossing folder for her card and I have to tell you for me it was love at first site! I liked the design and the color combo of the DSP and card stock she used and of course I loved the embossing.  I just knew I had to get busy and try it out myself.  I made a few minor changes in terms of the DSP and the sentiment but because I really loved the effect of the sanded embossed image on the DSP, I stayed with the same layout. Sanding the embossed image with a SU sanding block gives a distressed look fairly quickly and trust me it doesn't take away from the embossing. In fact, because the DSP double sided paper has a white core, it distresses really quickly and enhances the image.  Here is my card


Northern Flurry Textured Impressions Embossing Folder Die 120902      Price: $10.95
Create the wonderful tumult of snow storms on your winter projects with our Northern Flurry Textured Impressions Embossing Folder. These impressions coordinate perfectly with the images in our Northern Hearts stamp set for an abundance of sensational snowflakes to blanket a card or scrapbook page.

■ Textured Impressions Embossing Folder
■ Folder measures 4-1/2" x 5-3/4"
■ Coordinates with Northern Hearts set
■ Use with standard Big Shot cutting pads and multipurpose platform

Thanks for dropping by today.  Let me know what you think............... did you like it?

Monday, November 22, 2010

9 Days Only - Get Spectacular On Line Savings Nov 22 - 30, 2010

During this one week only, you can get incredible discounts with up to 50 percent off.  You can save big on some of your favourite products, as well as qualify for FREE SHIPPING on online orders of $200 or more.


Just click here to see all the bargains and download the PDF.  My online shopping site is available 24/7 simply click on my Shop Now button to visit the on-line catalogue.  Once you're there click on ONLINE SPECTACULAR and you're ready to shop!

Have fun and if you have any questions simply contact me at pennyhanuszak@telus.net, I'll be happy to help you out. 

Sunday, November 21, 2010

Birthday Wishes

Today I thought I'd take a break from all the Christmas and Fall posts and share a whimsical little Birthday Card I recently made for my good friend Carol.  I originally made this card which was designed by Maureen Pollock a local Stampin' Up demonstrator, while attending a demo get together in Langley last Spring. Maureen always incorporates such great detail in her cards and this one is no exception. I loved how feminine and light this card is and I've remade it several times for other  occasions, including Thinking of You, Thank You,  Mother's Day and sympathy cards.  By changing out cardstock colors and inks you can create some wonderful cards and make it in your own unique style.

The really fun thing about making this card is that you really have to bring out all your punches.  For instance, if you look closely you'll see that the clouds were sponged using a scallop circle punch outline as a mask.  As well on closer examination you'll see that the little picket fence is made by overlapping 2 jewelry tag medium punches for each fence slat. Isn't that clever?   The leaf from the 2-step bird punch was used to accent the stamped flower and vines which are from the very versatile Vintage Vogue stamp set. And finally, the darling butterflies on this card front are made using the Embosslits Beautiful Wings die cut. 

Closeup of the Fence Details


The Top Note Die is perfect for embellishing the inside of the card, and easily show cases the 3 Vintage Vogue flowers and the Perfect Polkadots embossing. 

Hope you like this card.  Enjoy!  

I Won Some Blog Candy on Royal Blog Tour..... Yippee!!!!

One of my favourite things to do is look at other stamper's blogs and what better way to indulge myself than to go on a blog tour.  Well that's exactly what I did from Nov 5 - 8, I visited the 70 sites that were featured on the Royal Blog Tour.  All of the projects were simply awesome and the blog sites were so inspiring.  I just had a ball!  Of course, while I was blog hopping I made sure I left comments on each and every site, as they were so deserving and who doesn't like to get some positive feedback. 

Some of the sites offered Blog Candy and although I would have left a comment anyway, I made sure I followed their special instructions and left a comment for them.  When the tour finished I went onto their site to see if I had won any of the fabulous prizes that had been offered, but much to my disappointment I didn't win anything.  Then, about 3 days after the RBT was over I received a note from Jennifer Blomquist who is the author of North West Stamper blog saying I had won her Northern Hearts Card Candy.  WOW!  You can't imagine my excitement, I was so thrilled.  And as if that wasn't enough, I was even more thrilled when a parcel arrived a few days later with this beautiful box and set of card embellishments (not to mention the chocolate - did I mention Ghiradelli?) spilled forth.  Her set was even more beautiful in real life and the cute little box that held everything is just exquisitely crafted.  Jennifer's blog is chock- a-blok full of wonderful projects and I hope you'll check out her site at http://www.nwstamper.com/, it's well worth the trip.   Thanks Jennifer you really made my day with this great project!!!


Even though the Royal Blog Tour is over for now and all the prizes have been won, there is still an opportuity to visit the blog sites as they are still available for viewing.  They are so worthwhile visiting.  I know I am going to be going back and visiting them again because there were so many special seasonal projects that I am interested in looking at again, and maybe trying my hand at.  Have fun and enjoy the tour!


2024-2025 Annual Stampin' Up! Catalogue has launched!

 HAPPY MAY 1ST| Today I'm celebrating and  sharing the launch of the much awaited Stampin' Up! Annual Catalogue which will run from ...