Showing posts with label Stylized Birthday. Show all posts

Wednesday, March 21, 2018

WWC #162 - Charolotte's Masculine "Anything Goes" Challenge

Spring Equinox arrives this week and I'm so excited because it means longer days and the move towards warmer weather, hopefully and all things Spring.  It hasn't arrived yet though, and today it's a tad cool in the shade and when the clouds move overhead.  I'm trying to layer up rather than turn on the furnace all the time, so it was a bit cool in my stamping room. 

This week's host for the Watercooler Wednesday challenge is Charlotte and she's challenging us to make a Masculine style card or project and "Anything Goes".  

This challenge will be open until 5:00pm Mountain Time on Monday March 26th, so if you feel inspired to join us we'd love to see your creation. All the rules and how too's are on the main screen of the Watercooler Wednesday blog. While you're there, check out all the awesome cards contributed by the Watercooler Wednesday Design Team Artists, they're awesome and so inspiring.

Here's My Card: With less than two weeks to go for the Sale-A-Bration Promotion, I was encouraged to make a card for a friend's son who's really in to sports, using the Epic Celebration stamp set.  What a charming and fun card for a young man!
My card is an A2 with a top fold, made with a Night of Navy card base measuring 8 1/2" x 5 1/2" and scored at 4 1/4".  I've layered the card base with a 5 1/4" x 4" piece of Whisper White card stock.  Before I adhered this panel to my card I stamped the sneakers and two sentiment pieces and cut them out.   Why waste card stock?  The Cherry Cobbler layer measures 5" x 3 3/4" and I randomly stamped the sneakers and headset in Versa Mark ink before adhering to the white layer. 
I stamped the sneakers in Momento Tuxedo Black ink and coloured them with the light and dark Night of Navy Stampin' Blends.  These are fantastic and easy to add depth and colour with.  I also coloured the white parts of the sneakers and laces with some Wink of Stella to add a little gleam.  I wanted to ground the sneakers to the card stock so I coloured around them with a Light Smokey Slate Stampin Blend.  The square was cut out with the 2 1/8" Stitched Shapes Square Die.  For some birthday fun I stamped some confetti in the top corner using the Confetti stamp from the Picture Perfect Birthday stamp set.  


I stamped the sneakers  and headsets from the Epic Celebrations stamp set randomly across the Cherry Cobbler layer with Versa Mark ink.  I love the look of this because the stamping lies subtly in the background and doesn't take away from the main images.  The panel with the "Happy Birthday" sentiment from  the Picture Perfect Birthday stamp set was stamped a row at a time in alternating Cherry Cobbler and Night of Navy inks.  I used my Stamp-A-Ma-Jig to line up the sentiments and make sure they were evenly spaced.  
  
I stamped the "Here's To An Epic Celebration" once in Night of Navy and again in Cherry Cobbler on Whisper White card stock and then cut both sayings out with a 1" circle punch.  I wanted to add the Night of Navy word "EPIC" so I cut across the circle just above and below the word Epic and then adhered the cut piece with Tom Bow Adhesive to the Cherry Cobbler circle.  This piece is mounted on a 1 1/4" circle cut from Night of Navy card stock.  It's popped up on top of the two other stamped panels with Dimensionals.  
The inside of the card is pretty simply, just a few more sprinkles of confetti and the Stylized Birthday stamp in Cherry Cobbler.  
Supplies:
Stamp Sets:  Epic Celebration (Sale-A-Bration 18), Picture Perfect Birthday #145519, and Stylized Birthday #141828
Card Stock:  Night of Navy, Cherry Cobbler and Whisper White
Inks:  Night of Navy, Cherry Cobbler, Versa Mark, and Night of Navy (Light/Dark) Stampin' Blends
Dies/Punches:  Stitched Shapes - 2 1/8" Square, 1" and 1 1/4" Circle Punches, Memory Box Pinpoint Rectangles 
Accessories:  Stamp-A-Ma-Jig, Big Shot, Paper Trimmer, Wink of Stella, Dimensionals, Tom Bow Glue 
Well that's it for this week's project.  I sure hope you enjoyed it.  I think I'll be making several more cards with this stamp set as it was really fun to colour and play with.  I'd love to hear your thoughts on this card.

Happy Stamping!
Penny Tokens Stampin Spot 

Wednesday, September 13, 2017

Watercooler Wednesday Challenge #136 - Gail's "All About Birthdays"


I don't know about your household but in mine, September and October are almost continual birthdays for friends and family. Because I need so many cards for these special occasions, I was happy to have the opportunity to play along with Gail Allen's Watercooler Wednesday "All About Birthdays" challenge.
Why don't you play along this week too? This challenge will be open until 5:00pm on Monday September 18th. It's easy to link up your card to our Linkski and who knows, your creation might "Rock the Watercooler"! Just click here to go to the Watercooler Wednesday home page and check out the rules of play.

One of the stamp sets I fell in love with from the new Holiday catalogue is called Half Full and features a wonderful array of stamps and sentiments that are wine based. I just knew this set would be perfect for some upcoming birthdays. So, without further adieu I'd like to share my Half Full Birthday card for this week's challenge.
Here's My Card: 


Supplies:Stamp Sets:  Half Full #144999 and Stylized Birthday #141828
Ink and Markers: Momento Tuxedo Black, Fresh Fig,
Card Stock: Crumb Cake, Basic Black and Fresh Fig
Accessories: Stamp-a-ma-jig, Paper Trimmer, Scissors, Dimensionals, Glossy Accents, Basic Rhinestone, Ribbon (non-SU), Paper Snips for Fussy Cutting.

Details:
1.  Cut a piece of 8 1/2" x 5 1/2" Fresh Fig card stock for base and score at 4 1/4".   These are a A2 card dimensions.

2.  Cut a 4" x 5 1/4" piece of Basic Black card stock for the first layer and adhere to base.

3.  Cut a  3 7/8" x 5 1/8" piece of Crumb Cake for top layer.  Using the Stamp-a-ma-jig and Fresh Fig ink, stamp four rows of the multi wine glass image across the widest part of this panel.  Sponge the edges with Fresh Fig ink and adhere to the Basic Black layer.

4.  Stamp the sentiment "Wine improves with age....." on a scrap of Crumb Cake card stock in Fresh Fig.  Fussy cut the image and using a sponge dauber and Fresh Fig ink sponge around the edges.  Using the 4th label die from the Lots of Labels Framelits cut out a Basic Black label.  Center and adhere the Wine Label to the Basic Black label and then cut it down so only the top and 1/16" show around the sides and bottom.  Adhere to card front on an angle on the left side.  Make a small bow and attach with a glue dot and a Basic Rhinestone. 

5.  Stamp the wine bottle image on Fresh Fig Card Stock and on Crumb Cake card stock.  Fussy cut the Fresh Fig bottle.  Fussy cut the wine label and the bottle top from the Crumb Cake bottle and piece on the Fresh Fig bottle.  To give the appearance of a glass bottle, use clear glue or Glossy Accents on the Fresh Fig portions of the bottle and let dry.  Attach with Dimensionals beside the tag.

6.  Stamp the wine glass on Crumb Cake and fussy cut it. Use a Fresh Fig marker to colour in the wine in the glass.  Cover the glass with Glossy Accents and let dry, then go over the wine with a Fresh Fig Marker to make it stand out.  Attach the glass with Dimensionals beside the wine bottle.  

7. To finish the inside of the card begin by cutting a Basic Black panel 5 1/4" x 4" and adhere to card base.

8. Cut a 5 1/8" x 3 7/8" piece of Crumb Cake for the inside panel.  Sponge the edges with Fresh Fig ink and stamp "Happy Birthday" using the Stylized Birthday stamp in the center.  Stamp a wine glass in the bottom right hand corner.  


This card came together pretty quickly and I love the glossy accents on the wine bottle and the glass, it just brought them to life.  I know my friend will love receiving this birthday card. 

I hope you like it as well and would love to hear your comments.  If you started at my blog forget to check out the other Watercooler Wednesday Design Team Birthday Projects.  So much inspiration! 
 
Happy Stamping!
PennyTokens Stampin' Spot

Wednesday, August 10, 2016

Watercooler Wednesday - WWC80 Heidi's CAS Challenge

Our bathroom renovation started last week and we've been up to our eyeballs in water related issues, so it was kind of ironic that Heidi's theme for her Watercooler Wednesday Clean and Simple Challenge this week is "Water".  

Since Clean and Simple (CAS) cards always seem to be a challenge for me and because I don't have a lot of water themed stamp sets, I had to really put on my thinking cap to come up with an original and fresh card design.  I hope you like it as much as I do. So with an idea about a school of fish in mind, this is how I started out and then my card designed morphed into the one below:  
Here are my working "drafts" of my card.  I like the final version which is below.
Here's My Card: 
 

Nothing like a school of fish swimming by to make you think of water.  My card base is an 8 1/2 x 5 1/2 piece of Island Indigo card stock scored at 4 1/4".  I used a single layer of Whisper White card stock for my stamping layer and it measured 4 1/8 x 5 1/4".  Note:  This layer should have measured 4 x 5 1/4". but I was out by an 1/8th of an inch, my layer doesn't fit evenly on the card front. I couldn't do anything about the wrong measurement because I'd already applied my glue before I discovered this.  Oh well "go with the flow", if you get my "drift"! 
 
Supplies:
Stamp Sets: Seaside Shore #141625, Stylized Birthday #141828
Ink:  Island Indigo
Card Stock:  Island Indigo and Whisper White 
Accessories:  Tom Bow Glue, Wink of Stella.
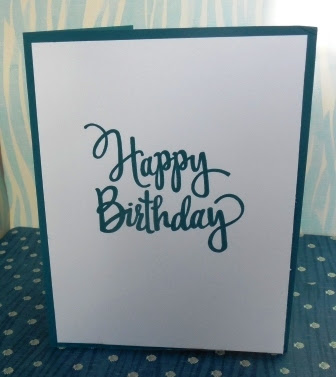
I kept the inside of this card pretty plain by just stamping "Happy Birthday" from the Stylized Birthday stamp in Island Indigo ink on a piece of Whisper White card stock that measured 4 x 5 1/4" (got it right that time).
 
I really like the size and timeless classic script featured on this single wooden stamp, and I'm glad I've added it to my collection. It really produces a good solid image, which is so important. 

I wanted the images from the Seaside Shore stamp set to look like a school of fish swimming by and I think I accomplished this.    Before starting on the school of fish I stamped the sentiment "Hoping Your Day Goes Swimmingly" and then masked off both corners of the card so I had clear lines to stamp the design along.
Seaside Shore a 15 piece clear mount rubber stamp set
Now It's Time For You: 
Well what do you think?  Did you like this challenge?  Are you ready to Rock the Watercooler this week and link up your card?  I sure hope so! I also hope after looking at the other Watercooler Wednesday design team artist's cards that you've been doubly inspired and will consider playing along with us.   

Entering challenges is such an awesome way to enhance your card making talents and get great feedback on your creations. After all, it's all about sharing and it's fun and easy.  So what are you waiting for? 

To help you out here are some guidelines you need to follow to be eligible for this week's challenge:
  • For the CLEAN AND SIMPLE (CAS) challenge the card must feature either a single layer upon which you stamp or a base with one single layer that you've stamped on (card stock only no dsp).
  • Because it's a CAS challenge, no embellishments or die-cuts or anything except the simplicity of stamping for the "clean & simple" is allowed. 
  • No embossing folders allowed.
  • Heat embossing is allowed since heat embossing does show up better than simple stamping. (Yeah!)
  • Your card or project, and this is really important, may not be entered in more than four challenges including the Watercooler Wednesday challenge.
  • Keep it clean and simple!  And have fun! 

I'm also adding my "Water" themed challenge card to the "Just Us Girls" Challenge Blog as their theme this week is the word "Water".  Hope appropriate and coincidental is that?  Make sure you check out their challenge site too.  
Check out this challenge site too!
Happy Stamping!
Penny Tokens Stampin' Spot
August Hostess Code:  EZGKEM73

2024-2025 Annual Stampin' Up! Catalogue has launched!

 HAPPY MAY 1ST| Today I'm celebrating and  sharing the launch of the much awaited Stampin' Up! Annual Catalogue which will run from ...