Last Friday I participated in a very enjoyable stamping evening with Cheryl Lefore's Stamp Club. It was nice to see familiar faces and be so well pampered by Melina, our fabulous and friendly stamp club hostess. I always enjoy attending Cheryl's stamp clubs and making her wonderful creations and Friday was no exception. We made two projects, both of which were fun, enlightening and very inspiring.
Project No. One: Christmas Angel Ornament
I've seen variations of this angel made with the Gift Bow Bigz Die on Pinterest and other boards but it didn't really pique my interest until I made this little cutie. This sweet little angel is so adorable and so quick to make. I can see myself making these for gift tags, hostess gifts and for decorations on my tree. They're addictive!
To make one of these little cuties yourself, check out the You Tube video by Tanya Bell that shows how to cut and assemble her version and Cindee Wilkinson for her written tutorial on this version.
We used the same method to make our angel, but made the following changes:
1. We added velum wings. To make the wings, cut out a heart matching up with the size of your angel using the Heart Framelits. Cut down the center of the heart to get 2 wings. Attach the wings by slightly overlapping them and attaching with sticky strip to the angels back. See photo for placement. When I make this again I'm going to texturize the velum with the Square Lattice Embossing Folder before cutting out the heart.
2. The angel's body is made with Designer Paper: While the card stock used in both Cindee's and Tanya's samples is nice, our angel is cut from Winter Frost Specialty DSP, and I think it looks awesome.
Silver Glimmer Paper instead of Champagne: Our angel's halo and the circle backing are cut with the circle punches from Silver Glimmer Paper.
Here's a tip on making the eye templates. Use the circle punch from the Itty Bitty Shape Punch or other small circle punch and the sticky part of a post it note to punch out the two circles for the eye templates. The sticky part will hold the circles in place while you draw the outline of the eyes and lashes.
Stamp Set: Very Merry Tags
Classic Ink Pad: Island Indigo
Stampin Write Marker: Basic Black
Cardstock and Paper: Blushing Bride or Crumb Cake (head), Silver Glimmer Paper, Winter Frost Specialty DSP, Vellum
Diecuts: Gift Bow Bigz Die (Holiday Catalogue and this week's Deals of the Week), Heart Framelit,
Punches: 1" Circle, 1 1/4" Circle, 1 3/4" Circle, 7/8 Scallop Circle, Itty Bitty Punch Circle
Miscellaneous: Liquid Adhesive (Tom Bow), Glue Dots, Linen Thread (or Silver), Dimensionals.
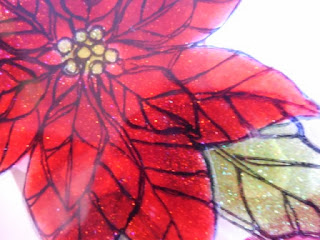
If you like this post please leave me a comment and be sure to come back tomorrow when I'll be posting the second project. Here's a teaser:
Project No. One: Christmas Angel Ornament
I've seen variations of this angel made with the Gift Bow Bigz Die on Pinterest and other boards but it didn't really pique my interest until I made this little cutie. This sweet little angel is so adorable and so quick to make. I can see myself making these for gift tags, hostess gifts and for decorations on my tree. They're addictive!
But before I get to the finer points of how to make the angel, I want to share that the Gift Bow Bigz Die is currently on sale for 25% off, but only until the end of this week.
 |
| Click here to see the Weekly Deals for Nov. 11 to 17th, 2013: |
 |
| Weekly Deal Nov 11 to 17th, 2014. Check it out at link above. |
 |
| Cindee Wilkinson's version of the Gift Bow Angel Ornament. Pretty Darn Cute. Her tutorial includes instructions for creating the Merry Christmas Banner. |
1. We added velum wings. To make the wings, cut out a heart matching up with the size of your angel using the Heart Framelits. Cut down the center of the heart to get 2 wings. Attach the wings by slightly overlapping them and attaching with sticky strip to the angels back. See photo for placement. When I make this again I'm going to texturize the velum with the Square Lattice Embossing Folder before cutting out the heart.
Silver Glimmer Paper instead of Champagne: Our angel's halo and the circle backing are cut with the circle punches from Silver Glimmer Paper.
Here's a tip on making the eye templates. Use the circle punch from the Itty Bitty Shape Punch or other small circle punch and the sticky part of a post it note to punch out the two circles for the eye templates. The sticky part will hold the circles in place while you draw the outline of the eyes and lashes.
Stamp Set: Very Merry Tags
Classic Ink Pad: Island Indigo
Stampin Write Marker: Basic Black
Cardstock and Paper: Blushing Bride or Crumb Cake (head), Silver Glimmer Paper, Winter Frost Specialty DSP, Vellum
Diecuts: Gift Bow Bigz Die (Holiday Catalogue and this week's Deals of the Week), Heart Framelit,
Punches: 1" Circle, 1 1/4" Circle, 1 3/4" Circle, 7/8 Scallop Circle, Itty Bitty Punch Circle
Miscellaneous: Liquid Adhesive (Tom Bow), Glue Dots, Linen Thread (or Silver), Dimensionals.
If you like this post please leave me a comment and be sure to come back tomorrow when I'll be posting the second project. Here's a teaser:


