Wednesday, June 3, 2020

Stampin' Up! 2021/22 Annual Catalogue Launch....

That magical day has arrived in the land of Stampin' Up!.... it's catalogue release day!  And, it's a good one!  Yippee Skippy!

PDF Copy Available Here
I don't know how they do it.  Every year Stampin' Up! seems to absolutely nail it with it's new catalogue and collection of Suites and Products to make our stamping world a fun get away place!  This year is no exception.  

The new catalogue features 196 pages jam packed with project ideas, tips and did I say awesome products?  There are suites of products for every occasion:

  • All Occasion
  • Love, Thanks and Support
  • Kids and Babies
  • Birthdays
  • Artistic Expression and
  • Accessories and More


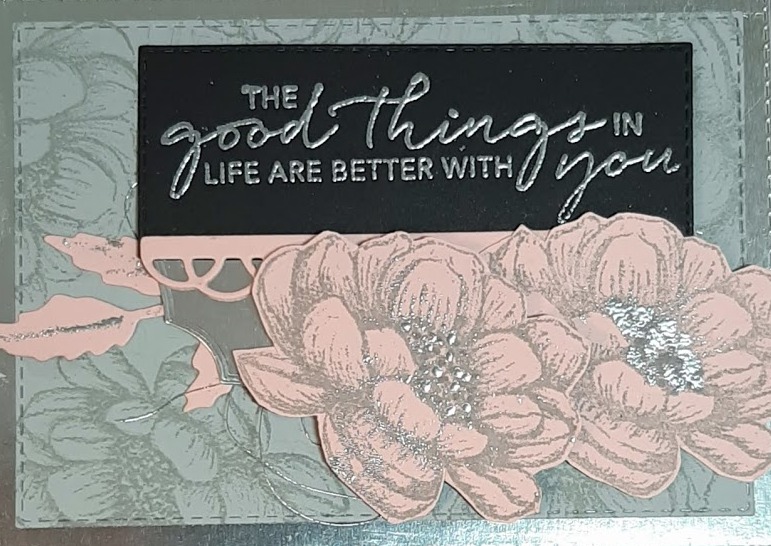
For me, part of the excitement of this release was seeing the return of some of my favourite stamp sets from last season. It's going to be a lot of fun pairing them up with the new InColours and Designer Series Papers to create a totally new look this year.   And of course many new sets that I'm sure will become my new favourites   


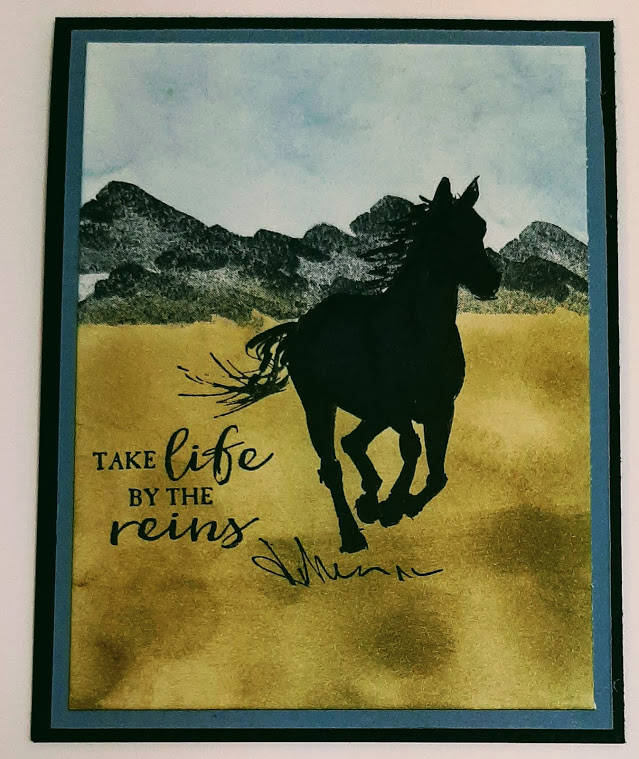
There are stamp sets for everyone and every age this season, lots of flowers and a lot more masculine stamp sets and designer papers.  Well, don't just take my word for it.  Check it out here:   

Our New In Colours:
These five brand new Incolours are sure to be popular this year.  From the moment I saw them I was excited:  


Happy Stamping!
Penny Tokens Stampin' Spot 

JUNE HOSTESS CODE:  6BKXXMK2


Use this Code June 3rd - June 30, 2020

Apply to orders $25-$195 before S&H and Sales Tax and you'll receive a Stampin' Rewards gift from me.  For orders $200 and more, no worries, you'll receive your very own Stampin' Rewards when your order is placed.  


Monday, June 1, 2020

Tasteful Touches Coming Soon

Hi and thanks so much for stopping by.  Quick post today as I just want to share a card I made with my new Tasteful Touches stamp set.  


I wanted a "hello" card to send to a friend during the COVID-19 that was soft and feminine.  

I began with a So Saffron base and then layered up with Flirty Flamingo, Basic Black and Whisper White card stocks.  

When I created my background piece I began with a 5 1/2" x 8 1/2" piece of Whisper White card stock.  From this base I was able to cut several different pieces.  The layer used on this card measured 3 3/4" x 5" and the sentiment label was cut out with the 2" Stitched Circle die.  I sponged the edges with Flirty Flamingo ink and then blended with a sponge dauber and So Saffron ink to blur the images around the edges.  

I inked up the floral stamp with So Saffron ink and then loaded a Sponge Dauber with Flirty Flamingo ink and daubed around the edges of the flower to add some different levels of shading.  While stamping I varied the intensity of the colour going with full colour or stamping off the colour as I went.  

My idea was to stamp the flower image around the left side of the card and then randomly stamp the leaves and squares to create a background.  The leaves were stamped in varying shades of Flirty Flamingo and the squares which I love were stamped in Crumb Cake ink.  

When I stamped the flowers along the card edge, I simple masked off the stamped flowers as I moved up the length of the card stock. I use Post It Notes to make my masks and I find if I'm careful handling the masks they can be used again.  I store my masks inside the stamp case so they are always ready to use on other projects.    

Don't you just love the large font used for this "Just Saying Hello" sentiment?  

It's different and looks like I just wrote it in black ink.  I think it worked well in setting the tone of this card.

I cut the coordinating circle layers with dies from Stitched Shapes  and
Layering Circles Dies .  
Layering Circles  is a great die set for nesting layers.  It has 16 circle dies. I love having this set of dies in my collection.  


Stitched Shapes a 12 piece die set that has Ovals, Circles and Squares.  Love it! 

Sequins are super easy to add when you use Stampin' Ups! Take Your Pick tool and Mini Glue DotsThe Mini Glue dots really make them stay in place and let's face it sequins add a warm shimmer and a small pop of shine to the face of the card.  

The Tasteful Touches stamp set is part of a new suite called In Good Taste.  Look for it in Stampin' Ups! new Annual Catalogue which will be available on June 3rd.  I know you'll love it too.
2020/2021 Stampin' Up! Annual Catalogue available June 3rd, 2020

Happy Stamping!
Penny Tokens Stampin' Spot 

Please Note:
Hostess Code JRJASCHJ
My May Hostess Code is Available Until June 2nd because of the Catalogue Transition.   The June Hostess Code will go live on June 3rd.  

Monday, May 25, 2020

Stampin' Up! Sneak Peek...... Tasteful Touches

Hi everyone.  May is flying by and there's only ten more sleeps before the much anticipated launch of Stampin'Up!s 2020/21 Annual Catalogue on June 3rd.

One of the perks of being a Stampin' Up! demonstrator is you get to purchase catalogue items early on a pre-order basis.  So while the clock is ticking down I thought I'd share a sneak peek at one of the new stamp sets I ordered from the new catalogue.  

This red rubber cling stamp set, called Tasteful Touches, is part of a larger suite called In Good Taste.  I purchased the stamp set and it's coordinating Tasteful Labels Dies as a Bundle. 

As soon as I looked at this set I fell in love with the flower image and was excited to use it to create this Anniversary card for a friend who's silver anniversary is coming up.  


She wanted something romantic and soft so I used a combination of Blushing Bride,Smokey Slate, Whisper White and Basic Black card stock to create this card.  I also used some silver foil for a layer and a label and incorporated some silver embossing.  

For the card base, I began with an 8 1/2"  x 5 1/2" Blushing Bride card base.  I stamped the leaf design from Tasteful Touches with Versa Mark ink around the edges of the card front, sprinkled it with Silver Embossing Powder and heat set the design.     
I'm very frugal when using specialty foils and designer papers, so to make the most of them I cut out die cuts from areas that won't be seen once the layers are stacked.  
For this card I used the Stitched Rectangle dies to cut out the Smokey Slate and Silver Foil layers.  I also cut out the 1" x 3 1/4" Basic Black layer for the sentiment from the bottom Basic Black layer.  

I used the two large die cuts for my layers and the smaller banner die cut will be used for another project down the line.  Both the banner and the label are from the Tasteful Label Dies.   

Here you can see all the layers added to the finished card.  I cut out the decorative edge die cut in Blushing Bride using a die from the Painted Labels Dies.  Oh my.  This little edge fit beautifully on the left hand side of the sentiment layer.  Beneath that I added the silver foil label and some leaves die cut in Blushing Bride from the Poppy Moments Die set.  The silver detail on the leaves was added with a Versa Marker Pen and Silver Embossing Powder.   

I love the verse from the Tasteful Touches stamp set.  It's so meaningful.  Although I chose to use a Stitched rectangle die to cut out the sentiment after I embossed it on the Basic Black card stock, there actually is one of the dies in the Tasteful Labels dies that fits perfectly with this particular sentiment. 

I fussy cut the two rose images after stamping them in Smokey Slate ink on Blushing Bride card stock.  I used the Versa Mark Pen to add some dots to the centers of the flowers and to the petals before heat embossing them with Silver Embossing Powder.  These flowers were popped up with Dimensionals and some silver thread was layered beneath them.  

For the floral Smokey Slate layer I started off with a 4 x 5 1/4" piece of Smokey Slate card stock.  I stamped two of the floral image on post it notes and fussy cut these for masks, then I randomly stamped the floral image on this piece using the masks when needed.  I used Smokey Slate ink and the flowers show all the beautiful details for a great back ground paper.  

I used the masks again to stamp multiple flowers in the lower right hand corner of the inside panel in Smokey Slate ink and then added some leaf sprays in Blushing Bride to finish off .  The Happy Anniversary sentiment stamped in Smokey Slate is from a retired Stampin' Up! set 

Once the card was completed I stamped a Stampin' Up! Whisper White envelope with the floral image.  Just couldn't get enough of that stamp image.  It's simply beautiful and so detailed.  
I hope you enjoyed my card today.  I really enjoyed making it and I know my friend will be happy with how it turned out.  

Be sure to check out the In Good Taste Suite when the catalogue goes live on June 3rd.  It's sure to be a favourite.  Although I've only showcased a few of the images from the stamp set everyone of the 9 rubber stamps are awesome.  

Happy Stamping!
Penny Tokens Stampin' Spot 

Friday, May 22, 2020

Everything Is Rosy

Hi Everyone.  Hope you're having a good Friday and looking forward to the weekend.  It's rainy and cool here again today, so a good day to stay inside and play with some of the stamp sets that will be retiring soon.   It's time to share some more of my favourites.  

One of the products that I'm totally over the moon happy with right now is the "Everything Is Rosy" Product Medley.  What's not to love about it? 

If you're a fan of Melon Mambo, Night of Navy and Pink then this is a set you need to get. And, beyond the gorgeous colour mix, this is probably one of the best buys Stampin' Up! has offered this year, and it's available right now on the Clearance Rack while supplies last.  

Here's what's included in the Medley:


Everything Is Rosy Product Medley  
#150059   Price: $59.95(reduced from $109.95)

The Everything Is Rosy Product Medley is a perfect blend of exclusive products.  This medley includes paper, ribbon, foil sheets, 10 die cuts, 18 Photopolymer stamps, and more.  Here's the breakdown:

  • Everything Is Rosy Photopolymer Stamp Set—18 stamps; suggested blocks: a, b, c 
  • Everything Is Rosy Dies—10 dies; largest die 2-7/8" x 1" (7.3 x 2.5 cm) 
  • 6" x 6" Designer Series Paper Stack—48 sheets; 8 each of 6 gorgeous double-sided designs 
  • 6" x 6" rose gold foil paper—8 sheets
  • Printed die cuts—2 sheets of floral designs  
  • Rose gold die cuts—4 sheets; 2 each of 2 designs
  • Rose gold adhesive backed mirror embellishments—60 embellishments; 1/4" (6.4 mm) (make sure to take the protective plastic off these to see how beautiful they are)
  • Melon Mambo 1/4" (6.4 mm) Ruched Ribbon—10 yards (9.1 m) 
  • Night of Navy/Rose Gold 3/8" (1 cm) Metallic –Edge Ribbon—10 yards (9.1 m) 
  • Rose Gold Shimmer Paint—1/2 oz. (15 ml)


This picture shows the front of the card with the belly band removed. I wish  I could show you this card in person, because the photo just doesn't do this rich and beautifully radiant DSP justice.  The little pieces rose gold foil that are mixed into the paper design really shine through.   


In this view you can see the inside of the card.  I chose coordinating designer papers and the die cut stickers to decorate the panels.   The card base is Night of Navy and I used Powder Pink for the card stock layers.  The ink used for the sentiments is Lovely Lipstick.  

This view shows the back of the card. When the belly band is removed, you've got plenty of writing space for your special message to the recipient. I used one of the floral die cut stickers in the top and stamped the sentiment in Lovely Lipstick ink. I also decorated the envelope flap by adding a 2" x 5" piece of the Everything Is Rosy DSP to the outside of the flap and then trimming away the excess. The result is a beautiful and complete card package. 

Here are a few more samples of cards made using the Everything Is Rosy Medley:  


Well that's it for this post.  If you're looking for great value and fun product grouping, I hope you'll consider getting the Everything Is Rosy Product Medley.  It's only available between now and June 2nd, on the Clearance Rack.  

Happy Stamping!
Penny Tokens Stampin' Spot


Tuesday, May 19, 2020

All About the Horses...........

Hi and welcome to my blog.  Our Canadian "Victoria Day Weekend", better known as the "May Long Weekend" has just finished and this will probably be the quietest one on record with all the COVID-19 safety measures about social distancing still in place.  However it will also be a memorable one for other reasons.

On Sunday during the RCAF's "Operation Inspiration" flight over Kamloops a tragic air accident involving one of our beloved Canadian Snow Bird jets occurred.  The Snowbirds have been flying across Canada since taking off from the Maritimes at the beginning of May and the flight, dubbed Operation Inspiration, was supposed to boost morale for Canadians who have spent months in isolation in an attempt to flatten the curve of COVID-19. 

Canadians are now mourning the loss of Capt. Jennifer Casey of Halifax, Nova Scotia.  Captain Richard MacDougall, the pilot and lone survivor is now recuperating in hospital with severe injuries.  Our condolences to Jennifer's family, friends and co-workers, she'll be truly missed.  We are praying Captain MacDougall's full and speedy recovery.


Last Chance Products Review:  

We're getting closer and closer to the end of our catalogue year and so I thought over the next week I'd get back into blogging by sharing some of my favourite stamp sets, papers and dies that will be retiring for good on June 2nd.  

To kick off this review, I'm featuring two stamp sets that I've enjoyed immensely.  They are Let It Ride and Country Road.   Probably some of the best country images Stampin' Up! has come up with over the years.  Man, who doesn't love horses and country?   
Let It Ride item # 148765 is a 9 piece red rubber cling mount set that uses Stampin' Up!s Acryllic Blocks c,d,e, and g.  
Country Road item # 151356 is a 6 piece red rubber stamp set.  It also uses the c,d,e, and g Stampin' Up! Acryllic Blocks.  

 Here are some of the cards I've made with these sets 

Card One:
I was inspired by Dawn Griffiths to try out a new to me technique called the "Triple Panel Stamping".  Click on Dawn's highlighted name to see her great video tutorial on this technique. 
Card Two:
The images were stamped on Very Vanilla, Mint Macaroon and Soft Suede for this sample.  The card base is Early Espresso card stock.  What a difference when you use the three different pieces of card stock.  
These are such super simple and quick cards to make, but the end result is very impressive.  I think my favourite of the two is the white and black one.  What about you?  Which one do you like best - one or two? 

The next grouping of cards are my own own design and feature a combination of Let It Ride, Country Road, Very Versailles and Waterfront Stamp Sets.  


Card Three:  
The card base is Crumb Cake with Chocolate Chip (R) and Very Vanilla Layers.  I repeatedly stamped the horses head  from the Let it Ride stamp set for the background and the circle images.  The layered circles were cut out with the Stitched Shapes Dies and the Happy Birthday sentiment  was cut out and layered with the Stitched Rectangles Dies.  Once I decided how I wanted this card to look, it came together in about 5 minutes - inside and out.  

For the inside of this card I stamped the horses image in Crumb Cake ink and the "Take the Reins" sentiment in Early Espresso ink.  Once again the panels were in Chocolate Chip(R)* and Very Vanilla card stocks.  

*(R) stands for Retired.  I have an abundance of Chocolate Chip and other card stocks in my stash and use them, regardless of the fact they are retired.  In this case the Chocolate Chip is the perfect compliment with the Crumb Cake and Very Vanilla 

Card Four: 
I really enjoyed making this card for my brother who has Alzheimer's and is having difficulty with the COVID-19 "stay in place" rulings.  I try to send him a card every week to let him know we love him and are thinking of him.  This card features a combination of the Very Versailles stamp set, Country Road and the dotted stencil from the Basic Pattern Decorative Masks

The two stars were stamped in Early Espresso and fussy cut before adhering them to the panel with Mono adhesive.  To add a hint of colour I inked up the stamp with Sahara Sand and then lightly thumped it with a Mossy Meadow marker along the stems.  You can't do this with Blends as that it an alcohol based medium, but markers are a great tool for adding some extra detail in your stamping.   
I used second generation stamping to stamp the weather vane image from Country Roads in the center of the panel.  Second generation stamping is simple ink up your stamp then stamp it off on a scrap to get a lighter image and then stamp on your panel.   The sentiment "Always thinking of you" is from the Very Versailles stamp set.  I sponged the edges of the panels on both the front and inside with Crumb Cake and a sponge dauber before adhering them to the Chocolate Chip Panels.  

Card Five:
Card Five was once again a mixture of the Let It Ride, Country Road and Waterfront stamp sets.  What fun I had creating this imagery.  Normally you would layer in your elements working from the top down, but I wasn't sure what kind of a scene I wanted to create so I began by stamping the small horses from Let It Ride in Momento Black ink on my Very Vanilla panel.   

The next  element I added was the meadow and to create this I used the pebble stamp from Waterfront.  I stamped it several times in Gray Granite, Old Olive and Crumb Cake inks.  I used a sponge dauber to add some Crumb Cake and Old Olive colouring to the meadow area and as you can see in the picture, I did this with the lightest of touches.  Then  I coloured the horses and grasses with Soft Suede and Old Olive Blends.   I stamped both the tree images from Let It Ride and Waterfront in Mossy Meadow and Old Olive. 

At this point I still had the top of the card to fill in but had to make a mask for the horses first.  I cut one from a post it note and then inked up the Mountain image from Waterfront with a mixture of Gray Granite and Soft Suede inks.  I stamped this image right over the masked horses and the tree line.  The sun from Waterfront was stamped mistakenly with Gray Granite ink and then I over-stamped it several times with So Saffron ink to correct my boo boo.  After all, we can't have a dark sun.  Anyway, this seemed to work okay so I went with it.  The final touch was to sponge in some clouds with  - Seaside Spray ink and stamp the sentiment "Friends Make the Good Times Better", sentiment from Waterfront

The finished 5" x 3 3/4" panel was adhered to a 4" x 5 1/4" piece of Basic Black card stock.  The base of the card is also a retired card stock I have, called "Buckeroo Blue" (R).  It's very close to the Seaside Spray colour, which I was out of.   
Again, the inside of my card is stamped very simply with the sentiment and trees from Waterfront.  

Card Six:
I CASed this card from Francis Martin and it's called the "Silhouette Technique".  To see the video that inspired me to try this out click here.
This was a very simple card to make, mainly stamping and sponging.  The only changes I made to this card were the use of a black Sharpie pen instead of the recommended Basic Black Stampin' Write Marker, simply because I don't own one.  As Frenchie explains in her post and video, the Black Stampin Blends and or the Black Marker pens simply aren't dark enough to create this silhouette effect. 


Card Seven:

There's nothing super special about this card it's simply stamping with the Let It Ride stamp set and colour added with Stampin' Blends alcohol ink markers. Like I said, nothing special in the way of techniques but all in all a pretty cool card.  Sometimes you don't need to have all the bells and whistles. 

This card show cases the beautiful galloping horse and the sentiment "Take life by the reins" which is stamped in Momento Black Ink.  I love that sentiment. 

I used Soft Suede light and dark Blends to colour the horse, Granny Apple Green blends for the trees and grass and a bit of Light Pool Party for the sky around the trees.  That's it.  The card base is Early Espresso and the first layer of the card is Pool Party card stock.  

Again nothing special about the inside of this card, simply some stamping with Momento Black ink.  Enjoy! 

Well that's the end of my post.  I hope you have enjoyed the seven cards that I've shown you.  I'd love to hear your thoughts on them.  

Remember if this post has inspired you to purchase either the Let It Ride or the Country Road stamp sets they are part of the Last Chance Product list and will no longer be available for purchase after June 2nd, 2020.  

Happy Stamping!
Penny Tokens Stampin Spot 

Click here for Last Chance Products List


The May Hostess Code #JRJASCHJ is in effect only until May 29th, 2020.  Remember to apply it on On-Line Orders of less than $200.  If you do, you'll earn a free gift from me. Note: If you place an order of more than $200 (before tax, shipping and handling) you will earn your very own Stampin' Rewards. 

My On-line Shopping Link is open 24/7.  While you're there don't forget to check out the Clearance Rack and Last Chance Product List.  Click here to go to On-Line Shopping. 

2024-2025 Annual Stampin' Up! Catalogue has launched!

 HAPPY MAY 1ST| Today I'm celebrating and  sharing the launch of the much awaited Stampin' Up! Annual Catalogue which will run from ...