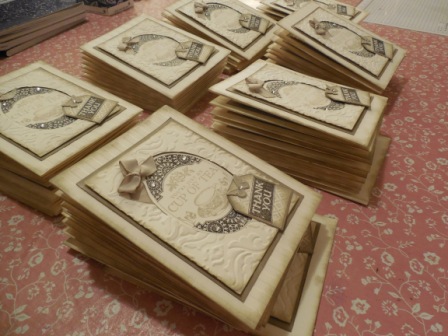
As promised, today I'll begin featuring a selection of cards I received for participating in the 64+1 New Catalog Stamp Set Card Swap@ Convention, as well as some cards I swapped along the way to various events.
I hope you'll enjoy these selections as much as I am and will leave a comment. I've been smiling ever since I received this exciting selection of cards. And, if you recognize your card please leave a comment, I'd love to hear from you.
I'll provide links to the card creator and products used as much as possible, but unfortunately some of the cards did not have any information accompanying them. Again, if one of these "unnamed" cards is yours, I'd loe to hear from you and amend my post with your name and link. Okay so here we go!
Card One:
 | ||||||
| Our first card was created by Beth Martin using the Wildflower Meadow Background Stamp (pg 83) and Wildflower Meadow Embossing Folder (pg 191). The background stamp measures 5 5/8" x 4 1/8". In case you didn't know, the Wildflower Meadow Embossing Folder also coordinates with the Gingham Garden Suite. You can buy this fantastic background stamp and coordinating folder as a bundle and save 15% (wood mount bundle #132735 and clear mount bundle #132985). Beth has done a fantastic job of stamping this card. The card base is Baked Brown Sugar and the 1st layer is Strawberry Slush card stock. She's stamped her images on Very Vanilla in Strawberry Slush Ink, and the polka dots are from inking up her Perfect Polka Dots Embossing Folder. The little "thankful for you" sentiment is from the hostess set Banner Greetings on page 202. Ask me how you could earn this last stamp set for free. Great card Beth! |
 |
| Card Two: Susan Gardner created this really enchanting welcome baby card using the Zoo Babies 10 piece stamp set on page 54 of the catalogue. Every character in this marvellous set is adorable. Susan incorporated three characters from the stamp set with So Ho Subway Designer Series Paper in a real thrifty but cute way. I also like how she added the smallest of the Basic Pearl Jewels for eyes on the elephant and rhino. Super cute! Any new mom would be thrilled to get this card. Thanks Susan for sharing. |
 |
| Card Three: Kris Kok has created a super cute welcome baby card using the single stamp "Worth The Wait". This wood mount only stamp offers terrific value at just $11.95 CDN. It coordinates with the 1 3/4" circle punch and the 2 3/8" Scallop Circle Punch to give a very sweet layered look. Kris has paper pieced the little turtles shell by stamping the image onto some Subtles DSP and then fussy cutting it out. The shell is mounted onto the stamped image with dimensionals. Kris has also added a cute touch by incorporating a small piece of the Crushed Curry Chevron Ribbon at the top of the card. The Whisper White Layer of the card is embossed with the Perfect Polka Dots Embossing Folder and the Soft Sky layer was cut out with the Apothecary Accents Framelit and then embossed with the Stripes Embossing Folder. Great card Kris............. loved it! |
 |
| Card Four was created by Lynn Zautner (www.lynnspirations.com - Pinterest site). Laura has used my now favourite colour combination Crisp Cantaloupe, Soft Skye and Crumb Cake for this lovely friendship card. Lynn has also used a strip of the Natural Composition Specialty DSP, which features shiny raised patterns that appear brown and glossy, for her banner. The increasingly popular stamp set "Perfect Blend" was used for the coffee cup image and sentiment. This three piece, two-step stamp set is economically priced at $13.95.The next detail I found really appealing was the way Lynn punched out the top corner of the Very Vanilla layer with the Scallop Trim Border punch and then added a circle of the 3/8" Ruffled Ribbon in Crisp Cantaloupe. Wow nice touch Lynn! |
 |
| Card Five: Barbara Dykhouse created a beautiful card using the 3-piece Background Builders stamps on pg 119 of the catalogue along with one of the doilies from the Delicate Doilies 4-piece stamp set on pg 122. Great combination! I also love how Barbara used the new InColours - Crisp Cantaloupe, Baked Brown Sugar and Coastal Cabana for her card stock ink and ribbon choices. Love it. Another cool thing that works for this card is the first layer which is embossed with the Modern Mosaic Embossing Folder. This element just seems to pull the whole card together. Thanks Barbara for this very appealing any occasion card. |
 |
| Card Six: Sometimes the simpliest of cards pack the biggest punch. I felt that way when I received Michele Robins-Keifer's perfect little wedding card. Just the sweetest. Michele stamped the flowers and sentiment using the "A Round Array" stamp set. What a great value this set is, with a mixture of 8 sentiment and flower shapes for just $22.95 in wood mount and $17.95 in clear mount. This stamp set is available in Spanish, French and English and coordinates with the 7/8" Scallop Circle Punch on page 182. The card base is Wisteria Wonder followed by a layer of Whisper White that's been embossed with the Perfect Polka Dot Embossing Folder. The sweet little banner sentiment is from the Banner Greetings Hostess Stamp Set, which you can earn for FREE with hostess dollars - ask me how. |
 |
| Card Seven: I was super excited to get this gorgeous swap card before the afternoon session on the final day of Convention. It was created by Claire Ventre from Cincinnati, Ohio, who was sitting right behind us throughout the closing session. Not only is this the first Christmas Card I've received this year, but it features this year's Ronald McDonald House stamp set "Tag It", which we received for FREE during Convention. This beautiful stamp set coordinates with the Chalk Talk Framelit Dies (p. 187)and is available in English, Spanish, French and German. Did you know that when you purchase the Tag It stamp set that Stampin' Up! donates $3.00 to the Ronald McDonald House Charities? Such a great deal for everyone. The Whisper White layer of this card is embossed with the Northern Flurry Textured Embossing Folder. The last great feature I want to point out on this card is the super cute little bow. Did you notice it? It's actually modeled after the bows on page 152 of the new catalogue, but this one is made with 1/4 inch Old Olive Grosgrain Ribbon (retired). Love, love, love it! I can show you how these bows are made, just come to one of my classes............. so much fun! |
 | |
| Card Eight: Snowflakes anyone? My second Christmas card came in a hallway swap with Jennifer-Buchanan-Springer from Bremerton, Washington. Jennifer is a very special gal who I've so enjoyed meeting on a couple of occasions. Her beautiful card features the Snowflake Soiree and More Merry Messages stamp sets which are both still available as carryover stamp sets from last years Holiday Mini. To find these sets you need to go to Stamps in the on-line catalogue and when you open that selection there will be another option called "online only stamps", click on this link to see all the carryover on-line only stamps. The snowflakes have been stamped in Marina Mist and Wild Wasabi for a beautiful colour combination. Awesome card Jennifer! |
 |
| Card Nine: Connie Bjork from Pennock, MN designed this very sweet little " Thanks so much" card. Connie has featured the Simply Sketched Hostess Stamp set featured on page 205 for the bird and sentiments on this card. What a beautiful job of water colouring the bird on a small piece of water colour paper. She's used the InColours designer series paper for the Bermuda Bay strip of DSP across the bottom of the card. Before layering and adhering this piece she added a small strip of the3/8" Ruffled Rib bon in the Baked Brown Sugar. Wow! What an awesome combination. Connie also added one of the small Very Vintage Designer Buttons tied off with some Linen Thread. |
 |
| Card Ten: Another simple card featuring the Modern Mosaic Embossing Folder and the coordinating stamp set Mosaic Madness. This stamp set coordinates with the Mosaic Punch on pg. 180, and in fact, you can save 15% in discount by bundling the stamp set and punch. How's that for a great deal? Check out the details on page 123 of the catalogue. Whisper White Taffeta Ribbon and some small Basic Rhinestones add some sophistication to this beautiful card which is stamped in Night of Navy. Unfortunately I can't give the owner credit as there was no identifying information in the swap envelope. Too bad this card is awesome! |
 |
| Card Eleven: My final card today is simply awesome. It was created by Julie Link of Inver Grove Heights, MN. Julie's card features the stamp set "Wetlands", which is a 6-piece stamp set featuring three sentiments that look awfully similar to the retired Sincere Salutations greetings, and three image stamps. Julie has stamped the reeds and small shore birds on her card. So beautifully made. This card features my favourite colour combination again - Soft Sky, Crisp Cantaloupe and Crumb Cake. There's also some Early Espresso going on which really compliments everything. The Square Lattice Textured Embossing folder was used on the Soft Sky layer and it really pulls the card together. Julie simply awesome, you know how to capture nature! |


