Showing posts with label Perfect Pennants. Show all posts

Sunday, May 24, 2015

Celebrate Today & Make a Wish


Hi everyone!  Hope your Sunday is a little brighter and sunnier than ours is.  

It's currently cloudy and on the verge of rain.  One good thing about the weather not being so enticing outside is that I get to play in my stamp room today...........yeah!

Last Tuesday when I was making cards with my bestie Sheri, we were working on a Colour Challenge put out by Just Add Ink.  The colour mix was Calypso Coral, Pear Pizzazz, Pool Party and Crumb Cake. Nice combination right? 


Well, as I sometimes do, I suckered myself into using Pear Pizzazz for the background on my card, even though my better judgement was screaming "go neutral" keep it "clean and simple".  

In the end because of my misguided decision followed by my indecision and dissatisfaction, I missed the post time for this challenge.  Urrrrrrrrgh!!! The final birthday card was finally finished a few days later after much creative angst and major revisions, but the good news is it did get finished and even though it was late for the challenge I decided to post it here.  


Here's the card I came up with: 


The card in MHO is overwhelmed by the Pear Pizzazz background which I tried to make more interesting by embossing with the Lovely Lace embossing folder.  I'm pretty sure that if I'd stuck to a Whisper White background for the card base and the stamped layer I think it would have worked better. Sometimes as the saying goes "less is more".


Along with the colour challenge we were eager to try out a new to us fancy fold technique called a "corner fold card".  This is a great card technique and takes very little time or effort to accomplish.

I'm not going to give you the dimensions and details for completing a corner fold card in this post as you can find several good examples on Youtube .  The one we chose to follow was done by Linda Bauwin.

Supplies:
Stamps:  Celebrate Today, Perfect Pennants
Ink:  Calypso Coral, Pool Party
Card Stock: Calypso Coral, Pear Pizzazz, Crumb Cake and Whisper White 
Accessories:  Balloon Framelit Dies, Lovely Lace Texturized Embossing Folder, Trimmer, Big Shot, Basic Rhinestones, Dazzling Details Glimmer Adhesive in Dazzling Diamonds, Note Tag and 1/2" Circle Punches, Snips, Crystal Effects, Adhesive, Dimensionals

Some Details:

Originally I stamped the birthday balloon from Celebrate Today in Pool Party ink on the whisper white layer, and coloured in the word happy with Calypso Coral blendabilities.  I also stamped the sprinkled stars image over top of the balloon and added some Dazzling Details glimmer adhesive to the stars.

One thing about the 17-piece Celebrate Today set is that you get so many creative options and can combine individual stamps to build the final image you want in the colors you want.  I decided to use some more of the images  to dress up this card.  I stamped 4 of the shaker images on Pool Party card stock with the matching ink.  I layered two of the shakers and then cut small strips below the tab part to make them look 3 dimensional.


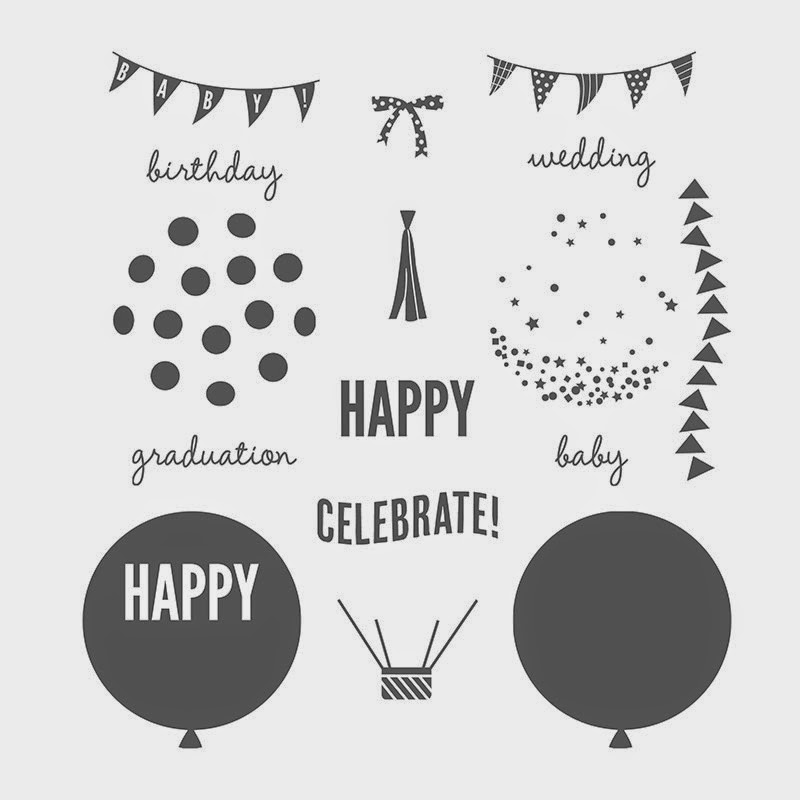
The banner was stamped in Calypso Coral on Whisper White card stock and then cut out using the Balloon Framelits (love those).  To add a lacquered look to the banners I covered them with Crystal Effects and let them dry before adhering some small rhinestones. 


I fussy cut the balloon tail which was stamped in Calypso Coral on Crumb Cake cardstock and used dimensionals to adhere it to the card base.   I finished it off by adding basic rhinestones in every second tail.  

I stood back, looked at the card and I still wasn't satisfied.   By now I'm sweating because time is ticking on the challenge clock and I so wanted to enter my card.  "What's a girl supposed to do?"

Well, I'll tell you, in frustration I went back to the drawing board, removed all the added details from the card front, that's right stripped it right back down to just the balloon image, and then I stared at it.   I hummed, played on the computer, looked at other stamp sets, planned dinner, and still nothing.  

Then, failing inspiration and in desperation, I did what all good stampers do when they get stumped............. I went and ate a bunch of chocolate and pondered what to do.  And finally the "ah ha" light went off in my head as inspiration hit me!  

It was while I was "wishing" for an idea to hit me that I remembered the "Make a Wish" sentiment stamp in the Perfect Pennants stamp set.  


Bingo this would be the perfect sentiment to layer onto the balloon and I could use my Note Tag Punch to cut it out.  I stamped the image in all four of the colours from the challenge to see which one would work best on the card front and chose to use a Calypso Coral on Crumb Cake.  I punched out the "a" from one of the tags I'd stamped in Pool Party with a 1/2" circle punch and then  mounted it with a dimensional to the center of the tag.  

The rest was easy peasy.  I re-attached the shakers, banners and balloon tail, and stamped the inside of the card with another balloon image.  I missed the challenge but, I did finish the card and that was important to me, along with being satisfied with the second attempt. 


I hope you enjoyed this card and the journey I took to finish it.  How about you, have you experienced my "I'm not satisfied" feeling, and if so what did you do about it?  I'd love to hear your story.  Please share and links to your card if any.  

Happy Stamping!
Penny Tokens

May Hostess Code is in effect Until May 31st:   BD37E4S4

Sunday, July 20, 2014

Happy Hour Friendship Card - PCCCS #102

I don't know where the time goes.  Honestly.  How can it be Sunday?  I still have things to do this week, like get this entry for the The Paper Craft Crew's card challenge posted.

Have you ever thought about doing a card challenge or do you get stuck thinking about how you want your card to look?  Well if you do now's the time to start checking out this site for ideas.  There are so many great ones.  

Here's This Week's Sketch:


It's easy.  Don't be shy.  To start, just check out their sketch for the week, then   follow the rules for posting and creating your card. Finally post your finished card with a link to your blog post about the card.  If you don't have a blog you can send them an email with your card and they'll post it for you.  So what are you waiting for try this sketch out. 

 Here's My Card:

I recently got my new Designer Series Pack DSP called "Moonlight" and was anxious to try out some of the awesome papers.  So once I had chosen the paper featured in this card it became the focus for my colours, stamp set choice and composition.
Supplies:

Stamps:  Work of Art, Perfect Pennants, Happy Hour
Ink:  Lost Lagoon, Hello Honey, and Memento Tuxedo Black
Designer Series Paper:  Moonlight 
Cardstock:  Basic Gray, Whisper White, Lost Lagoon and Hello Honey
Accessories:  Large Oval punches, Banner Framelits, Circle Framelits, Basic and Large Rhinestones, Adhesive and Dimensionals. 

The Moonlight Designer Series Paper Stack is featured on page 185 of the new Stampin' Up! catalogue.  It contains 48 sheets in the stack.  There are four each of 12 double-sided designs. Each piece measures 4-1/2" x 6-1/2".  These beautiful papers are archival quality being acid free and lignin free so very safe for scrap booking. The colour match-ups for Moonlight are:  Basic Gray, Blackberry Bliss, Hello Honey, Lost Lagoon, Sahara Sand, Whisper White.  At only $8.50a package, this is an awesome deal.    Note:  Unfortunately the Designer Series Paper Packs are not eligible for the Buy Three Get One Free promotion that is currently running.

The banner sentiment is from Perfect Pennants and is cut out with the second smallest banner framelit.  I added a few basic rhinestones to the base of the banner in the grouping suggested in the sketch.  The "cheers" sentiment is from the Happy Hour stamp set.  Doesn't it just make you want to smile!  I clumped three large Rhinestones together to go with the bubble background. 

The Perfect Pennants Stamp Set comes in Wood and Clear Mount as well as Brush Script version on MDS.  This 10 piece set coordinates with the Banners Framelits, to make a very versatile stamp set.  Lots of basic shapes, pennants, sentiments and even some washi-tape designs.  Can you say awesome?
The Happy Hour stamp which comes in Wood and Clear Mount styles, has been around for a while now.  If you haven't seen it or don't have it, take a look now.  This is one of those great sets to have in your collection for not only the Holiday Season, but other happy occasions too.  Lots of images to create festive drink-themed cards and projects for whatever the occasion.  There are 17 stamps in this set. 
I used the circle image from the Work of Art stamp set and recreated the design from the Moonlight DSP.  Because this DSP is so clean I could have just cut a 3 3/4 x 5  piece of it and used it on the inside of the card.  The Stampin' Up! Lost Lagoon Ink would have easily stamped over the DSP and been readable. 
I stamped the drink glass once in Tuxedo black on the 2 1/2" Whisper White circle and then created a mask by stamping the image again on a piece of post it note.  I just needed the bowl part.  Once I put the mask in place I was able to stamp the drink umbrella without the stem cutting through the edge of the glass.  I stamped the glass again in Hello Honey on a scrap of Whisper White, fussy cut it out and glued it to the glass.  Same with the drink umbrella, I stamped a second image in Lost Lagoon and then cut it out and pasted it in place using a 2-way glue pen.  There was too much white space on the circle so I inked up the spot from Work of Art in all three colours and stamped it randomly on the circle........ much better.  


Hope you like my rendition of this week's sketch.  Leave me a comment if you do, I'd love to hear from you.

Happy Stamping!
Penny Tokens

Tuesday, July 15, 2014

Nautical Get Well

We've been having a heat wave for the last few days and it's brought soaring temperatures and sleepless nights.  So, when you can't sleep you might as well stamp..........right?

I'd been trying to come up with a masculine "Get Well" card and when I checked out this week's sketch on Paper Craft Crew Challenges it grabbed me right away. I love when that happens! 
 Here's the sketch:

You can check out the design team's submissions and other entries by clicking here:  PCCSC #101
Here's my card:
 

As luck would have it, I'd just received an order from Stampin' Up! and was thinking of using some of the new Designer Series Paper (DSP) called Maritime to make a nautical theme card.  One look at the sketch and I knew I would be able to incorporate the DSP and stamps from the Open Sea stamp set into my card.  
The Open Sea Stamp Set is perfect for making masculine cards and teamed up with the new Maritime DSP it's sure to be a big hit. 
For the inside of my card I wanted to make a bold statement so I chose to use the "Get Well" sentiment from a recently retired set called Perfectly Penned*.  I love the script on this stamp and I thought it went perfectly with the Open Sea images.  I stamped it in Real Red ink.  The ship image is stamped in Night of Navy.  The inside layer dimensions are 5 x 3 3/4"
*Some alternative "get well sentiments" from the new 2014-15 catalogue that would work for this card can be found in the following sets:  Fabulous Four on pg 13, Sassy Salutations on pg 67, A Dozen Thoughts on pg 108 and Really Good Greetings on pg 120.

I love the bold written message I used for the front of the card.  The sentiment "Sending Good Thoughts Your Way", is from the Perfect Pennants 10 piece stamp set on page 16 of the catalogue.  When you're looking for sentiments remember that Stampin Up has put together a Greeting Alphabet Stamp Set Index on pages 245 -247 of the catalogue. The Whisper White banner was cut out with the Banner Framelits and the image was popped up with dimensionals on the card face. 

The map image from the Open Sea has been layered with Night of Navy and Real Red card stock that was cut out with the Circles framelits.  The beautiful little arrow comes from the Label Card Thinlets die set.   I used a red Sharpie Marker to colour one of the medium sized Basic Rhinestones and glued it to the tail of the arrow for a bit of bling. 

Supplies Used: 
Stamp Sets:  The Open Sea, Perfectly Penned and Perfect Pennants
Card Stock:  Whisper White, Night of Navy and Real Red
DSP:  Maritime #133696 coordinates with Coastal Cabana, Night of Navy, Real Red and Whisper White
Ink:  Real Red and Night of Navy
Accessories:  Circle Framelits, Banner Framelits, Label Card Thinlets, 1/4" Whisper White Grosgrain Ribbon, Large Basic Rhinestone coloured red with Sharpie Marker, Dimensionals, Paper Trimmer, Big Shot, Adhesive


During the month of July you can buy 3 Designer Series Papers and get a fourth one for free.  That's how I got my Maritime Paper and I'm loving it! 

Here's one last look at my card.  I love how the Maritime DSP gives such a strong nautical image to the face of this card.  The designs are so classic.

Hope you enjoyed this post and will come back and see me again sometime soon.  Please leave a comment if you like this card, it's the only way I know if I'm making something that's appealing to others.  So let me know would you like to receive this card?  I'd appreciate it.

HAPPY STAMPING
PENNY TOKENS

Friday, May 23, 2014

Petal Parade Double Time Stamping

Unfortunately I didn't get to play much with the free stamps and products I earned from the Sale-a-bration catalogue this year as we were away.  

One of the stamps I had been eager to use was the Petal Parade set.  I liked the look of the flower and leaf images. 

Now that I'm back home and stamping on Tuesdays, I've had an opportunity to ink up this stamp and I love the results. I think you will too when you see these five cards. 
 
Here Are My Cards:

Card One is a Double Time card stamped on Naturals Ivory cardstock. To achieve the double time effect you center the Natural Ivory layer over top of the card base with repositioning tape and then stamp your images all over the cardstock.  Remove the top layer and adhere it to the Always Artichoke layer.  Add the ribbon to this layer and tie a bow.  Take the Always Artichoke layer and adhere it to the card base matching up the flower images that have over lapped and adhere it with adhesive.  
 Supplies:
Stamp Sets:  Petal Parade (SAB 2014 retired), Perfectly Penned
Ink:  Sahara Sand, So Saffron, Always Artichoke, Early Espresso
Card Stock:  Naturals Ivory measuring 4 1/4" x 11" for card base and scored at 5 1/2". Cut another layer to measure 3 3/8" x 4 7/8".  Always Artichoke layer measures 3 5/8" x 4 7/8".  
Accessories:  Ribbon 10 inches in Daffodil Delight, Adhesive, Trimmer
 
The inside of the card was left blank except for the flowers and leaves.

The Happy Birthday sentiment is from the Perfectly Penned Stamp set.

Perfectly Penned a 4 piece stamp set on page 95 of the Idea Book and Catalogue will retire on May 31st of this year. 
 
Card Two:  This is the same as card one but instead of the Naturals Ivory I've used Whisper White card stock.  All measurements and other materials remain the same.  The images are quite a bit crisper on the Whisper White and it doesn't have the homespun a look as Card number One. 

Here are Cards One and Two together.

Card Three is a side-fold card once again the Petal Parade stamp set stamped in the new Stampin' Up! In Colours - Blackberry Bliss, Lost Lagoon and Hello Honey.  

Supplies and Measurements:

Stamp Sets:  Petal Parade, Work of Art (NEW)

Ink:  Lost Lagoon, Hello Honey and Blackberry Bliss

Card stock:  Whisper White card base measuring 4 1/4" x 11 and scored at 5 1/2".  Whisper White layer measuring 3 3/8" x 4 5/8", Rich Razzleberry layer measuring 3 5/8" x 4 7/8" and a Sage Shadow layer measuring 4 x 5 14" and embossed with the Designer Dots embossing folder.  

Accessories:  Dimensionals, Designer Dots Embossing Folder, Big Shot and Trimme


Card Four is a side fold card that uses the Emboss Resist Technique.  This card uses the same cardstock, ink and measurements as Card Three.  The only additional accessories you'll need are a heat tool, Versa Mark Ink, Clear Embossing Powder, Basic Rhinestones and a sponge dauber. 

I stamped the leaves with Versa Mark Ink randomly across the White Layer, covered with Embossing Powder and then heat set it with the heat tool.  I then did the rest of the stamping on the card.  I stamped off some of the smaller flowers so the images were faded.  Once all the stamping was done I rubbed over the embossed areas with Lost Lagoon ink and the sponge dauber to bring colour to those areas. 

Card Five uses the Resist Embossing Technique too but I've changed up the colours and added a small banner.  This is a top fold card.   

The leaves were embossed using Versa Mark ink and Clear Embossing Powder.  The colour was applied with a sponge dauber once all the stamping was finished on the layer.

The sentiment "Fabulous is what you are" is from the Million and One stamp set and is stamped in Coastal Cabana ink on the inside of the card. 

The sentiment on the banner was stamped in Blackberry Bliss on a piece of Whisper White card stock and then cut out using the small banner from the Chalk Talk framelits set.  I used the next size framelit to cut out a piece of Elegant Eggplant cardstock to use as a mat for the sentiment.  The small flowers were cut out with the Itty Bitty Punch. 
 Stamps:  Petal Parade, Perfect Pennants, Million and One.

Card stock:  Whisper White, Elegant Eggplant, Coastal Cabana.

Ink:  Crumb Cake, Blackberry Bliss, Elegant Eggplant, Coastal Cabana, and Versa Mark 

Accessories:  Chalk Talk Framelits, Itty Bitty Punches, Basic Rhinestones, Clear Embossing Powder, Heat Tool, Adhesive, Dimensionals, and a Sponge Dauber.

Thanks for dropping by and visiting my blog.  Leave me a comment if you think these posts are good and inspiring you to stamp or try a new technique.

Penny 
Happy Stamping! 

Friday, March 28, 2014

Make a Wish...........Birthday Banner Card

Every now and again we all need a little push to try something out that isn't in our comfort zone.  Last week I entered that "twilight zone" by choosing to make a gender neutral birthday card using banners and brighter colours than I normally would.

The decision to change up my usual card making style gave me an opportunity to try out some of my new products from the Spring Occasions catalogue. 

Supplies:
Stamp Sets:  Perfect Pennants #133230(cm) or wood #133227and Bring on the Cake

Framelit:  Banners Framelit Dies #132173  Note: You can save 15% by bundling the Banner Framelit Die and Perfect Pennants Stamp set.  See details on Page 27 of the Occasions Catalogue.

Ink:  Real Red, Coastal Cabana

Card Stock:  Real Red, Crumb Cake, Coastal Cabana, Whisper White

DSP:  Fresh Prints Designer Series Paper Pack #132996, pg 33 Occasions Catalogue

Accessories:  2 1/2 Circle Punch, Starburst Framelits Die #132967, 1/2 inch circle punch, Stripes Embossing Folder, Decorative Dots Embossing Folder (Free in Sale-a-bration Catalogue with $60 purchase until MARCH 31st) adhesive, Big Shot Machine,

Bring On The Cake - Clear-Mount Stamp set #121958 Price: $33.95 or Wood Mount # 128490 $47.95

Perfect Pennants Clear-mount Stamp Set #133230 Price: $26.95 or Wood Mount #133227 Price: $36.95

Perfect Pennants Clear-Mount Bundle   #134816 Price: $50.95 or Wood Mount #134815 Price: $59.50    If you want to create that "just because" project for a friend or loved one, the Perfect Pennants Set is perfect! And the Banners Framelits Dies make cutting the Perfect Pennants images quick and easy.  Buy the Perfect Pennants clear-mount stamp set and coordinating Banners Framelits Dies together at a 15% discount. 

Here's My Finished Card:


TIP FOR USING BANNER FRAMELIT DIES:
Tip #1.  I find it really helpful to put a label on each package of dies that I have in my stockpile of Stampin' Up Tools so I can find them quickly when I'm searching for it in the drawer.  
Tip #2:  I like to number my nesting framelits starting from the inside and working to the center.  As you can see from this picture there are 6 dies in this framelit set.  I just use a Sharpie Black Marker.

Tip #3:  When I get a new die cut I like to cut a template for reference.  The template(s) can be stored in the packaging for the die cut and I find it helps to write the number of the Framelit and the framelit measurements on each of the templates in a set. When I'm working on a sketch or designing my own card I can play with the templates to get positioning and sizing worked out before I cut my actual card layers.  


The next layer on this card is really fun to make.  For the Coastal Cabana banner simply cut a 2 1/2" x 8 1/4" piece of card stock and score this piece at 4 2/8 and fold on the score line.   


  Using framelit #2 from the Banner Framelit dies, place the fold line of the Coastal Cabana card stock just below the cutting edge of the framelit and run through the Big Shot.  

To make sure the fold line isn't cut off place the card stock a little below the cutting line.  See the gap above.
Emboss the full banner with the Stripes Embossing Folder.  Adhere this banner to the right hand side of the large dsp banner.

Using Framelit #3 cut out a banner from Whisper White card stock and stamp it with the "Wish Big" sentiment from the Bring on the Cake stamp set.  Adhere this smaller banner to the inside of the folded Coastal Cabana banner.


For the layered Starburst portion of the tag, stamp the sentiment "Make a Wish" from the Perfect Pennants stamp set in Real Red on Whisper White and punch out with a 2 1/2" circle punch.  Stamp the sentiment again in Coastal Cabana ink and punch out the "a" with the 1/2" circle punch.  Mount this small "a" with a dimensional to the real red image.   

Die cut a piece of Real Red card stock with the Starburst Framelit die and adhere to Coastal Cabana banner with dimensionals.  

For the inside of the card I adhered the top of a 5 14 x 4" piece of Whisper White card stock to the card base.  I added a 1/4" wide strip of the Fresh Prints Designer Paper to the right hand side of this card layer and stamped the sentiment "Sending Good Thoughts Your Way" in Real Red ink.

This card could be made in many colour combinations, just pick a piece of DSP or make your own designer paper by combining at least 3 colours. I really liked using the Banner Framelits for this card and the Starburst framelit and think they added a modern twist. 

Thanks for joining me today and checking out this brief tutorial.  Hope you enjoyed it.  I would really appreciate your comments and any tips you can leave about how you organize or work with framelits and your thoughts on this card.  Is it one you would re-create?  Let me know.

 Penny  


Paper Pumpkin Alternatives April 2024 and Sketch Challenges

The past week was so busy that time literally flew by.  I have a number of projects on the go, including working on my April 2024 Paper Pump...