Showing posts with label Happy Birthday Cards. Show all posts

Wednesday, March 21, 2018

WWC #162 - Charolotte's Masculine "Anything Goes" Challenge

Spring Equinox arrives this week and I'm so excited because it means longer days and the move towards warmer weather, hopefully and all things Spring.  It hasn't arrived yet though, and today it's a tad cool in the shade and when the clouds move overhead.  I'm trying to layer up rather than turn on the furnace all the time, so it was a bit cool in my stamping room. 

This week's host for the Watercooler Wednesday challenge is Charlotte and she's challenging us to make a Masculine style card or project and "Anything Goes".  

This challenge will be open until 5:00pm Mountain Time on Monday March 26th, so if you feel inspired to join us we'd love to see your creation. All the rules and how too's are on the main screen of the Watercooler Wednesday blog. While you're there, check out all the awesome cards contributed by the Watercooler Wednesday Design Team Artists, they're awesome and so inspiring.

Here's My Card: With less than two weeks to go for the Sale-A-Bration Promotion, I was encouraged to make a card for a friend's son who's really in to sports, using the Epic Celebration stamp set.  What a charming and fun card for a young man!
My card is an A2 with a top fold, made with a Night of Navy card base measuring 8 1/2" x 5 1/2" and scored at 4 1/4".  I've layered the card base with a 5 1/4" x 4" piece of Whisper White card stock.  Before I adhered this panel to my card I stamped the sneakers and two sentiment pieces and cut them out.   Why waste card stock?  The Cherry Cobbler layer measures 5" x 3 3/4" and I randomly stamped the sneakers and headset in Versa Mark ink before adhering to the white layer. 
I stamped the sneakers in Momento Tuxedo Black ink and coloured them with the light and dark Night of Navy Stampin' Blends.  These are fantastic and easy to add depth and colour with.  I also coloured the white parts of the sneakers and laces with some Wink of Stella to add a little gleam.  I wanted to ground the sneakers to the card stock so I coloured around them with a Light Smokey Slate Stampin Blend.  The square was cut out with the 2 1/8" Stitched Shapes Square Die.  For some birthday fun I stamped some confetti in the top corner using the Confetti stamp from the Picture Perfect Birthday stamp set.  


I stamped the sneakers  and headsets from the Epic Celebrations stamp set randomly across the Cherry Cobbler layer with Versa Mark ink.  I love the look of this because the stamping lies subtly in the background and doesn't take away from the main images.  The panel with the "Happy Birthday" sentiment from  the Picture Perfect Birthday stamp set was stamped a row at a time in alternating Cherry Cobbler and Night of Navy inks.  I used my Stamp-A-Ma-Jig to line up the sentiments and make sure they were evenly spaced.  
  
I stamped the "Here's To An Epic Celebration" once in Night of Navy and again in Cherry Cobbler on Whisper White card stock and then cut both sayings out with a 1" circle punch.  I wanted to add the Night of Navy word "EPIC" so I cut across the circle just above and below the word Epic and then adhered the cut piece with Tom Bow Adhesive to the Cherry Cobbler circle.  This piece is mounted on a 1 1/4" circle cut from Night of Navy card stock.  It's popped up on top of the two other stamped panels with Dimensionals.  
The inside of the card is pretty simply, just a few more sprinkles of confetti and the Stylized Birthday stamp in Cherry Cobbler.  
Supplies:
Stamp Sets:  Epic Celebration (Sale-A-Bration 18), Picture Perfect Birthday #145519, and Stylized Birthday #141828
Card Stock:  Night of Navy, Cherry Cobbler and Whisper White
Inks:  Night of Navy, Cherry Cobbler, Versa Mark, and Night of Navy (Light/Dark) Stampin' Blends
Dies/Punches:  Stitched Shapes - 2 1/8" Square, 1" and 1 1/4" Circle Punches, Memory Box Pinpoint Rectangles 
Accessories:  Stamp-A-Ma-Jig, Big Shot, Paper Trimmer, Wink of Stella, Dimensionals, Tom Bow Glue 
Well that's it for this week's project.  I sure hope you enjoyed it.  I think I'll be making several more cards with this stamp set as it was really fun to colour and play with.  I'd love to hear your thoughts on this card.

Happy Stamping!
Penny Tokens Stampin Spot 

Wednesday, September 20, 2017

Watercooler Wednesday Challenge #137 - Penny's Masculine "Anything Goes"


Today is the second of two rainy days in BC.  Good for the fires but depressing for the soul unless you have something to do.............like spending time in your craft room.  Nothing could be better!

It's time for this week's Watercooler Wednesday Challenge and I get to be the hostess!  What fun!  

Before I get on with the challenge details I'd like to welcome our newest temporary guest artist Charlotte Ehrukainen from Finland. Charlotte's contributed many, many times as a participant in our challenges as "Lady Joyful", and has often Rocked the Watercooler with her terrific designs. So, welcome Charlotte it's going to be great having you on board!

This week is one of those love it or hate it challenges because it's about crafting a Masculine card. Don't groan..... I get it.  With the over abundance of floral and cutesie stamps that are geared to our feminine side, it's sometimes hard to come up with a design for the guys in our life.  Well don't despair, our WCW Design Team artists have come up with some  delightful samples that I'm sure will inspire you.

Here's My Card:
 
Here's what the inside looks like.  When you open the card the secret hinge allows this display to pop out.  There's plenty of room on the red bottom panel for writing a birthday message.


This is a Twist and Pop birthday card I made for a friend's cousin who was celebrating his 70th birthday. To create a card that was perfect for him, I needed to get into detective mode to find out whatever details I could about his life so the card would be a very personal experience for him.

On questioning, my friend said her cousin was a well traveled man who loved carsHe's taken to the open road in his little red and white Corvette and on his Harley driving through California and Arizona on many trips.  He's also traveled Route 66 and been a big NASCAR fan.  So, road trips in the southern states have played a big part in his life.  

From this information, I tried to create a card that mirrored her cousin's life experiences and would signify not only what a great journey he's had but those he will continue to have.

Supplies:
Stamp Sets: Stylized Birthday, Guy Greetings, One Wild Ride, Badges and Banners, Happy Birthday Gorgeous, Gorgeous Grunge and Route 66 (Carta Bella non SU)
Card Stock: Basic Black, Real Red, Crumb Cake and River Rock (R) and Route 66 DSP Carta Bella
Ink: Momento Tuxedo Black, Real Red, Crumb Cake and River Rock
Accessories: Big Shot, Paper Trimmer, Detail Scissors, Stamp-a-ma-jig, Post-It Notes for masks, Dimensionals, Mini Glue Dots, Tom Bow Glue, Sticky Strip, Envelope Maker, Misti.

The Envelope:  
This card making adventure begins with the Real Red envelope which I made with my Envelope Maker. It's a handy tool to have when making a Twist and Pop card because they can be bulkier than an A2 card and need some room.
The lighting in this photo doesn't make it look like Real Red but trust me it is.  I've stamped the Badge from Badges and Banners  in Momento Black ink on Crumb Cake.  It was cut out with the Best Badge Punch.  The Banner with Dan's name in it was punched out with the Duet Banner Punch, and the little houses are from the retired Sleigh Ride Edgelits.  The strip of DSP is from the Carta Bella Route 66 DSP.
This envelope started with a 9" x 9" piece of textured card stock.  This card stock isn't as dense as regular card stock, so it's easier to work with when making envelopes.  The only pitfall to using it is it's rough and uneven texture which makes it difficult to stamp on. To remedy this  I used my Misti to stamp the Stylized Happy Birthday sentiment multiple times to get a good image without fear of blurring it. 
Details:
I'm not providing instructions on how to make a Twist and Pop card in this post, but you can check out this link to one of my previous posts that provides a detailed tutorial. 

The Belly Band:
This Belly Band is unique because it's made from an Acetate Window Sheet rather than card stock.  The Acetate measured 3 1/2" x 10".  By mounting the die cut on the Acetate, it still allowed the map on the top of the card to show through. 
I mounted the Happy Birthday die cut sentiment which was cut from Real Red and Basic Black card stock to the center front of the Belly Band.  The two die cuts were glued together with Tom Bow glue.  They were offset slightly to get an illusion of a shadow and depth to the letters.  Mini glue dots secured the lettering to the Acetate Sheet.
To finish the Belly Band, I carried on the desert theme from the front of the card on Crumb Cake card stock and stamped the bike from One Wild Ride.  

I stamped a second image of the bike on a Post It Note and masked the original image before stamping the cactus and the "pit stop" images.  These stamps were from the Route 66 stamp set. The edges of this layer were sponged with Basic Black ink and I used the large splatter stamp from the Gorgeous Grunge stamp set to add dots of Real Red, River Rock and Basic Black ink randomly across the images
 The Card Front:
I found some great DSP with a matching stamp set called Route 66 that was perfect for my card.  The top section of the card was a 3 7/8 x 5 1/8" piece of the DSP that features a map of California. 
I stamped the Corvette on a piece of River Rock card stock, and fussy cut out the car.  The desert scene from the Route 66 stamp set was stamped in Momento Tuxedo Black ink.  The sentiment "To a Classic" from the Guy Greetings stamp set was perfect for the Banner which was cut out with the Bunch of Banner Thinlet dies.  The edges were sponged with black ink.  

The Inside Panels: 


The top panel dsp has a map of Arizona and the motorcycle is from the One Wild Ride stamp set.  I've also used the Route 66 stamp set again to recreate the desert image.

The first two panels in the center of the pop up feature the Best Badge and Banners and Badges stamp set and the new Every Day Label Punch. the Happy Birthday and confetti are from the Happy Birthday Gorgeous stamp set.
The third panel has an old Chevy from the Route 66 stamp set and the sentiment "Hope Today is One Wild Ride!" is from One Wild Ride. The Real Red numbers were cut out with the Large Numbers Framelit dies.

Well that's the end of this journey, and I hope you enjoyed it.  It's such a challenge making a card that tells a story and I think I've succeeded in capturing some of Dan's journey.  My friend said he really liked the card, so that's all that counts.  If you liked it too I hope you'll leave me a comment. 

Don't forget to check out the rest of the WWC Design Team if you haven't already done so.  Just click on the Designer's name above their cards to check out their individual blog posts. 

Also, if you want to participate in this challenge, and I sure hope you do, it's easy to play along.  All you need to do is make a Masculine card and link your blog post to the Linsky before 5pm Mountain time on Monday September 25th.  Please don't enter your card in more than 7 other challenges or you won't be eligible to win our "Rocked the Watercooler" or "Honourable Mentions" badges, and that would be sad.  Until next time....

Happy Stamping!
Penny Tokens Stampin' Spot

Sunday, August 30, 2015

WWC31 Heidi's Sketch Challenge


Where is the time flying to.  Suddenly summer's over and it's time for another sketch challenge at the Watercooler Challenge.  

This sketch #WCC31 was designed by the very talented paper crafter, Heidi Weaver.  If you're into cards or layouts with lots of layers then this one will be right up your alley.  

I decided to combine this great sketch with the colour challenge at Colour Me.  It's colour challenge CMCC#86 and showcases Pool Party, Lost Lagoon, Cajun Craze and Tangerine Tango with a neutral of your own choice. I chose to combine these colours with Whisper White.

Here's my entry:
My card started with a 5 1/2 x 8 1/2 Whisper White card base scored at 4 1/4".  The first mat measuring 5 1/4 x 4" is cut from Pool Party and I sponged around the edges with the same ink.

The next mat measures 5 x 3 3/4".  I started with a 5 1/2 x 8 1/2 sheet of Whisper White card stock and stamped a random pattern with Sponge Daubers in the four challenge colours. Some dots were full strength and others were stamped off almost to opaqueness. I also used the dotted image from the Watercolour Wings stamp set and stamped it over the circles in Lost Lagoon ink.  Once all the stamping was done I cut the paper down to the above size for the mat.  I also die cut the three butterflies with the Butterflies Thinlet Dies. 
Note:  If I was making this card again, I think I would have changed how I used the Tangerine Tango, because it's simply too bright a card stock and overwhelms the left side of the card creating an imbalance. In retrospect, I should have have die cut the large Butterfly image and placed it as the bottom layer of the Butterfly stack. I would have then substituted a strip of Lost Lagoon for the Tangerine Tango banner and probably embossed it with the large Polka Dot TIEF, to mimic the circles on the background paper, instead of using the smaller Perfect Polka Dots TIEF which is now retired. 
 
I stamped the sun burst from the Kinda Eclectic Stamp set on a 2 3/4 x 2 3/4" piece of Whisper White.  It makes a nice background design.  In retrospect I should have stamped it using Versa Mark and Lost Lagoon inks and then heat set it with clear embossing powder.
Kind of Eclectic Stamp Set comes in wood or clear mount.

 
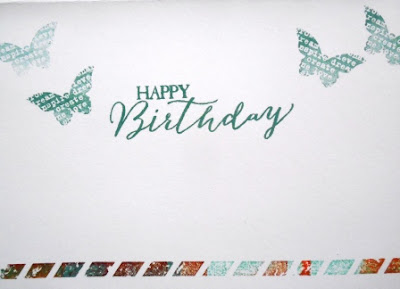
For the inside of the card I stamped the Happy Birthday sentiment the butterflies and the border strip using images from the Basic Butterfly stamp set.
This eleven piece coordinating stamp set and matching butterfly dies come in a bundle in either wood or clear mount styles. You can save 15% off the regular price of the stamps and dies by purchasing them as a bundle.  I'm totally in love with my clear mount.
I think I've fallen in love with the Boho Chic Embossing folder.  It's one of my favourites this season.  It looks great layered over other images or on it's own.  In this picture you can see a bit more of the background paper that I stamped with all the sketch colours.  Background papers are so much fun to make.
Supplies:
Stamp Sets:  Butterfly Basics, Kinda Eclectic, Watercolour Wings 
Ink:  Cajun Craze, Lost Lagoon, Pool Party, Tangerine Tango
Card Stock:  Whisper White, Cajun Craze, Pool Party, Lost Lagoon, Tangerine Tango
Accessories:  Big Shot, Trimmer, Perfect Polka Dots(R) and Boho Chic Embossing Folders, Basic Butterflies Thinlet Dies, Basic Rhinestones, Silver Charm (R), Dazzling Details, adhesive and dimensionals.

Well I hope you enjoyed today's colour and sketch challenges.  There's still a little bit of time to play along so if you want to get in on the fun, please click on the Watercooler Challenge or the Colour Me Challenge or both to find out the details.   


HAPPY STAMPING!
PENNY TOKENS STAMPING 

Tuesday, June 11, 2013

Stampin On Tuesday Masculine Card Class

With a number of male birthdays coming up and Father's Day just around the corner, I decided to kick off the first of my Stampin' on Tuesday Card Classes with some Masculine Cards.  

I don't know about you, but masculine cards have always been the most difficult ones for me to make, and I always have to put my thinking cap on when making them.  For this set, I wanted something that would be exciting and fun to make.

To begin with, I don't have a lot of masculine or graphic themed stamps.  I need to change that, don't you think?  And, I've made lots of shirt and tie related cards in the past, so it's high time to find something new and modern!

With that in mind, I set out to design four simple cards with a minimal amount of stamping, modern colours and design elements and appeal for men.  I also wanted a variety of cards that would work for any occasion such as Father's Day, Birthday, Retirement, Graduation, Thinking of You, and Encouragement.  Tall order you say?  I checked out card shops locally and did some searching on the internet and with a little help here's what I came up with, I hope you enjoy them:

Card Number One: Striped Masculine Card


If you're like me you probably have lots of scrap card stock kicking around, so here's a great way to use up those those bits and pieces.  

This simple card starts with a standard  5 1/2" x 4 1/4" base in Crumb Cake,  followed by a 5 1/4" x 4" layer of Whisper White.  Add 1/4" inch stripes in Basic Black, Marina Mist, Cherry Cobbler and Crumb Cake. Very the length of the strips in conjunction with the size of the sentiment stamp you use.  You can also change up the direction of the card and have the fold at the top and your stripes layered horizontally for a different look.  I stamped this big bold birthday sentiment from the "You're Amazing" Stamp set in basic black ink.  I think it adds a very masculine look to this card front.
Card Number Two:  Washi Tape Birthday Card

Have you used Washi Tape yet?  Well this next card features the Washi Tape from the Epic Day - This and That Collection.  This was my first experiment with it and I'm in love!

What fun!  There are three spools in each of Stampin' Ups! Washi Tape  collections and they are 3/8", 1/2", 5/8" in width.  Each spool has 5 yards of tape.  

These beautiful translucent tapes have a lot of flexibility to them.  They're light weight and can be easily be removed or repositioned without damaging the card stock or leaving marks behind.  Note:  Washi tape is not the same composition as adhesive tape (think Magic tape), so they aren't strong enough to permanent bind objects together, they are more for decorative purposes.  

I got inspiration for my card when I recently attended Deb Smart's New Catalogue Open House.    Here is what her card looked like:
Deb's card uses the Gingham Washi Tape Collection and Serene Silhouettes Stamp set.


I've used all three of the Washi Tapes in the Epic Day set and created a grid pattern. You can create whatever pattern that appeals to you when making this card.  The card base is in Crumb Cake and the first layer is Calypso Coral Card stock measuring 5 1/4" x 4".  The Whisper White layer is 5" x 3 3/4". The sentiment is stamped with the Pretty Petites and That's the Ticket stamp sets on Whisper White card stock.  I used the new Petite Curly Label punch for the happy birthday sentiment and the Ticket Duo Builder punch for the basic gray layer and the happy birthday ticket image.  Note: To create the ticket layers I fussy cut around the Calypso Coral stamped image.
If you stamp on Washi tape you create a whole new look.  For this card I used Basic Gray classic ink, and the image from The Open Sea.  I also spritzed the card face with Calypso Coral, Basic Gray and Crumb Cake re-inkers for a splotched appearance.  Tip:  Leave some extra drying time for the stamping on the Washi Tape as the ink does not dry as quickly as it does on card stock, and you wouldn't want to smudge it.
Card Number Three:  Colour Swipe All Occasion

My next card uses a direct to paper technique where you literally take your ink pad and swipe it across your card stock. Thus the name "Colour Swiping". 

I'd actually forgotten about this method of stamping but my interest was rekindled by Julie Davidse's blog post titled "Feeling Blue".  

I liked Julie's great card with its free flowing design and blend of colours, and decided this technique would work perfectly for the card I had in mind.  Here's my card:  

I used Soft Sky one of the new Subtles Collection colours along with Basic Gray and Midnight Muse cardstocks and inks for my card.  The Labels Collection framelit dies were used to cut the stacked sentiment and backing labels. Three 3/8" Silver Mini brads were added for some interest.
The sentiment stampwhich I feel is very versatile and could be used for almost any occasion such as "Retirement, Congratulations, Graduation or Encouragement is from a very special stamp set that Stampin' Up! distributed to demonstrators who attended the 2012 SU Convention in Salt Lake City.  It is aptly titled "I Am....".  This years new catalogue has many sentiments that would also be perfect for this style of card.

To finish off this card I wanted to add movement and a sense of going somewhere.  To achieve this I chose to add a strip to simulate a tire tread.  I did this by embossing a  1" strip of silver duct tape and glued it behind the sentiment labels layers.  I also added three 3/8" mini silver brads to draw the eye across the card face.  I don't know if anyone else gets my theme for this card, but for me it was "mission accomplished".


Card Number Four:  Open Sea Double Flip Card

The last card in my Masculine card class is one of those WOW cards that I wish you could see in 3-D because it's really very special.  I cased it exactly the way it was shown and I have to give full credit for the design and execution of this card to Tammi White of "Stampin' With Tami".

The card base is in Crumb Cake and is cut 7 1/2" x 4 1/4".  I used the 2nd and 3rd label dies from the Label Collection die cuts produced by Stampin' Up!.  The beautiful stamped images are from one of my all time favourite sets, The Open Sea.  I hope you enjoy this card.  
This is the front view of the flip card.  When it is completely open the ship will face the back of the card.

This view shows the inside view of the flip.  Pretty cool eh?  I just loved doing this fast and easy card. 


These two views show a little of the stamping detail.  Ink colours were Midnight Muse, Soft Suede and Crumb Cake.  Cardstock was Midnight Muse, Soft Suede and Ivory Naturals.
The Open Sea


Atlantic Hearts Sketch Challenge #572:

April has sure been living up to its reputation for rain showers but it's been really on the cold side which isn't normal for this t...